
I remember assisting on a high-end commercial set where the client had spent more on glass than on the actual talent. They were obsessed with the idea that a 200mm lens was a magic wand for beauty, but all I saw was a photographer struggling to keep a subject from feeling like they were being hunted from across a football field. Everyone talks about compression and that creamy, expensive-looking bokeh, but nobody mentions the psychological distance you create when you’re standing ten feet away from someone. If you’re trying to figure out how to shoot a portrait with a long lens without making your subject feel like a specimen under a microscope, you need to stop looking at the spec sheets and start looking at the person.
This isn’t a tutorial on how to read your aperture ring; it’s a notebook on the messy reality of the work. I’m going to tell you exactly how I manage the physical space, how to deal with the inevitable loss of connection, and why your choice of focal length matters far less than how you handle the person in front of you. No fluff, just the practical compromises you’ll actually have to make when the light is fading and the client is getting restless.
The Distance Dilemma How to Shoot a Portrait With a Long Lens
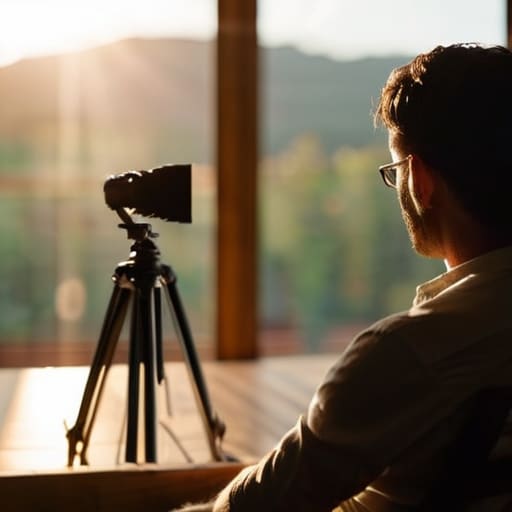
The thing about a 200mm lens is that it changes the physical math of the room. You aren’t just changing the look; you’re changing the relationship between you and the person in front of you. When I’m shooting an author portrait and I pull out a heavy telephoto lens, I’m suddenly ten, fifteen feet away. For some clients, that’s a relief—it gives them space. For others, it feels like I’m interrogating them from across a parking lot. You have to watch their shoulders. If they start to hunch or look guarded because of that distance, you’ve lost the shot, regardless of how sharp the glass is.
Once you’ve managed the social distance, you have to deal with the optics. Everyone wants that creamy, melted look, but they often forget that lens compression explained simply means the background is going to feel much closer to your subject than it actually is. If you’re working in a cramped studio, that beautiful background blur can quickly turn into a cluttered mess of equipment or a beige wall pressing right up against their head. You can play with your aperture settings for portraits to get that separation, but distance from the background is still your most important variable.
Lens Compression Explained Making Small Rooms Feel Vast

We talk about lens compression explained in textbooks like it’s some magical optical phenomenon, but in a cramped studio, it’s actually a spatial hack. When you switch to a longer telephoto lens focal length, you aren’t actually “squeezing” the world, but you are changing how the subject relates to the background. If you’re stuck in a studio where the client’s office is basically a broom closet, a wide lens will show every messy bookshelf and stray power cable. A long lens, however, allows you to pull that background away visually. It’s about making a claustrophobic corner feel like a deliberate, expansive setting.
The trick is realizing that compression works hand-in-hand with your depth of field control. You can’t just rely on the glass; you have to manage the physical gap between your subject and the wall behind them. If they are leaning against the drywall, even an 85mm or 135mm lens won’t save you from a cluttered mess. You need to push them forward, find that sweet spot, and let the bokeh effect techniques do the heavy lifting to turn a distracting office into a soft, creamy wash of color.
Mastering Telephoto Lens Focal Length Without Losing the Connection

The problem with a telephoto lens focal length is that it creates a physical barrier. When you’re standing five or six meters away, you aren’t just a photographer; you’re a stranger in a different zip code. I’ve seen so many shoots stall because the subject feels like they’re being observed through a telescope rather than being photographed. You lose that subtle feedback loop—the small nod, the quick laugh, the way they adjust their collar—that makes a portrait feel alive.
To fix this, you have to compensate for the distance with your presence. Even if you can’t step closer, you need to talk more, move your body, and use your voice to bridge the gap. While you’re likely chasing that creamy bokeh effect techniques demand, don’t let the technical pursuit of subject separation tips turn you into a technician who forgets there is a human being on the other end of the glass. If they feel isolated by the lens, they’ll freeze up, and no amount of expensive glass will save a stiff expression.
Aperture Settings for Portraits When the Light Refuses to Cooperate
When you’re working with a telephoto lens, the physics of the light often work against you. You want that creamy, expensive-looking background blur, but you’re stuck in a dim studio or a corner of an office where the windows are small and the overheads are ugly. It is tempting to just crank your ISO into the stratosphere to keep your aperture wide open, but I’ve learned the hard way that grain is much harder to fix in post than a slightly sharper subject. If you can’t hit f/2.8 because the light is dying, don’t panic. Instead, focus on your subject separation tips by physically moving the person further away from the wall behind them.
Sometimes, you actually have to sacrifice that extreme bokeh effect techniques to save the shot. If you’re shooting a corporate team and everyone needs to be in focus, you’ll need to stop chasing the widest aperture and tighten things up to f/5.6 or f/8. This is where depth of field control becomes a practical tool rather than an aesthetic choice. You aren’t just “shooting a portrait”; you are negotiating with the environment to find a balance between a soft background and a usable exposure.
Depth of Field Control Navigating the Chaos of the Background
When you’re working with a long lens, you aren’t just fighting for focus; you’re fighting the environment. People often think a telephoto lens is a magic wand for background blur photography, but that’s a dangerous assumption. If your subject is standing two feet away from a cluttered bookshelf or a messy office corner, that “creamy” look disappears, and you’re left with a sharp, distracting mess right behind their head. You have to physically move the subject. I’ve spent more time dragging chairs across a studio floor than I have adjusting my ISO, simply because distance between the person and the wall is the only real way to get true subject separation tips to actually work.
It’s also about managing your expectations with depth of field control. At 200mm, even at f/4, the plane of focus is razor-thin. If your subject leans forward just a fraction to tell you a story, their eyes might be sharp while their nose is a blur. I always tell my clients to keep their chin slightly out or their head steady; if they’re fidgeting, that narrow slice of focus becomes your worst enemy.
Achieving Subject Separation Tips Amidst a Distracting Environment
When you’re working in a cramped studio or a busy office, the background is usually your biggest enemy. You can have the perfect lighting on your subject, but if there’s a bright window or a cluttered bookshelf right behind their head, the whole image falls apart. This is where your telephoto lens focal length actually earns its keep. By backing up and zooming in, you aren’t just getting that flattering compression we talked about earlier; you are physically increasing the distance between your subject and the mess behind them. Even with a wide aperture, if your subject is leaning against a white wall, you’re going to struggle to get any real separation.
If the environment is particularly chaotic, don’t just rely on your settings. I always look for “negative space”—a dark corner or a patch of shadow—to place behind the person. Combining a wide aperture with clever positioning is the most effective way to execute bokeh effect techniques that actually look intentional rather than accidental. It’s about creating a pocket of focus where the subject can breathe, even when the room itself is working against you.
The Practical Reality: Five Things to Watch For When You’re Backed Into a Corner
- Watch your feet, not just your focus. When you’re shooting at 85mm or 200mm, you lose that tactile sense of where you are in the room. I’ve spent more time than I care to admit tripping over a light stand because I was too busy staring through a tiny viewfinder to notice the floor wasn’t empty. Check your perimeter before you commit to a frame.
- Don’t let the distance turn into a wall. A long lens is a physical barrier between you and the person sitting in the chair. If you find them getting stiff or staring blankly at the glass, stop looking through the lens. Step in, talk to them, ask them what they do with their hands when they’re nervous, and then go back to the long end once the tension has dropped.
- Mind the micro-jitters. You can have the best IBIS (in-body image stabilization) in the world, but it isn’t magic. If you’re shooting handheld at 135mm in a dim studio, your breathing matters. I usually tell my assistants to brace their elbows against my ribs if we’re working in low light—it’s a bit ungraceful, but it beats a blurry shot of a client who only has one hour for their session.
- The “Background Creep” check. Because long lenses compress everything, a distracting element that looks far away might actually be inches behind your subject’s head. I always do a quick scan of the edges of my frame to make sure a stray lamp or a messy power cable hasn’t suddenly become a permanent part of the portrait’s silhouette.
- Committing to the crop. Sometimes, you can’t get the physical distance you want because the client is in a cramped office or a tiny studio. Don’t fight the room. If you’re stuck at 50mm but want the look of a 105mm, shoot a bit wider and crop in later. It’s better to have a sharp, well-composed shot that you crop in post than a tight, shaky shot that’s technically “correct” but unusable.
The Distance Trap
A long lens gives you beautiful compression and a creamy background, but it also creates a physical barrier that can make your subject feel like they’re being hunted from across the room; if you aren’t careful, you’ll end up with a technically perfect shot of someone who looks absolutely terrified.
Iwona Krawczyk
The Reality Check
At the end of the day, shooting with a long lens is a constant negotiation between physics and psychology. You’ve spent the last hour wrestling with focal lengths to get that compression, fighting the shallow depth of field to keep the eyes sharp, and trying to find enough light to keep your aperture from bottoming out. But remember: all those technical tweaks—the specific distance from your subject, the way you managed the background chaos, or the way you compensated for a tiny room—are just tools to manage the environment. If you focus too much on the math of the lens, you’ll miss the moment the subject finally stops performing and actually starts being themselves.
Don’t let the gear intimidate you or, conversely, let it become a crutch. A 200mm lens can make a person look incredible, but it can also make them feel isolated and vulnerable if you don’t know how to bridge that physical gap with your voice. My advice? Once you’ve dialed in your settings and checked your focus, stop staring at the back of the LCD screen and start looking at the person in front of you. The best portraits don’t come from perfect compression or a creamy bokeh; they come from the moment you realize the connection is more important than the equipment.
