
I once spent forty-five minutes in a cramped, overheated studio trying to convince a CEO that he didn’t actually have a “bad face,” he just had a bad relationship with a lens at eye level. He was convinced he needed a high-end prime lens or a specialized facial contouring kit to look decent, but the truth was much more mundane. We weren’t fighting his bone structure; we were fighting the way he slumped his shoulders the moment the shutter clicked. If you’ve spent any time staring at your own selfies feeling like a stranger, you’ve probably gone down the rabbit hole of searching for how to find a flattering angle for a face, thinking there is some magical, mathematical formula that will suddenly make you look like a magazine cover.
There isn’t. There is no secret “golden ratio” that works for everyone, regardless of how they hold their chin or how the light hits their jawline. What I’m going to give you instead is the unfiltered reality of what I do when a client starts to panic. I’m not going to talk about focal lengths or sensor sizes; I’m going to talk about the physical shifts—the tilts, the leans, and the micro-adjustments—that actually move the needle when you’re standing in front of the camera.
It Is Not Your Face Learning How to Find a Flattering Angle for a Face

The first thing I do when a client starts spiraling is tell them to stop looking at the lens like it’s a judge. Most people think they have a “bad face,” but usually, they just haven’t found the relationship between their chin and the sensor. I spend a lot of time understanding facial structure for photography before I even touch the shutter button. It’s not about magic; it’s about geometry. If they are standing dead-on, they feel exposed. I usually have them turn their shoulders about thirty degrees away from me and then bring their head back just a fraction. It creates a sense of depth that a flat, frontal shot can never achieve.
Then there is the chin issue. If someone feels their jawline is disappearing into their neck, I don’t suggest a different camera—I suggest a different posture. I’ll ask them to push their forehead toward me, just an inch, like they’re trying to smell a flower. It feels ridiculous to them, but it’s the most effective camera angle for jawline definition you’ll ever find. We aren’t looking for perfection; we’re just looking for the line where the light hits the bone instead of the shadow.
The Battle Against Asymmetry Minimizing Facial Asymmetry in Photos
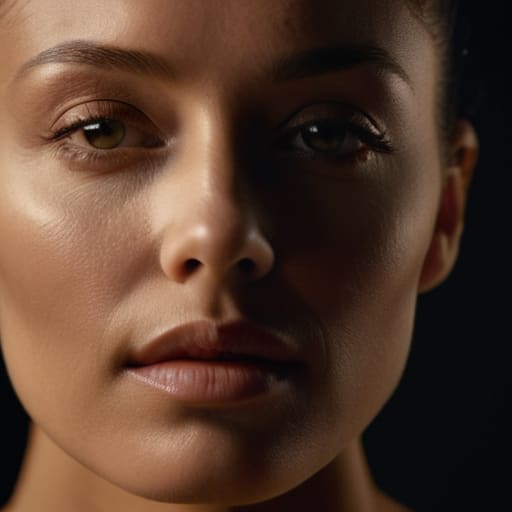
Here is the reality: nobody has a perfectly symmetrical face. If you look closely enough at any of the “perfect” portraits in a gallery, you’ll see the slight tilt or the way one eye sits a fraction higher. The trick isn’t fixing the face; it’s about understanding facial structure for photography so you can work with the lean rather than against it. When a client starts panicking because their nose looks “crooked” or one side of their jaw is heavier, I don’t tell them they’re wrong. I just find the line where the light hits the bone most forgivingly.
Usually, this means a subtle rotation. If I’m shooting a corporate headshot and they feel lopsided, I’ll have them turn about ten degrees away from the lens. It’s a tiny movement, but it’s the most effective way of minimizing facial asymmetry in photos without making them look like they’re posing for a high school yearbook. I also find that a slightly higher camera angle helps define the jawline, preventing that “double chin” anxiety that makes people freeze up. We aren’t looking for perfection; we’re looking for the version of them that feels intentional.
Understanding Facial Structure for Photography Instead of Blaming the Lens

Look, I’ve spent enough time behind a tripod to know that people treat their faces like they’re fixed, unchangeable objects. They aren’t. They are a collection of planes, shadows, and bone density that react to light in real-time. When a client tells me they “look weird” in a shot, they aren’t actually complaining about their nose; they are complaining about how the light is hitting the ridge of it. Understanding facial structure for photography means stopping the search for a magic lens and starting to look at how the cheekbones catch a rim light or how the jawline disappears into a shadow.
If you want to actually fix the problem, you have to stop guessing and start measuring. I don’t care about the “perfect” angle; I care about the angle that works for that specific person’s bone structure. If they have a softer jaw, we aren’t just tilting the chin; we are looking for a specific camera angle for jawline definition by slightly dropping the lens height to create a more decisive line. It’s about finding where the light creates a shadow that separates the face from the neck, rather than just hoping the sensor does the work for you.
Sculpting With Shadows Best Portrait Lighting Techniques for Real People
Once you’ve figured out where they need to point their chin, you have to deal with the light. Most people think “good lighting” means bright and even, but that’s usually a lie. Even light is boring light; it flattens everything and makes people look like they’re in a witness protection program. If you want to actually define a face, you need to stop fighting the shadows and start using them. I usually start with a single light source—a medium softbox about four feet away—positioned just off-center. This creates a subtle fall-off that helps with minimizing facial asymmetry in photos by letting the shadow side of the face do the heavy lifting.
If you’re working with someone who is particularly self-conscious about their jawline, don’t just rely on a better camera angle for jawline definition. Instead, move your light slightly higher and to the side. This creates a “short lighting” effect where the side of the face closest to the camera is in shadow. It’s a classic trick for a reason: it carves out the bone structure instead of washing it away. It’s less about finding the perfect angle and more about using contrast to tell the viewer where the face actually ends and the neck begins.
Finding the Jawline the Perfect Camera Angle for Jawline Definition
Once you’ve sorted the lighting, you usually run into the “disappearing chin” problem. It happens constantly—a client leans back just a fraction too far, and suddenly their jawline melts into their neck, no matter how much you tweak the key light. To fix this, stop looking for the perfect camera height and start looking at the subject’s posture. I usually tell them to push their forehead toward the lens—it feels ridiculous to them, like a turtle coming out of a shell, but it creates that necessary separation between the jaw and the throat.
When I’m searching for the right camera angle for jawline definition, I rarely go high or low. If I’m too high, I lose the structure; too low, and I’m looking up their nose. The sweet spot is usually eye level, but with a slight tilt of the head. I’ll have them drop their chin an inch and then extend it slightly forward. It’s a tiny adjustment, but it’s the difference between a portrait that looks heavy and one that looks sharp. It’s less about the gear and more about managing the physical space between their chin and their collarbone.
From Selfies to Posing Tips for Better Portraits in Any Room
Most people think they know how to pose because they’ve spent years mastering selfie angles for different face shapes in front of a bathroom mirror. But there is a massive difference between holding a phone at arm’s length and actually managing your presence in a room with a professional lens. When I’m on a commission, I see people default to that “phone tilt”—chin down, looking up through the lashes—which might work for an Instagram story but usually ends up looking forced or even a bit predatory in a professional portrait.
If you want to move beyond the selfie, you have to stop thinking about your face as a flat object and start thinking about it in three dimensions. This is where real posing tips for better portraits come into play. Instead of just tilting your head, try a slight rotation of the shoulders. It breaks up the silhouette and prevents that “mugshot” stiffness. I always tell my subjects to find the light source first, then move their chin just a fraction of an inch toward it. It’s a small, almost invisible adjustment, but it’s often the difference between a shot that feels awkward and one that feels effortlessly composed.
Five ways to stop the tilt-and-panic cycle
- Watch the chin, not the eyes. When a client tells me they feel “flat,” it’s usually because they’ve tucked their chin too hard toward their chest, creating a shadow that swallows their neck. I tell them to imagine a string pulling the crown of their head up, then ask them to extend their chin just an inch toward the lens—it feels ridiculous to them, but it creates that necessary space between the jaw and the neck.
- Use the “micro-rotation” trick. People tend to either face the camera dead-on like a mugshot or turn so far they’re showing a profile. The sweet spot is almost always a slight 15-degree turn. I find it’s easier to guide them by saying, “Turn your left shoulder just a hair toward me,” rather than asking them to “angle their face,” which is too vague and leads to awkward neck craning.
- Check the eye line relative to the lens height. If I’m shooting a seated author and they’re looking up at a tripod-mounted camera, they’ll look intimidated or swallowed by the frame. If I drop the camera to chest height and tilt it slightly up, it gives them a sense of authority. Conversely, if they’re feeling self-conscious, bringing the lens slightly above eye level and having them look up just a fraction can slim the jawline instantly.
- Solve the “hand-to-face” problem. As soon as someone gets nervous, they either hide their chin behind their hands or touch their hair in a way that pulls the skin tight and unnatural. I always ask them what they do with their hands before we even turn on the lights. If they’re fidgety, I give them something to do—hold a lapel, rest a hand on a hip, or even just grip the edge of a chair—to keep the tension out of their facial muscles.
- Stop chasing the “perfect” angle and start finding the “comfortable” one. If I spend ten minutes trying to find a mathematical angle that works with their bone structure but they look like they’re posing for a high-fashion editorial they didn’t audition for, I’ve failed. I’d rather find the angle where they actually look like themselves, even if it means a slightly more shadow-heavy side, because a confident expression beats a technically perfect jawline every single time.
## The Myth of the 'Good Side'
Stop asking them which side of their face they prefer; they don’t know, and they’re usually lying to you. Your job isn’t to find a magic angle that fixes everything, it’s to find the specific tilt of the chin and the slight shift in the shoulder that stops them from feeling like they’re being interrogated by a lens.
Iwona Krawczyk
The Reality of the Final Shot
At the end of the day, finding that “perfect” angle isn’t about discovering a magical tilt that erases someone’s humanity; it’s about managing the physics of the room and the psychology of the person in front of you. We’ve talked about everything from using shadows to sculpt a jawline to the way a slight chin drop can mitigate the asymmetry we all obsess over. It’s a combination of controlling the light, understanding how the bone structure reacts to the lens, and—most importantly—keeping the subject from spiraling into a critique of their own features. If you can master the interplay between the modifier and the angle, you stop fighting the person and start working with the environment.
Stop looking for a way to make people look like something they aren’t. My best portraits never come from finding a way to hide a nose or a chin; they come from finding the specific way a person sits when they finally stop worrying about the camera. The “flattering angle” is really just a tool to help them feel less exposed. Once they stop fighting the lens and start trusting your direction, that’s when the real work happens. Put the camera down for a second, ask them what they do with their hands, and wait for the moment they actually settle into themselves. That’s the shot you’re actually looking for.
