
I spent three years as an assistant watching photographers spend thousands on specialized modifiers and high-end lighting rigs, only to end up with images that felt just as flat and lifeless as a cheap LED panel. They’d follow every tutorial to the letter, yet still miss the mark because they were taught the math of light rather than the behavior of it. If you’re staring at your gear thinking you need a more expensive setup to learn how to shape light with a softbox, you’re being sold a lie. A softbox isn’t a magic wand that fixes a bad setup; it’s a tool that requires you to understand how distance and angle actually interact with a human face.
In this notebook, I’m skipping the theoretical fluff you won’t find in a textbook. I want to talk about what happens when the light hits a subject who is squinting, or when your studio space is too cramped to move the stand where you actually want it. I’ll show you the specific compromises I make—the exact distances and the way I tilt a modifier to save a shoot when the room is working against me. This isn’t about perfection; it’s about practical control when things get messy.
Understanding How to Shape Light With a Softbox

When you’re standing in a studio, you quickly realize that a softbox isn’t just a box with a white cloth; it’s a tool for managing the physics of a room. The fundamental goal here is the transition from diffused light vs hard light. A bare flash is aggressive—it’s going to hit a cheekbone and create a tiny, blindingly bright point of reflection that makes your subject look sweaty or oily. By using a modifier, you’re essentially increasing the size of your light source relative to the subject. The larger the surface area, the more gradual the transition from light to dark becomes.
This is where you actually start mastering shadow softness photography. It’s not just about “making things bright”; it’s about how quickly the light falls off. If you place the softbox two feet from a face, you get a wrap-around effect that hides skin texture. If you push it back five feet, that light becomes more directional and “stiffer.” You aren’t just throwing light at a person; you are deciding exactly how much of their features you want to surrender to the shadows.
Key Things to Know
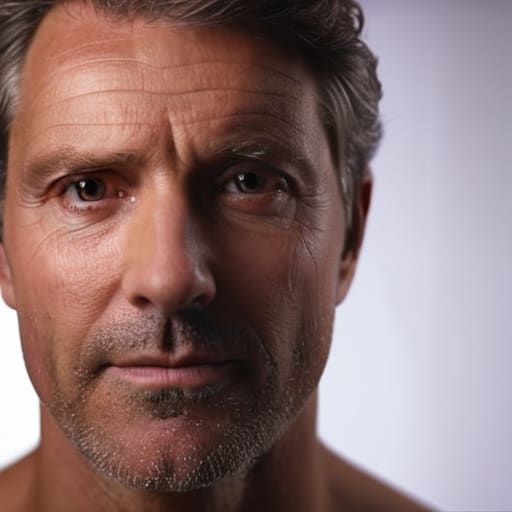
First, let’s get one thing straight: a softbox isn’t a magic wand that fixes a bad room, but it is the most reliable way to manage modifier light quality. When you’re setting up a lighting setup for portraits, you aren’t just “adding light”; you are deciding how much of the subject’s texture you want to reveal. A larger surface area relative to the subject means a more gradual transition between light and dark. If you move the box closer, you get that wrap-around effect that hides skin imperfections, but if you push it back, you’re going to see more of the underlying structure.
You also need to keep an eye on controlling light spill. I’ve spent too many shoots trying to fix the fact that my softbox was illuminating the entire back wall of a cramped studio, washing out the mood I was actually trying to build. If you’re working in a small space, use the grids. They aren’t optional if you want to keep the light on your subject and off the bookshelf behind them. It’s about precision over volume, every single time.
Practical Tips and Steps
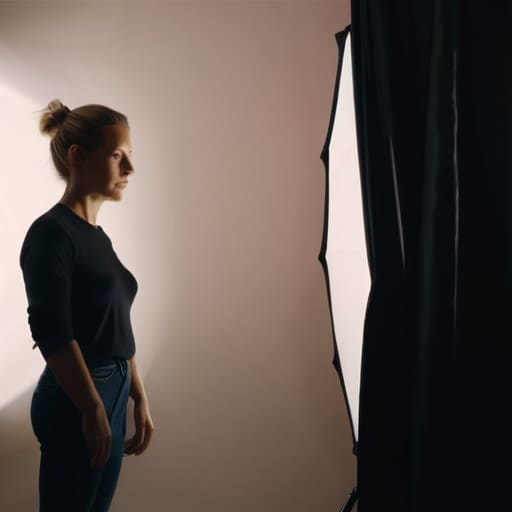
First, stop thinking about the softbox as a magic box that fixes everything. It’s just a tool for modifier light quality, and it only works if you respect the physics of the room. If you want more shadow softness photography, move the modifier closer to your subject. It sounds simple, but most people get too intimidated by the gear and stand five feet back, ending up with light that feels thin and uninspired. When you’re tight on space—which is usually the case in a client’s cramped office—don’t fight the walls. Instead, focus on controlling light spill by using flags or even just a black sheet to keep that light from bouncing off a white wall and washing out your subject’s features.
Once you have the position right, pay attention to the catchlights. If you’re seeing distracting, oily-looking specular highlights control issues on a forehead, your light is too direct or your modifier is too small for the distance. I usually find that angling the softbox slightly off-axis, rather than hitting them dead-on, creates a much more natural transition from light to shadow. It’s about the compromise between drama and clarity.
Common Mistakes to Avoid
The biggest mistake I see—and I’ve seen it in expensive studios and amateur bedrooms alike—is thinking that a softbox is a “set it and forget it” solution. People slap a modifier on a light and assume the job is done. But if you place that box too close to a white wall or a reflective window, you end up with massive amounts of controlling light spill issues that wash out your subject’s features. You aren’t just shaping the light hitting the person; you’re shaping the light hitting the entire room. If you don’t account for the bounce, you lose all the intentionality of your setup.
Another trap is the obsession with making everything perfectly even. There is a tendency to chase a level of shadow softness photography that ends up looking flat and lifeless, like a passport photo from a bad decade. If you lose the transition between light and dark, you lose the shape of the face. You need to be mindful of specular highlights control; if your softbox is too large or too close without any direction, you’ll end up with a face that looks like a shiny, featureless orb. Don’t be afraid of a little contrast.
Final Thoughts
Look, at the end of the day, a softbox isn’t a magic wand that fixes a bad mood or a cramped studio, but it is the most reliable tool you have for managing the chaos. Once you stop obsessing over the gear and start focusing on how the diffused light vs hard light actually hits your subject’s skin, everything changes. You’ll start to see that it’s less about following a manual and more about reacting to the room. If the light is spilling everywhere and washing out your background, don’t just stare at the settings—move the modifier or grab a flag.
Don’t get caught in the trap of thinking “more light” is the answer to every problem. Often, the best portrait comes from knowing exactly when to pull back. Mastery is found in the subtle stuff: the way you manage specular highlights control on a forehead or how you tilt the box just a fraction to soften a jawline. It’s about the compromise. Keep practicing, keep failing, and keep paying attention to the shadows. That’s where the real work happens.
Five ways to stop fighting your softbox and start using it
- Stop thinking about the box and start thinking about the distance. If you want that wrap-around light that makes skin look decent, get the softbox as close to the subject as you can without hitting them in the nose. The closer it is, the softer the light; the further away, the more it just becomes a slightly diffused version of a harsh lamp.
- Watch your spill. A softbox isn’t a magic vacuum; it throws light everywhere, and if you’re working in a small studio with white walls, that light is going to bounce back and kill your shadows. If you want to actually shape something, you need to use flags or even just a piece of black foam core to stop the light from washing out the rest of the room.
- Don’t just point it straight at their face. If you’re shooting a portrait and the subject is starting to look like they’re being interrogated, tilt the modifier. Aiming the softbox slightly higher or even slightly off-axis can change the way the light hits the cheekbones and prevents that flat, “passport photo” look that everyone hates.
- The grid is your best friend when things get messy. If you’ve got a softbox but the light is bleeding into the background and ruining the mood, slap a honeycomb grid on it. It restricts the beam, giving you much more control over where the light actually lands, which is a lifesaver when you’re working in a room that wasn’t designed for photography.
- Check the light on the hands. I always ask people what they do with their hands when they’re nervous, and usually, they end up tucked away in shadows or looking like weird fleshy lumps. If you’re using a single softbox, make sure your light angle is wide enough to catch those hands, or you’ll spend the whole shoot trying to fix a composition that’s fundamentally broken.
The Softbox Illusion
Don’t fall for the idea that a softbox is a magic wand for bad lighting. It’s just a tool to control the direction and the spill, but if you haven’t accounted for the window light bleeding in from the left or the client’s sudden urge to move into the shade, that expensive modifier is just a glorified paperweight.
Iwona Krawczyk
A Final Note Before You Turn the Lights Off
At the end of the day, mastering the softbox isn’t about memorizing a specific distance or a perfect degree of tilt; it’s about understanding how that light interacts with the specific mess in front of you. Whether you’re struggling with a ceiling that’s too low to mount a heavy modifier or a subject who keeps trying to hide their chin, remember that the softbox is just a tool to manage the chaos. You’ve learned that size matters, that placement dictates the mood, and that sometimes the best light is the one you have to compromise on just to get the shot done. Don’t get precious about the gear—focus on how the light falls on the skin and how it makes the person feel.
If you find yourself staring at a light meter and feeling like you’re failing, take a breath and look away from the screen for a second. Most of the time, the “perfect” setup is a myth we tell ourselves in textbooks. Real photography happens in the friction between your intentions and the reality of the room. Trust your eyes more than your settings, and remember that the best portraits come from being present, not just from having the most expensive diffusion on your strobe. Now, go out there, get your hands dirty, and see what you can actually make happen.
