
I once spent three hours in a cramped studio basement trying to figure out how to light a product on a table, convinced that I needed a secondary strobe and a specialized softbox to fix the weird, oily reflections on a glass bottle. I was sweating, frustrated, and about ten minutes away from throwing my tripod across the room, only to realize the problem wasn’t my gear—it was the windowless corner and the fact that I was fighting the glare instead of shaping it. Most tutorials will tell you to buy more lights, but they forget to mention that a single, well-placed piece of white foam board can do more work than a five-thousand-dollar kit when you’re working in a tight space.
In this notebook entry, I’m skipping the gear porn and getting into the actual physics of the setup. I’ll show you how to manage reflections without losing your mind, the exact distance to place your modifier to avoid those harsh, “cheap-looking” hot spots, and why controlling the shadows is more important than brightening the whole scene. This isn’t about perfect studio conditions; it’s about making it work when the room is working against you.
Guide Overview
Tools & Supplies
- Smartphone or DSLR camera for capturing shots
- Desk lamp or LED light for primary illumination
- Diffuser (paper or thin white cloth) to soften shadows
- White poster board or foam core for background
- Reflectors (aluminum foil or white cardstock) 2 units
- Clamps or tape to secure materials
Step-by-Step Instructions
- 1. First, stop looking at your gear list and look at the room. If you’re working in a cramped corner of a client’s office or a kitchen with a massive window dumping harsh afternoon sun onto your table, your first job is to kill that light. Close the blinds or throw a heavy sheet over the window. You cannot control a single product if the environment is fighting you before you even plug in a lamp.
- 2. Clear the table of everything except the product and a neutral surface. I don’t care if the client wants a “lifestyle” look; you cannot fake a lifestyle if you’re tripping over props. Start with a clean, flat plane—a piece of matte foam board or even a scrap of linen—and get your camera position locked in before you even think about turning on a light. If you move the camera after the lights are set, you’re just starting the struggle all over again.
- 3. Set up your primary light source, and please, for the love of everything, don’t start with a massive softbox. Use a single light—a strobe or a continuous LED—placed about 45 degrees to the side and slightly above the product. This creates a shadow that gives the object shape. If you light it from the front, you’ll end up with a flat, lifeless image that looks like a cheap catalog from 1998.
- 4. Now, deal with the reflections. This is where most people lose their minds, especially with glass or polished metal. If you see a nasty, bright white spot where you don’t want it, don’t just move the light; use a bounce card. Grab a piece of white foam core and hold it opposite your light source to fill in those deep, ugly shadows. It’s the simplest way to soften the transition between light and dark without adding more complicated gear to the table.
- 5. If the shadows are still too “crunchy” or aggressive, bring in a second, much weaker light or a diffuser. I usually prefer a large silk or a thin white sheet placed between the light and the product. It’s not about adding more light; it’s about spreading the light out so it wraps around the edges of the object instead of hitting it like a hammer.
- 6. Check your highlights. This is the moment where you realize the “perfect” setup you just built is actually washing out the texture of the product. If the top of the object is a blown-out white mess, move your light further away or tilt it slightly more toward the side. You want to see the surface detail, not a glowing void where the texture used to be.
- 7. Finally, do a “blackout” test. Turn off all your lights and look at the product. If you can see any stray light from a hallway or a computer monitor hitting the side of the object, it will ruin your contrast. Block it, tape it, or move the table. Once the room is dark and your single light is doing all the heavy lifting, you’ve actually gained control.
Understanding How to Light a Product on a Table
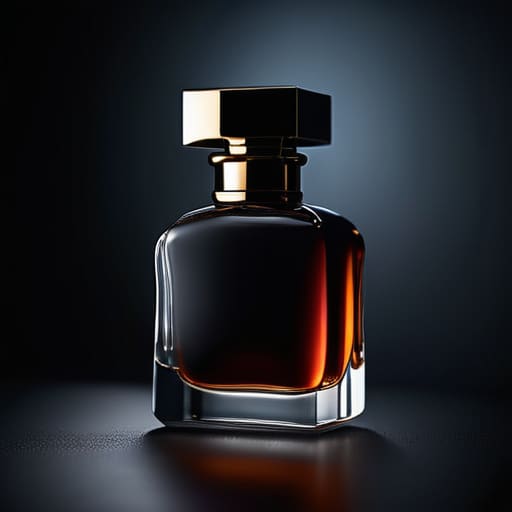
Before you even reach for the power switch, you need to realize that you aren’t just lighting an object; you are managing reflections. If you’re shooting something even slightly reflective—a glass bottle, a polished watch, or a ceramic plate—your biggest enemy is controlling specular highlights. I’ve spent far too many hours staring at a single, tiny, blown-out white dot on a product that ruined a perfectly good composition. Instead of fighting it, I lean into it. I use large, white foam boards or even a piece of white cardstock to bounce light back into those hot spots, turning a harsh glare into a clean, intentional line.
When I’m setting up my studio lighting for tabletop work, I rarely start with a complex three-point rig. That’s a recipe for clutter and confusion when you’re working in a cramped kitchen or a tiny studio corner. Usually, I start with one single source and a large modifier. I prefer diffused light techniques—think a medium softbox placed slightly behind and to the side of the product—to create a sense of depth. It’s about finding that sweet spot where the light wraps around the edges without washing out the texture. If the shadows look too heavy, don’t add another light; just move your reflector.
Key Things to Know
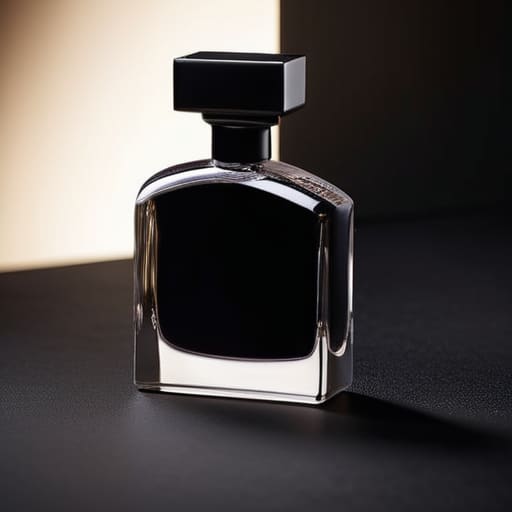
First, let’s talk about the surface you’re working on. I’ve spent too many afternoons fighting with a reflective glass table that turned my expensive light source into a giant, distracting white blob. If you aren’t careful with controlling specular highlights, you’ll spend more time cleaning up glare in Photoshop than you did actually shooting. I usually suggest starting with a matte board or a piece of dark felt to kill those unwanted reflections before you even touch a power switch.
Secondly, don’t fall into the trap of thinking more gear equals better results. You’ll see tutorials screaming about a complex three-point lighting setup, but for a small object, that often just creates a cluttered, messy look. Most of the time, I find that a single light source with some decent diffused light techniques—like a piece of tracing paper or a cheap scrim—does more heavy lifting than a full kit. It’s about the quality of the light hitting the object, not the number of strobes you have cluttering up your floor space.
Practical Tips and Steps

If you’re working in a cramped corner of a studio or a kitchen table, stop looking at your gear list and start looking at your surfaces. One of the biggest headaches I run into is a shiny object—think glass bottles or polished metal—that decides to turn into a mirror the moment I turn on a lamp. Instead of fighting it, focus on controlling specular highlights by using something larger and softer than you think you need. If you can’t afford a massive scrim, even a piece of white foam core held just a few inches from the object can act as a makeshift reflector to bounce light back into those dark, ugly voids.
When the reflections get out of hand, I usually lean heavily on diffused light techniques. I’ve spent many afternoons taping thin white fabric over a single light source because a standard softbox lighting setup was still throwing too much “bite” onto a product’s edges. It’s about the compromise; sometimes you have to sacrifice a bit of crispness to get a shape that doesn’t look like it’s fighting the viewer. Don’t be afraid to move the light further away to wrap the illumination more gently around the object.
The stuff they don't tell you in the manual
- Stop chasing the perfect light and start managing the reflections. If you’re shooting something even slightly shiny—a glass bottle or a polished watch—your biggest enemy isn’t a lack of light, it’s seeing your own face or that ugly white ceiling in the reflection. Use a piece of white foam board to bounce light back into the shadows, or better yet, use a large piece of diffusion paper to turn a harsh point of light into a soft, manageable glow.
- Distance is your best friend for controlling the “mood.” If you want that dramatic, moody look where the product emerges from the dark, pull your light source further away and lower its power. If you’re too close, you’ll blow out the highlights before you even have a chance to adjust your exposure. I usually find that moving the light just eighteen inches back changes the entire texture of the object.
- Watch your shadows like a hawk. A single light source is great for drama, but it can also create “dead zones” where the product looks like a black hole. Use a small reflector—even a piece of silver foil if you’re in a pinch—to kick a little bit of light back into the shadow side. You aren’t trying to eliminate the shadow; you’re just trying to make sure it has some shape and doesn’t look like a mistake.
- Mind the background clutter. It sounds obvious, but I’ve seen so many beginners spend an hour perfecting the light on a product only to realize there’s a stray power cable or a coffee stain just two inches outside the frame. If the table is messy, move the product to the edge or bring in a piece of colored cardstock to create a clean “sweep.” A clean background does half the heavy lifting for you.
- Don’t trust your eyes; trust your histogram. Your brain will try to convince you that the lighting looks “fine” because it looks fine in the room, but the camera sees things differently. If you’re shooting a dark product on a dark table, you’ll be tempted to overexpose it to see the detail, which can kill the atmosphere. Check your levels on the screen—if the spikes are hitting the far right, you’re losing your highlights to pure white.
The Myth of the Perfect Setup
Stop obsessing over whether you need a three-point lighting kit or a high-end softbox; if you haven’t accounted for the way the light is bouncing off that white tabletop and washing out your shadows, you’re just making expensive mistakes. It’s not about the gear, it’s about managing the reflections you didn’t see coming.
Iwona Krawczyk
The Reality of the Final Shot
At the end of the day, lighting a product on a table isn’t about having a studio full of Profoto strobes; it’s about managing the light you actually have. We’ve talked about controlling reflections with scrims, using a single source to avoid that messy, amateur look, and why your positioning matters more than your aperture. Remember that the table itself is a participant in the shoot—if it’s reflective, you’re fighting it; if it’s matte, you’re working with it. If you can master the balance between your key light and the shadows it creates, you’ve already won half the battle. Don’t get bogged down in the math of it all; just watch how the light hits the edges and adjust by millimeters, not meters.
There will be sessions where nothing goes to plan, where the client brings a product that is impossibly shiny or the room’s ambient light is fighting your every move. That is when you stop looking at your manual and start looking at the object. Photography is a constant negotiation between your intent and the physical reality of the room. Trust your eyes more than your gear. Once you realize that the camera is just a witness to the light you’ve sculpted, you’ll stop worrying about the technical specs and start actually seeing the work. Now, go turn off the overheads and try it again.
