
I once spent forty minutes sweating through my shirt in a public park, trying to rig a massive, expensive octabox to a tripod because I thought I needed to “control” the sun. My subject, a nervous architect who kept twisting his wedding ring, was getting more agitated by the second, and frankly, the light was still a mess. I realized then that most tutorials spend way too much time talking about expensive modifiers and not enough time teaching you how to use shade for portraits that actually works in the real world. You don’t need a $2,000 lighting kit to fix a harsh midday sun; you just need to know where the shadows are hiding and how to move your subject into them before the light turns their eyes into tiny, squinting dots.
In this entry, I’m skipping the gear porn and the technical fluff. I’m going to show you the practical geometry of finding usable light in a chaotic environment. We’ll talk about using building overhangs, the specific distance you need to stand from a shadow line to avoid “split lighting” disasters, and why a simple tree is often a better tool than any flash you can buy. This is about making the environment work for you, rather than fighting a losing battle against the sky.
Understanding How to Use Shade for Portraits
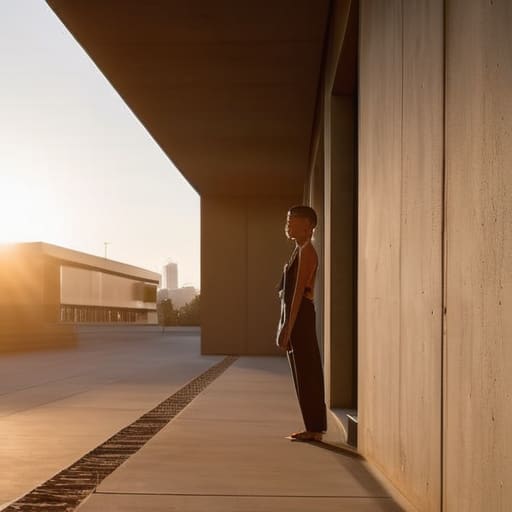
Most people think they need a $2,000 softbox to get that creamy, professional look, but they’re usually just ignoring the architecture around them. When I’m out on a commission and the sun is being particularly aggressive, I’m not looking for a studio; I’m looking for a building with a deep overhang or a thick line of trees. This is the essence of using open shade for soft lighting. You want your subject tucked just inside the shadow line, far enough from the direct sun that they aren’t squinting, but close enough to the edge that the ambient light still has some life in it.
The trick is understanding that shade isn’t just “darkness”—it’s a container for reflected light. If you place someone deep in the center of a dark alley, they’ll look muddy and flat. You have to play with portrait lighting direction and placement by positioning them so the “sky light” hits them from a slight angle. I always tell my assistants to look for the transition zone: that sweet spot where the shadow meets the light. If you get the distance right—usually about two or three feet from the edge of the shade—you get a wrap-around quality that no cheap umbrella can quite replicate.
Key Things to Know
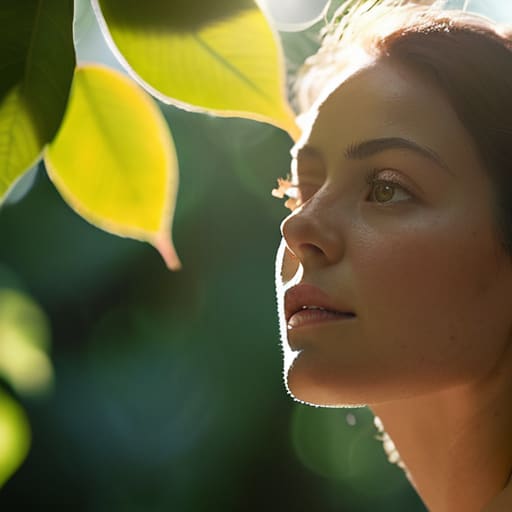
First, forget the idea that shade is just “lack of light.” It’s a tool, not a failure of the sun. When I’m out on a commission and the midday sun is turning my subject into a mess of high-contrast squinting, I’m looking for using open shade for soft lighting. This means finding the edge of a building, a thick tree canopy, or even the shadow cast by a large van. You want your subject positioned right at the boundary where the light transitions. If they are too deep in the dark, they look muddy; if they are too far out, you’re back to fighting those nasty, nose-shaped shadows.
Second, you have to pay attention to the ambient bounce. Even in the shade, there is light hitting the ground and reflecting back up. If you’re working in a narrow alleyway, that light is going to be much more directional than if you’re under a wide, open porch. I always check the shadow quality in outdoor photography by looking at the ground first. If the shadows on the pavement are crisp, your subject’s face will be too. If the shadows are blurry and soft, you’ve found your spot.
Practical Tips and Steps
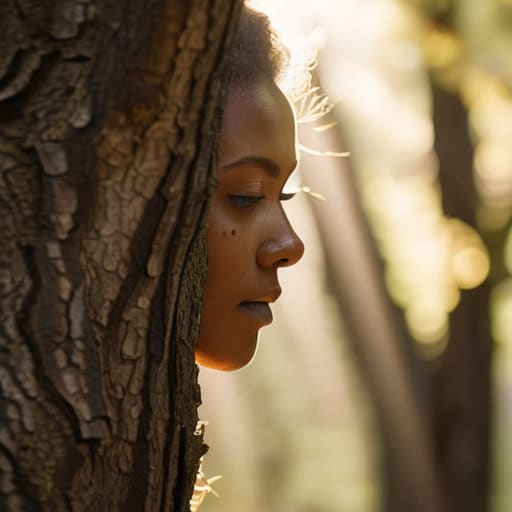
First, stop looking for the perfect light and start looking for the perfect edge. When I’m out on a commission and the sun is being particularly aggressive, I’m not looking for a wide-open field; I’m looking for the shadow cast by a building or a thick tree line. This is where you master using open shade for soft lighting. Find that boundary where the sun stops hitting the skin directly, but the sky is still bright enough to fill the shadows. If you place your subject right at the edge of that shade, you get a beautiful, wrap-around glow without the squinting or the red nose.
Don’t just stand them in the dark and call it a day, though. You need to pay attention to portrait lighting direction and placement relative to the sky. If the shade is too deep, your subject will look like they’re being interrogated in a basement. I usually have them turn their face slightly toward the open sky—not the sun—to catch a bit of that reflected brightness. It keeps the eyes alive. If the shadows are still looking too heavy or muddy, move them six inches closer to the light source until the transition from light to dark feels natural, not like a cliff edge.
Common Mistakes to Avoid
The biggest mistake I see—and I’ve made it myself more times than I care to admit—is thinking that “shade” is a single, uniform thing. People wander into the shadow of a building and think they’re safe, only to realize they’ve walked into a dark, muddy mess. They forget that shadow quality in outdoor photography depends entirely on what is around the shade. If you’re tucked under a heavy concrete overhang with no light bouncing back from the ground, your subject is going to look like they’re in a witness protection program. You aren’t just looking for darkness; you are looking for light that has been filtered by the environment.
Another trap is getting too comfortable and ignoring the sun’s position relative to the edge of the shadow. I’ve seen so many beginners struggle with avoiding harsh shadows in portraits because they let the subject sit right on the “line.” If one half of their face is in beautiful, soft light and the other is being scorched by direct sun, the contrast is going to be a nightmare to fix in post. Don’t just find a shaded spot; move your subject until the transition between light and dark is intentional, not accidental.
Final Thoughts
Look, at the end of the day, your expensive modifiers won’t save you if you haven’t mastered the basics of the environment you’re standing in. I spent years watching senior photographers scramble with umbrellas in the middle of a field because they didn’t bother to look for a tree or a building first. If you can learn the art of using open shade for soft lighting, you’ll find that half your gear problems simply evaporate. You don’t need a massive softbox when a well-placed shadow can do the heavy lifting for you.
Don’t get caught up in the technical perfectionism that keeps you from actually shooting. The goal isn’t to create a sterile, perfect studio look every time; it’s about managing the chaos of the real world. Whether you are practicing diffused natural light photography or trying to salvage a session when the sun decides to be aggressive, remember that the light is something you hunt, not something you just wait for. Stop obsessing over your settings and start looking at where the light actually lands. That’s where the real work happens.
Five ways to stop fighting the sun and start using it
- Stop looking for “perfect” light and start looking for “useful” shade. If you’re shooting an outdoor corporate headshot and the sun is high and punishing, don’t try to fight it with a massive umbrella that’ll just blow away in the wind; find the edge of a building or a thick tree line. The goal isn’t to find a dark cave, but to find a spot where the light is soft enough that your subject isn’t squinting like they’re being interrogated.
- Watch the “edge” of the shadow. The most interesting light usually happens right at the transition point between sun and shade. If you place your subject just inside the shadow, but let a tiny bit of ambient light bounce back into the shadowed side of their face, you get depth without the harsh, ugly lines that make people look like they’ve aged ten years in one frame.
- Mind the color cast from your surroundings. This is the part the manuals skip: if you move your subject into the shade of a bright green hedge, their skin is going to look slightly sickly and olive. I’ve spent way too many hours in post-production trying to fix “lawn-colored” skin. If the shade is too colorful, move them five feet left or right until the skin tones look human again.
- Use the ground as your biggest modifier. If you’re in a deep, flat shadow and the portrait looks a bit lifeless or “muddy,” look at what’s on the ground. A concrete sidewalk will bounce a cool, neutral light back up into the eyes, while a patch of dry grass will throw a warm, golden glow. Use the environment to fill in the shadows instead of lugging a heavy reflector around.
- Check the subject’s eyes before you click. Shade is great for preventing squinting, but if you’ve moved them into a deep shadow, you might lose the “catchlight”—that little spark of life in the eyes. If the eyes look like black holes, you’ve gone too deep. Back them out toward the light just enough so they catch a glimmer, even if it means the light isn’t perfectly even.
The Myth of the Perfect Light
Stop waiting for the sun to behave or your expensive softbox to save you; real portraiture happens when you stop fighting the shadows and start using them to hide the chaos of a bad room.
Iwona Krawczyk
The Reality of the Shade
At the end of the day, using shade isn’t about finding a magical, perfect spot; it’s about managing the mess you’ve been handed. We’ve talked about finding the edge of the light, checking your subject’s eyes for that essential catchlight, and realizing that a massive oak tree is often a better modifier than a five-hundred-euro softbox. Remember that shade is a tool for control, not just a way to hide from the sun. If you can master the transition between the bright open space and the soft, occluded light, you stop being a victim of the weather and start being the person who actually knows how to handle a difficult location. Stop worrying about the gear you didn’t bring and start looking at how the light is actually behaving in the space you’ve been given.
If you walk away with nothing else, remember this: the most beautiful portraits I’ve ever taken didn’t happen because I had the perfect setup, but because I stopped fighting the environment and started working with it. When the sun is too harsh and the client is getting restless, don’t panic. Just find the shadow, move the subject three inches to the left, and look for the soul in the eyes rather than the technical perfection of the exposure. The best work happens in the compromises we make between the light we want and the light we actually have.
