
I once spent forty minutes in a cramped, overheated studio trying to explain to a CEO why his chin needed to be slightly more forward, all while he stared at my expensive prime lens like it was a magic wand that would fix his posture. He thought the gear was the solution, but the truth is, most people approach how to shoot a profile portrait by obsessing over focal lengths and sensor resolution when they should be obsessing over the geometry of a jawline and the tension in a subject’s neck. You can own the most expensive lighting kit in Europe, but if you don’t know how to manage the way a person’s silhouette collapses when they get self-conscious, you’re just taking very expensive, very flat photos.
I’m not here to give you a technical manual that reads like a manufacturer’s spec sheet. Instead, I want to talk about the actual mechanics of the side profile: where to place a single light source to catch the ridge of the nose without blowing out the cheek, and how to talk a client through the awkwardness of looking away from the lens. This is about the practical, messy reality of getting a shape that actually looks like a human being.
Forget the Gear How to Shoot a Profile Portrait Amidst Chaos
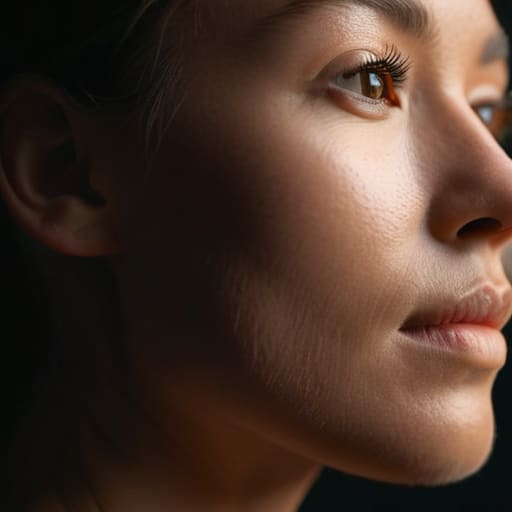
I’ve spent enough years assisting to know that the most expensive strobe in the world won’t fix a subject who is physically bracing themselves against a wall. When you’re working on a profile, you aren’t just managing light; you’re managing tension. People tend to stiffen their necks when they turn sideways, which makes the jawline disappear into the neck. Before you even touch your settings, I ask them to take a breath and drop their shoulders. If they feel like they’re posing for a mugshot, they will look like they’re in a mugshot.
Once the tension settles, stop obsessing over your gear list and look at the shape of the shadow. If you want to emphasize the structure of the face, don’t just blast them with light; focus on capturing the facial silhouette by letting the far side of the face fall into darkness. I usually lean on a single large softbox placed slightly behind the subject to create a clean rim lighting for profiles. This separates them from the background without needing a complex three-point setup. It’s about finding the line where the nose meets the air, not finding the perfect aperture.
The Room Is the Enemy Mastering Side Profile Lighting Techniques
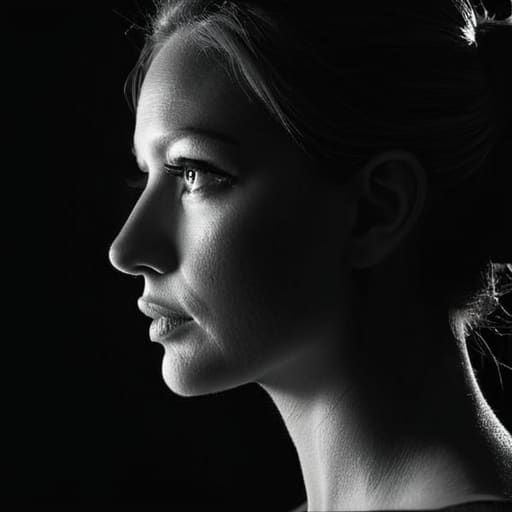
The room is rarely a neutral space. You’ll walk into a studio thinking you have control, only to realize a massive, unmovable window is washing out your shadows or a ceiling light is creating a nasty catchlight in the subject’s eye. When you’re working on side profile lighting techniques, you aren’t just positioning a strobe; you are negotiating with the architecture. If the ambient light is too strong, stop trying to overpower it with a massive softbox. Instead, turn the subject away from the window and use a single, controlled light source to create a clean line from forehead to chin.
I’ve learned that the best way to handle a messy environment is to lean into the darkness. If you can’t kill the room’s light, use rim lighting for profiles to separate the subject from a cluttered background. By placing a small light slightly behind them, you catch that sliver of light along the jawline, which does more for the image than any expensive lens ever could. It’s about finding the shape in the mess, not pretending the mess isn’t there.
Sculpting the Shadow Capturing the Facial Silhouette With Intention
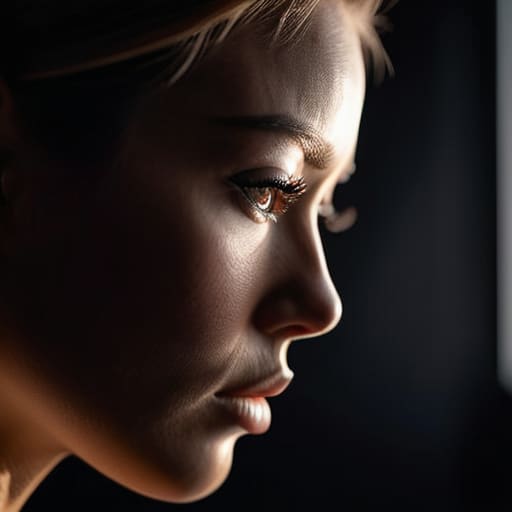
When you’re capturing facial silhouette, you aren’t just looking for a clean outline; you’re looking for the way the light falls off the cheekbone and the jawline. I’ve learned the hard way that if your light is too broad, you lose the very thing that makes a profile interesting—the shape. I usually pull my key light back about four feet and tilt it slightly to create a more dramatic fall-off. If the subject has a particularly strong nose or a soft jaw, I don’t try to “fix” it with more light. Instead, I lean into it. I’ll use a small strip box to create some subtle rim lighting for profiles, which helps separate their head from a dark background without washing out the character of the face.
It’s also about the geometry of the shot. I often find myself playing with camera angles for side view shots, dropping the tripod a few inches lower than I think I need to. This adds a sense of weight and presence. You also have to watch your depth of field in portraits; if you’re shooting wide open at f/1.4, you might accidentally blur the ear or the temple, which breaks the silhouette. I usually stop down to f/2.8 or f/4 just to ensure the entire profile stays sharp enough to feel intentional.
Finding the Edge Using Rim Lighting for Profiles
When you’re working with a dark background, a side profile can easily turn into a black blob if you aren’t careful. This is where rim lighting for profiles becomes your best friend. I usually grab a strip box, pull it about 45 degrees behind the subject, and keep it tight to their back. You aren’t looking for a wash of light here; you want a thin, sharp line of definition that traces the bridge of the nose and the curve of the jaw. It’s that tiny sliver of light that separates the person from the shadows, and if you get it right, it does more for the image than any expensive lens ever could.
Don’t overthink the power settings. If the light is too bright, you’ll blow out the skin texture and lose the shape entirely; if it’s too dim, the profile just disappears. I find that balancing the exposure between that rim light and the fill on the face is where the real work happens. It’s a delicate dance of positioning and tweaking, but once you nail that edge, the portrait finally feels three-dimensional.
When the Subject Fails Camera Angles for Side View Success
Once you’ve wrestled the lighting into submission, you’re left with the person in the chair. And this is where things usually fall apart. I’ve spent enough time assisting to know that the moment a subject decides they “don’t have a good profile,” their posture collapses. Their chin tucks, their shoulders hunch, and suddenly you aren’t capturing a facial silhouette; you’re photographing a slumped mess. When this happens, stop talking about the light and start talking about their spine. I usually have them stand slightly offset from the camera rather than a strict 90-degree turn. It feels less confrontational and helps them find a natural center.
Don’t be afraid to play with your camera angles for side view success by dropping your tripod a few inches. Shooting slightly from below can add a sense of authority to an author portrait, but if they’re looking down, it just makes them look defeated. I find that eye level—or even a hair above—is the safest bet to keep the chin from disappearing into the neck. If the depth of field is shallow, make sure your focus point is dead-on the eye closest to the lens; if that eye is soft, the whole composition is dead.
Beyond the Lens Portrait Photography Composition and Depth of Field
Once you’ve wrestled the lighting into submission, you have to deal with the spatial reality of the subject. In a profile shot, the distance between the nose and the ear becomes your primary compositional axis. I’ve seen too many beginners treat the frame like a flat plane, but a profile only breathes when you respect the depth of field in portraits. If you’re shooting with an 85mm, don’t just aim for a blurry background; aim to isolate the bridge of the nose and the lash line while letting the back of the head soften into the atmosphere. It’s a delicate balance—too much sharpness on the ear and the focus feels clinical; too little, and you lose the character of the silhouette.
Compositionally, stop centering everything. A profile shot is inherently directional; the subject is looking somewhere, even if it’s just into the void of a studio corner. Use the rule of thirds to give them room to look into, or conversely, crop in tight to create a sense of confrontation. When you combine intentional portrait photography composition with a shallow aperture, you aren’t just taking a picture of a face; you’re directing the viewer’s eye exactly where the story lives.
The Small Stuff: Five Things That Actually Make or Break a Profile
- Watch the nose. I’ve seen too many “perfect” profile shots ruined because the subject tilted their head just a fraction too far toward the camera, making the nose look twice as long as it actually is. I tell them to keep their chin slightly out and down—it feels unnatural to them, but on screen, it defines the jawline instead of burying it.
- Manage the “Hand Problem” early. Before I even touch the strobe, I ask them what they do with their hands when they’re nervous. If they say “fidget with my hair” or “clench my fists,” I know I need to give them a prop—a chair arm, a lap, or even just a heavy book—to anchor that nervous energy before it ruins the silhouette.
- Don’t ignore the ear. It sounds pedantic, but in a tight profile, a stray lock of hair or a poorly positioned ear can break the entire line of the face. I usually spend three minutes just tucking hair behind the ear or adjusting a collar, because once you’re in that side-on view, there’s nowhere for the mess to hide.
- Check the eye-line, not just the direction. A profile shot where the subject is staring blankly into the distance often looks vacant or “dead.” I ask them to look at something specific—a mark on the wall, a point just past the lens—to ensure there’s a sense of intention in the gaze rather than just a blank stare.
- Mind the distance to the background. If you’re shooting a profile, you’re relying heavily on that clean outline. If your subject is leaning against a wall two feet behind them, your depth of field won’t save you from a distracting shadow or a textured surface cutting right through their neck. Get them away from the wall; give the silhouette room to breathe.
## The Profile Isn't a Setting
A profile portrait isn’t something you just ‘capture’ by turning a subject ninety degrees; it’s a negotiation with their silhouette. You aren’t just looking for a sharp nose or a strong jawline—you’re looking for the exact moment where the light stops being a tool and starts being a way to tell them that they don’t actually look as awkward as they feel.
Iwona Krawczyk
The Reality of the Profile
At the end of the day, a successful profile portrait isn’t about having a perfect lighting diagram or the sharpest glass in your bag. It’s about how you manage the friction. It’s knowing when to stop fighting a difficult window and instead use that harsh side-light to sculpt the jawline, or realizing that a rim light is the only thing saving a subject who is blending into a dark background. We’ve talked about the technicalities—the angles, the modifiers, and the depth of field—but remember that the gear is just a tool for managing the environment. If you can control the light, the shadows, and most importantly, the person sitting in the chair, the technical side of the profile will eventually fall into place.
Don’t let the fear of a “bad” angle or a difficult subject paralyze you. Most of the time, when a profile feels off, it isn’t because you lack a specific lens; it’s because you haven’t yet accounted for the way the room is behaving or how the client is holding their shoulders. Stop looking at your settings for a second and look at the space around them. Once you start seeing the light as something you shape rather than something you just capture, you’ll stop fighting the chaos and start working with it. That is where the real photography happens.
