
I once spent forty minutes in a cramped, overheated studio trying to convince a client that we didn’t need a third strobe, we just needed to stop fighting the window. I watched a junior photographer struggle with a massive, expensive softbox that was doing nothing but creating muddy shadows, all because they hadn’t realized that knowing how to use a reflector properly is actually more important than owning every light in the catalog. Most tutorials make it sound like some magical, high-tech secret, but in reality, a reflector is just a way to stop fighting the room and start working with what you’ve already got.
I’m not here to give you a lecture on the physics of light bounce or sell you a kit you don’t need. Instead, I want to talk about the actual, messy physics of a shoot: where to stand so you don’t cast your own shadow, why a silver disc can sometimes feel like a weapon, and how to manage that annoying glare in a subject’s eyes. This is about the practical reality of using a single piece of foam to save a failing portrait, without the expensive gear or the textbook nonsense.
When the Room Fails Learning How to Use a Reflector Properly
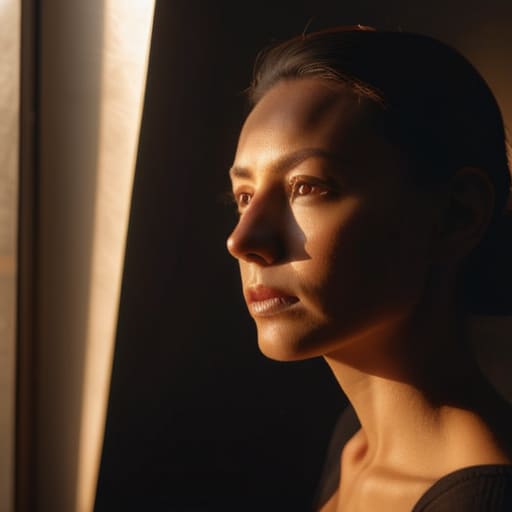
When the room fails, you stop looking at your gear and start looking at the walls. I’ve spent too many shoots in cramped studios with tiny windows where the sun decides to hit a subject’s cheekbone like a spotlight, leaving the other side of their face in a pitch-black void. This is where you stop fighting the environment and start using a bounce light technique to fix it. If you’re working with a single window, don’t just sit there praying for more sun; grab a large white foam board or a silver reflector and place it on the shadow side. You aren’t adding a new light source; you’re just recycling what you already have to fill in those heavy, unflattering gaps.
It’s not about being fancy; it’s about softening harsh shadows that make even the most confident client look like they’re in a film noir. If the light feels too aggressive, move the reflector closer to the subject to spread the glow, or tilt it slightly away to control the light intensity so it doesn’t look like a second, accidental flash hit them in the face.
Choosing Your Weapon Navigating Different Reflector Types for Portraits
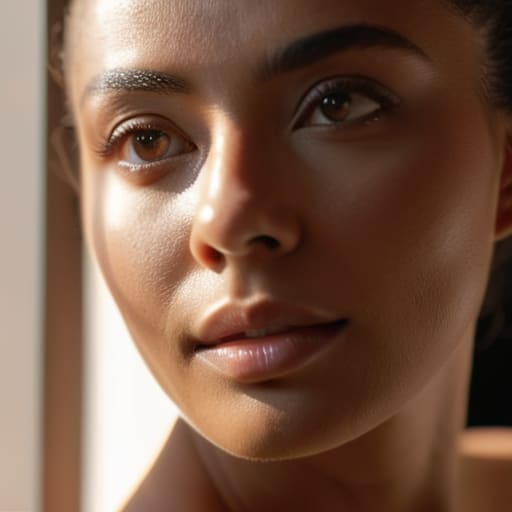
Don’t let the marketing fool you; you don’t need a kit containing every possible shade of silver and gold to do decent work. When I’m out on a commission, I usually reach for the 5-in-1 collapsible disc because it’s the only thing that survives being shoved into a cramped gear bag. If you’re working with a single window and trying to fill in some deep eye sockets, the white side is your best friend. It’s subtle. It’s great for softening harsh shadows without making the subject look like they’ve been hit by a spotlight in a disco.
However, if you’re stuck in a dim corner of a studio or a moody cafe, the silver side is the heavy hitter. It’s much more aggressive with its bounce light technique, throwing a punchier, more directional light back into the face. Just a heads-up: silver can get “specular” very quickly, meaning you might end up with hot spots on a forehead if you aren’t careful. I usually prefer the gold for that specific, warm “golden hour” look, but honestly, if you use it too much in a professional headshot, the client will just look like they have a fever.
Softening Harsh Shadows When the Sun Wont Cooperate

So, you’ve finally found that perfect outdoor location, the light is hitting the subject just right, and then—suddenly—the sun decides to be aggressive. You’re looking at deep, cavernous shadows under the eyes and a nose that looks like it’s been carved out of granite. This is where most people panic and start looking for a studio strobe, but you don’t need more power; you need to redistribute what you already have.
The trick to softening harsh shadows in these moments isn’t about adding light, it’s about a smart bounce light technique. Grab your large silver or white reflector and position it just below the subject’s chin or slightly off-axis from the sun. You aren’t trying to blast them with light; you’re just trying to “fill” those dark voids. If the sun is too intense, don’t fight it—use a white reflector to catch the ambient glow and gently push it back into the shadows. It’s about controlling light intensity through redirection rather than raw force. It feels a bit like wrestling, but it’s the only way to save the portrait without retreating to a dark corner.
The Art of the Bounce Light Technique in Difficult Spaces
The thing about small, cramped studios or awkward hotel rooms is that you can’t just move the light stand wherever you want. You’ll end up tripping over a power cable or hitting a client in the face with a softbox. This is where the bounce light technique becomes your best friend. Instead of trying to force a massive light source into a corner, aim your light at a white wall or a ceiling. You aren’t just pointing a lamp; you are turning the entire room into your modifier. It’s about controlling light intensity by choosing how much of that surface area you actually hit.
If you’re working with a single window and the sun is being aggressive, don’t just let it blast the subject. Use a large silver reflector to catch that spill and redirect it back into the shadows. I’ve spent many sessions in tiny apartments where the only way to achieve a decent photography lighting setup was to bounce a flash off a piece of white foam board tucked into a corner. It feels like a hack, but it’s actually just working with the physics of the space instead of fighting them.
Controlling Light Intensity Without Changing the Entire Photography Lightin
Sometimes you’re halfway through a session and realize the light is just too much. You’ve got a beautiful window or a single strobe, but it’s hitting your subject with a ferocity that makes them squint and turns their skin into a landscape of highlights. You could spend twenty minutes moving heavy stands or adjusting your entire photography lighting setup, but honestly? You don’t have the time, and neither does the client. Instead, treat your reflector like a dimmer switch. If the light is blowing out the shadows too aggressively, don’t just point it at the face; tilt it away or move it further into the periphery to subtly manage the spill.
The trick to controlling light intensity without a total overhaul is all about distance and angle. If the bounce is too bright, pull the reflector back a meter or two. If you need a more delicate touch, don’t use the silver side—that’s for when you’re desperate for punch. Stick to the white side to keep things creamy. It’s about finding that middle ground where you’re filling the shadows just enough to keep the shape of the face, without making the whole image look flat and uninteresting.
Natural Light Photography Tips for When Everything Goes Wrong
When you’re shooting on location and the sky decides to turn that flat, miserable grey, your entire photography lighting setup feels like it’s falling apart. You can’t rely on the sun to provide any shape, and suddenly every face looks like it’s been pressed into a piece of cardboard. This is where most people panic and start reaching for more flashes, but before you go full studio, try working with what’s left. Grab your silver reflector and aim it at the shadows under the eyes and jawline. You aren’t trying to recreate the sun; you’re just trying to inject a bit of life back into a face that the clouds have flattened.
If you’re stuck in a bright, high-contrast spot—think a cafe with massive windows and zero shade—don’t fight the glare. Instead of trying to overpower it, focus on controlling light intensity by using a white reflector to fill in those deep, dark pockets. It’s much more forgiving than a flash when you’re trying to keep a natural feel. If the light is too aggressive, move your subject just two feet back from the window. Sometimes the best natural light photography tips involve simply finding the edge of the light rather than standing right in the middle of the chaos.
Five ways to stop fighting the light and start using it
- Stop aiming for the eyes and start aiming for the chin. If you’re trying to bounce light directly into someone’s pupils, you’re going to end up with those tiny, distracting catchlights that look more like a laser show than a portrait. Aim the reflector slightly lower, toward the jawline; it fills the shadows under the chin and softens the neck without making them look like they’re staring into the sun.
- Watch out for the “hot spot” trap. If you’re using a silver reflector in a small room, you aren’t just adding light; you’re adding a concentrated, harsh glare that can blow out skin tones in a single frame. If the light looks too aggressive, tilt the reflector just a few degrees away from the subject—even a tiny shift can turn a harsh glare into a gentle, usable glow.
- Use your body as a buffer. If you’re working solo and the reflector is behaving like a wild animal, don’t just hold it at arm’s length. Get close to the subject, but keep the reflector between the primary light source and them. Sometimes, the best way to use a reflector isn’t to add light, but to use the matte side to subtly dampen a reflection that’s bouncing off a nearby white wall.
- Distance is your dimmer switch. Since we aren’t constantly swapping out strobes or adjusting gels mid-session, treat the distance of the reflector as your control knob. Two feet away is a punchy, high-contrast fill; four feet away is a soft, subtle lift. If the subject starts looking “washed out,” move that board back immediately.
- Mind the hands. I always ask people what they do with their hands when they’re nervous, and usually, they end up clutching something or hiding them. If they’re holding a prop or even just their own hands, use the reflector to ensure those shadows don’t turn into dark, messy blobs. A little bit of bounce light on the hands makes them look intentional rather than like an afterthought.
Stop fighting the light
A reflector isn’t a magic wand to fix a bad setup; it’s a way to negotiate with the light you’ve actually been given. If you’re standing there waiting for the sun to behave or the shadows to disappear on their own, you’ve already lost the shoot. Grab the silver disc, find the bounce, and start working with the room instead of pretending it isn’t there.
Iwona Krawczyk
Stop Fighting the Light
At the end of the day, a reflector isn’t some magical piece of gear that fixes a bad setup; it’s a tool for negotiation. You’ve learned that it’s about managing the shadows the sun leaves behind, knowing when to use a silver disc to punch through a gloomy room, and when a simple white foam board is enough to stop a subject from looking like a ghost. Whether you are bouncing light into a dark eye socket or softening a harsh midday glare, the goal is always the same: stop fighting the environment and start working with it. If you can master the distance between your modifier and your subject, you’ll find that you don’t need a five-light studio setup to get a professional result.
Don’t let the technicalities paralyze you when you’re on location and the client is staring at their watch. Most of the time, the “perfect” shot isn’t waiting for the perfect lighting conditions to arrive; it’s waiting for you to make the most of what is actually there. Grab your reflector, find the bounce, and focus on the person in front of your lens. The gear is just a way to bridge the gap between a chaotic room and a great portrait. Now, go out there and see what you can catch.
