
I remember a corporate headshot session three years ago where the client’s office was basically a glorified broom closet. I had my main light set up, but the shadows were swallowing the subject’s jawline, and I knew I needed more depth. I started eyeing my gear bag, thinking about how to add a second light without clutter, but then I looked at the floor: a single rogue power cable was already making the subject look like they were walking a tightrope. Most tutorials will tell you to just buy a bigger softbox or a more expensive wireless trigger, but they never mention that the real enemy isn’t the lack of lumens—it’s the physical chaos that comes with trying to expand a tiny footprint.
I’m not here to sell you on a new kit or a fancy studio management app. I want to talk about the actual physics of the room and the sanity of the photographer. In this entry, I’m going to show you how to introduce a second source using specific modifiers and clever positioning that keeps your workspace functional. We’re going to focus on the compromise between a beautiful catchlight and a studio that doesn’t look like a tripod graveyard.
The Room Is the Problem Not the Gear
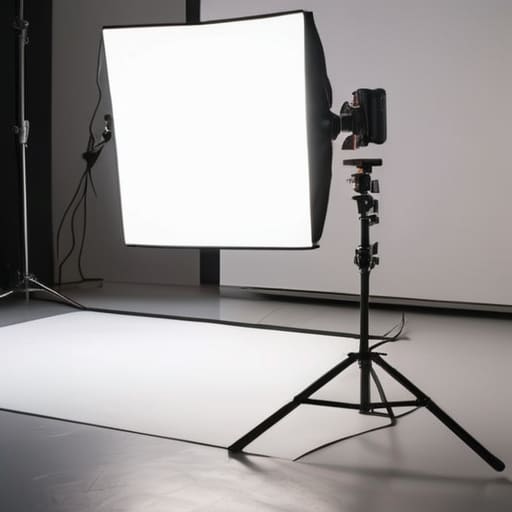
Before you even touch a power switch, look at the floor. I spent years assisting on sets where we spent forty minutes fighting a single rogue power strip because the studio layout was an afterthought. When you’re trying to implement layered lighting techniques, you aren’t just adding a light; you’re adding a new obstacle course. If your second source is a massive softbox on a heavy C-stand that forces you to shuffle your tripod every time you want to change angles, you haven’t solved a lighting problem—you’ve created a spatial one.
The goal isn’t to have a kit that looks like a NASA control room; it’s about finding hidden light sources that do the heavy lifting without demanding center stage. I’ve learned that a small, well-placed LED panel tucked behind a piece of furniture or a reflector angled just right does more for the mood than a second strobe that requires its own dedicated circuit. Stop thinking about what gear you need to buy and start looking at the gaps in the room. If the space is cramped, your best tool isn’t a bigger light, it’s a smarter placement strategy.
How to Add a Second Light Without Clutter or Chaos

The trick isn’t finding more floor space; it’s about choosing a modifier that doesn’t require its own zip code. If you’re trying to add depth to a portrait, don’t just grab a second stand and a massive softbox. You’ll end up in a wrestling match with a light meter while your subject stares at a wall of black fabric. Instead, look for minimalist lighting solutions—think a small LED panel or a narrow strip box that can be tucked just behind the subject’s shoulder. I usually aim for a hair light or a subtle rim that provides just enough separation to keep them from melting into the background, without turning the floor into a minefield of metal legs.
The real secret to staying sane is mastering layered lighting techniques rather than just stacking brightness. I prefer using a single large source for the heavy lifting and then finding a hidden light source to do the delicate work. Maybe it’s a small bounce card tucked out of frame or a tiny light pointed at a white wall to create a soft, secondary glow. This keeps the “visual noise” down. If you can’t see the gear, you aren’t fighting it, and more importantly, your client isn’t distracted by it.
Mastering Minimalist Lighting Solutions for Smaller Spaces
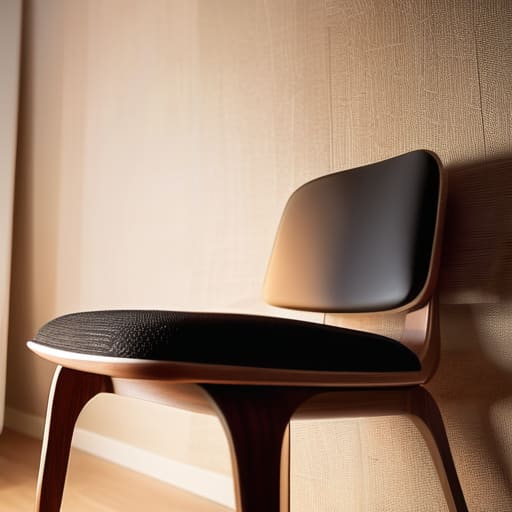
If you’re working in a spare bedroom or a cramped corner of a studio, you don’t have the luxury of a sprawling floor plan. You can’t just throw a C-stand in every corner and hope for the best. In these tight quarters, I rely on hidden light sources to build depth. Instead of a massive softbox that eats up all your walking space, I’ll tuck a small LED panel behind a chair or use a reflector to bounce light from a single source. It’s about using the architecture of the room to do the heavy lifting for you.
When space is at a premium, you have to get smart with layered lighting techniques. I rarely use a second stand if I can avoid it; instead, I’ll use a desk lamp with a diffused bulb or even a bounced light off a white wall to create a subtle rim. It keeps the floor clear so you aren’t constantly dancing around tripods just to reach your subject. The goal isn’t to fill the room with gear, but to create enough separation so the subject doesn’t look like they’re stuck to the background.
The Art of Layered Lighting Techniques and Hidden Sources
When you stop thinking about “adding a light” and start thinking about layered lighting techniques, the studio stops feeling like a hardware store and starts feeling like a workspace. Instead of dragging out a second heavy strobe and a stand that’ll inevitably wobble, look for things that are already there. I’ve learned that a well-placed practical lamp in the background can do more for depth than a second expensive softbox. It’s about using hidden light sources—a small LED panel tucked behind a chair or a desk lamp filtered through a bit of diffusion—to create a sense of space without the visual noise of a tripod graveyard.
The trick is to treat your secondary light as a way to wrap the subject, not just to blast them. If you’re using a lamp, pay attention to the aesthetic lighting placement; you want it to look like a natural part of the room, not a piece of equipment that just happened to be left on the floor. This keeps the frame clean and prevents that frantic, cluttered feeling that happens when you’re fighting both the shadows and your own gear.
Ambient vs Task Lighting Finding the Right Balance
When you start talking about ambient vs task lighting in a studio context, people usually think about living rooms. But in a portrait session, the same logic applies. Your ambient light is the “mood”—the soft, existing glow from a window or a dim ceiling fixture that sets the tone. Your task light is the workhorse, the single modifier you’ve placed exactly 45 degrees off the subject’s nose to actually see something. The mistake I see most often is trying to make the task light do everything. If you try to force one heavy strobe to act as both your key and your fill, you end up with a setup that feels flat and a room that feels like a construction site.
The trick to finding that balance is realizing that your second light doesn’t always need to be a massive softbox. Sometimes, the best way to achieve layered lighting techniques is to use a small, tucked-away LED panel to just catch a bit of rim light on a shoulder. This keeps the floor clear and prevents that feeling of being trapped in a cage of stands. You aren’t just lighting a person; you’re managing the energy of the space. Keep the heavy lifting to one solid source, and use the second one to soften the edges rather than to fight the primary light.
Aesthetic Lighting Placement and Taming the Cord Mess
Once you’ve figured out where the light needs to go, you have to deal with the inevitable snake pit of black cables snaking across the floor. If you’re working in a tight corner or a client’s living room, a stray power lead isn’t just a trip hazard; it’s a visual distraction that ruins the vibe before you’ve even clicked the shutter. I’ve learned that aesthetic lighting placement is useless if the shot is framed around a tangled mess of extensions. I usually keep a roll of gaffer tape in my bag—not for the “pro” look, but because it’s the only way to secure a lead to a floorboard without making a scene.
If you can’t hide the cable, make it part of the architecture. I like to run cords along the baseboards or tuck them behind furniture legs to maintain those minimalist lighting solutions we talked about earlier. If you’re using a small LED panel as a fill, try to position it so the power source is shielded by the subject’s own shadow or a piece of set dressing. It’s about being intentional; if a cord is visible, it should look like it belongs there, not like you just dropped a bag of gear and ran.
Five Ways to Keep the Chaos Under Control
- Stop buying more stands and start looking at your furniture. If you’re shooting a corporate headshot in a cramped office, don’t bring in a heavy C-stand if you can just tuck a small LED panel behind a stack of books or a monitor. Use what’s already in the room to hide the gear; it keeps the floor clear and the client from feeling like they’re in a construction zone.
- The “One Cable Rule” is my personal sanity saver. Before you even turn a light on, trace the cord from the power source to the lamp. If that cord is going to cross a walking path, it’s a trip hazard and a mood killer. Use gaffer tape—real gaffer, not the cheap stuff that leaves residue—to pin it flush against the baseboard. If you can’t hide the cable, make it part of the architecture.
- Switch to battery power whenever the shot allows. I know, I know, the weight is a pain and you have to manage charging cycles, but if you’re working in a client’s living room or a tight corner of a studio, being able to ditch the power cables entirely is the ultimate way to de-clutter. A single battery-powered light on a small tabletop tripod is infinitely less intimidating than a web of wires snaking across the carpet.
- Think in modifiers, not just light sources. Instead of bringing in a second massive softbox that takes up half the room, try using a small reflector or a bounce card to catch the spill from your main light. You get that secondary fill without adding another light stand, another power cable, and another thing for your subject to accidentally kick while they’re trying to figure out what to do with their hands.
- Consolidate your footprint by using multi-purpose gear. If you’re working solo, a light stand that also doubles as a perch for your phone (for a quick video check) or a stand with a built-in sandbag weight is worth its weight in gold. Every piece of equipment you bring in needs to earn its spot on the floor; if it’s only doing one thing and taking up three square feet, leave it in the car.
The Myth of the Multi-Light Setup
Adding a second light isn’t about achieving some magical cinematic depth; it’s about having enough control to stop the shadows from swallowing your subject whole, without turning your studio floor into a lethal obstacle course of black cables and heavy stands.
Iwona Krawczyk
The Reality Check
At the end of the day, adding a second light shouldn’t feel like you’re staging a construction site in the middle of a portrait session. We’ve talked about managing the physical mess of cables, choosing modifiers that don’t eat up half your floor space, and the importance of using ambient light as a partner rather than an enemy. It’s about intentionality. If you’re adding a light just because you think “more is better,” you’re probably going to end up with a cluttered room and a flat, lifeless image. Keep your footprint small, your cables tucked away, and your setup focused on what the subject actually needs to look human.
If you find yourself staring at a tangle of black cords and feeling like you’ve lost control of the room, take a breath and step back from the viewfinder. The gear is just there to serve the person standing in front of you. Don’t let the pursuit of the “perfect” multi-light setup get in the way of the connection you’re trying to build with your subject. Sometimes, the most professional thing you can do is simplify everything until the only thing left in the frame is the light and the person. Now, go tidy up your workspace—you can’t create anything good if you’re constantly tripping over your own ambition.
