
I once spent forty minutes in a cramped studio in East London, sweating through my linen shirt while trying to figure out why my lighting looked like a cheap wedding snapshot instead of the high-end editorial my client had paid for. I had the most expensive modifiers money could buy, but I was still staring at a flat, lifeless face that refused to pop. It turns out, people love to sell you the idea that a piece of metal and mesh is a magic wand, but if you don’t actually understand how to use a beauty dish in a room with terrible ceilings and a subject who is currently wondering what they should do with their hands, you’re just expensive clutter.
I’m not here to give you a lecture on the physics of light or a gear list that will bankrupt you. Instead, I want to talk about the actual mechanics of the thing: the distance from the nose, the angle of the stand, and the inevitable compromise you have to make when the shadows get too aggressive. This is my notebook on the practical reality of the tool—the stuff they skip in the tutorials—so you can stop fighting your gear and start controlling the light.
Understanding How to Use a Beauty Dish
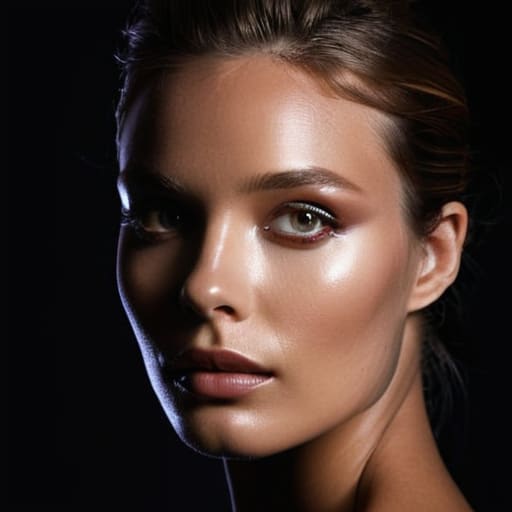
Think of a beauty dish as the middle ground between a harsh, naked flash and a massive, forgiving softbox. If you’re comparing beauty dish vs softbox setups, the main difference is the way the light wraps—or doesn’t wrap—around the face. Because the light is more directional, it creates a much more intentional light falloff in portraiture, meaning the background drops into shadow much faster than it would with a large octabox. This is exactly what you want when you’re trying to sculpt a face rather than just flooding a room with white light.
When I’m setting one up, I’m usually looking for those crisp specular highlights in photography—that little glint in the eye or the sheen on a cheekbone that makes a person look three-dimensional. But be careful; if you place it too close or too direct, you’ll end up with shadows under the nose and chin that look more like a crime scene than a professional headshot. You have to find that sweet spot where the light feels punchy but doesn’t make the subject feel like they’re under interrogation.
Key Things to Know
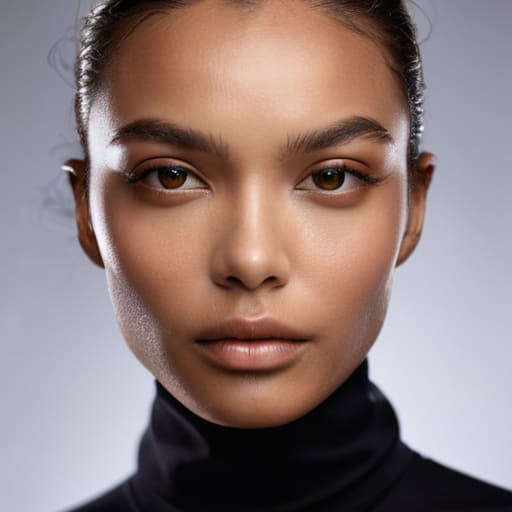
First, let’s talk about the physics of it. Unlike a softbox, which wraps light around a face like a warm blanket, a beauty dish is much more aggressive. It produces a punchier, more directional light that creates those sharp, defined specular highlights you see in high-end editorial work. If you’re looking for that soft, “everything is perfect” glow, you’re probably in the wrong place. But if you want to add some bone structure to a subject who feels a bit “flat” under your standard studio lighting, this is your tool.
The real trick is managing the falloff. Because the light is more concentrated, the transition from light to shadow happens much faster. This means you have to be incredibly intentional about your distance; move it too far back and you lose the drama, move it too close and you’ll blow out the highlights on their forehead before they even have a chance to settle their nerves. It’s a constant negotiation between the intensity of the beam and the depth of the shadows you’re trying to carve out.
Practical Tips and Steps
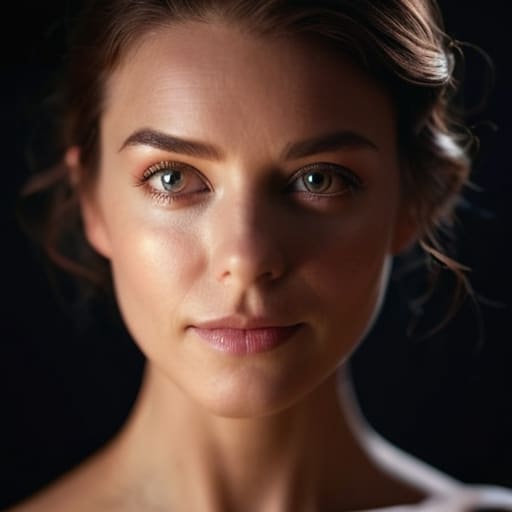
Start by positioning your subject about 1.5 to 2 meters away from the modifier. If you crowd them, you lose that beautiful, controlled wrap, and you’ll end up with harsh, unflattering shadows that feel more like an interrogation than a portrait. When I’m setting up studio lighting for portraits, I always check the catchlights in their eyes first. If the light feels too aggressive, don’t reach for a different light; just tilt the dish slightly more towards the camera or add a small piece of diffusion paper inside. It’s a tiny compromise that saves the whole look.
Watch your distance to manage the light falloff in portraiture. If you want that moody, high-contrast vibe, keep the dish closer and the power lower. If the subject starts complaining about the light feeling “too sharp,” move the stand back. You aren’t just aiming for brightness; you are managing the way light rolls off the cheekbones. It’s a constant game of inches, and honestly, the distance matters more than the setting on your strobe.
Common Mistakes to Avoid
The biggest mistake I see is treating a beauty dish like a softbox and expecting the same forgiving results. If you’re used to the wrap-around glow of a large octabox, the beauty dish is going to feel aggressive, almost punishing, at first. People often place it too close to the subject’s face without realizing they are creating harsh, unforgiving specular highlights that make skin look textured rather than luminous. You can’t just “set it and forget it”; you have to manage the falloff.
Another trap is ignoring the room entirely. I’ve been in studios where the walls are white and the ceiling is low, and suddenly your “dramatic” setup looks like a washed-out mess because the light is bouncing everywhere. When you’re aiming for high contrast studio lighting, you have to be intentional about where that light goes. If you don’t control the spill, you aren’t using a modifier for dramatic lighting—you’re just making a mess of the shadows. Don’t let the environment undo your technical setup.
Final Thoughts
At the end of the day, don’t get precious about the gear. A beauty dish isn’t a magic wand that fixes a bad setup; it’s just a tool that demands you actually understand your environment. If you find yourself staring at a flat image, stop looking at your camera settings and start looking at the distance between that modifier and your subject. The difference between a professional look and a messy one often comes down to how you manage the light falloff in portraiture—if you’re too far away, you lose that intentional, sculpted feel that makes this tool worth the extra weight in your kit.
I’ve spent enough years assisting to know that most people default to a softbox because it’s “safe,” but if you want to move away from that generic, washed-out look, you have to embrace the bite. Choosing a beauty dish over a standard softbox is a deliberate choice to embrace high contrast studio lighting. It’s about being okay with the shadows. It’s about controlling those specular highlights so they look intentional rather than accidental. Master the physics of the room, and the gear will finally start behaving.
Five ways to stop fighting your beauty dish
- Watch your distance like a hawk. If you move the dish even eighteen inches closer to your subject, the light wraps differently; it goes from a flattering, soft glow to a harsh, specular punch that highlights every pore and bit of dry skin. Don’t just set it and forget it.
- Don’t ignore the center diffuser. If you’re shooting a corporate headshot and the light feels too aggressive, pop that small white fabric disc into the middle of the dish. It kills that “fashion editorial” edge and makes the subject look like a human being instead of a high-contrast sculpture.
- Mind the catchlights. I’ve seen too many people obsess over the light quality while ignoring the eyes. If your beauty dish is positioned too high or too far to the side, you lose that spark in the pupil, and suddenly your subject looks vacant or, worse, like they’re staring into a void.
- Check your shadows against the background. A beauty dish is directional by nature, which means it’s going to throw a shadow behind your subject. If you’re working in a cramped studio, that shadow might hit a messy corner or a distracting piece of gear. Adjust your angle or move the subject three feet forward before you even turn the strobe on.
- Use it to fix a “flat” face, not to hide one. If a client is telling you they “photograph badly,” they usually mean they feel washed out. A beauty dish adds just enough dimension to define a jawline without the heavy-handedness of a snoot, but it won’t work if you’re trying to use it to mask a lack of direction.
The Truth About the Beauty Dish
Stop expecting the beauty dish to do the heavy lifting for you; it’s not a magic wand, it’s a modifier. If you don’t respect the distance between the light and the face, or if you ignore how the ceiling is bouncing that harshness back into the shadows, you aren’t making a portrait—you’re just making a mess.
Iwona Krawczyk
The Reality Check
At the end of the day, a beauty dish isn’t a magic wand that fixes a bad setup; it’s a tool for control. You’ve learned that the difference between a polished portrait and something that looks amateurish isn’t the brand of the light, but how you manage that specular highlight and where you place the modifier in relation to the subject’s eyes. Remember that distance is your most effective dimmer switch. If the shadows are getting too aggressive or the texture on a client’s skin is becoming something they’ll hate in the proofs, move the dish back or add a diffusion sock. It’s about managing the falloff, not just turning on a light and hoping for the best.
Don’t get too precious about the gear, though. You can have the most expensive beauty dish in the studio, but if you haven’t checked the room’s reflections or calmed the person sitting in the chair, you’re just wasting time. The best shots I’ve ever taken didn’t come from a perfect technical setup, but from the moment I stopped fiddling with the stand and actually looked at the person in front of me. Use the dish to shape the light, but use your eyes to shape the portrait. That’s the part they don’t teach you in the manuals, and it’s the only part that actually matters when the shutter clicks.
