
I once spent four hours in a cramped, overheated studio trying to shoot a series of vintage perfume bottles, convinced that if I just bought one more expensive polarizing filter or a larger softbox, the reflections would finally behave. I was wrong. I was treating the glass like an enemy to be conquered with gear, when I should have been treating it like a mirror that needed a better view. Most tutorials will tell you that knowing how to light glass is about mastering complex physics or high-end equipment, but that’s a lie. In reality, it’s about managing the chaos of the room and realizing that your light source is only as good as the surface it’s bouncing off of.
I’m not here to sell you on a new piece of kit or a theoretical lecture on refraction. I want to talk about the actual, messy process of positioning a single flag, moving a black foam board three inches to the left, and knowing when to just give up on a specific angle and try something else entirely. This is my notebook on the practical, unglamorous side of the work—the specific distances, the necessary compromises, and the real-world ways to handle reflections without losing your mind.
The Glass Refuses to Cooperate Why Everything Goes Wrong
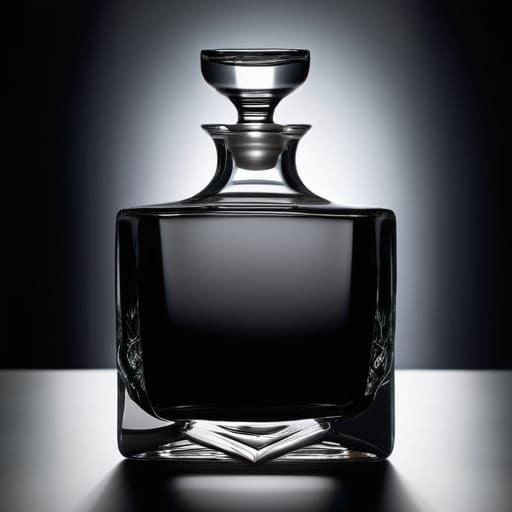
The reason you’re struggling isn’t usually because you lack a better strobe; it’s because glass is a liar. It takes the light you’re trying to use to define its shape and turns it into a chaotic mess of white streaks and blown-out highlights. You think you’re controlling the scene, but you’re actually just fighting a losing battle against refraction and reflection in glass. One minute you have a beautiful rim light, and the next, a stray reflection of your own white t-shirt is screaming from the center of the bottle.
It’s rarely a technical failure of the gear. It’s usually a failure of spatial awareness. You haven’t accounted for the way a single softbox, positioned just two inches too far to the left, can turn a high-end whiskey decanter into a glowing, featureless blob. Most people approach studio lighting for glassware by thinking about where they want the light to hit, but with glass, you have to spend twice as much time thinking about where you don’t want it to show up. You aren’t just lighting an object; you are managing a series of tiny, accidental mirrors.
Managing the Chaos of Refraction and Reflection in Glass
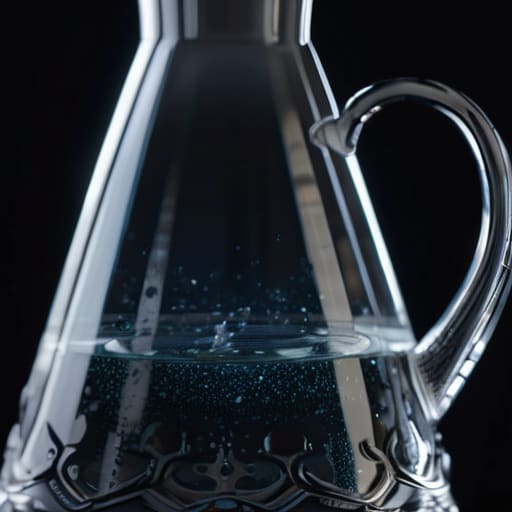
Once you accept that the glass is going to fight you, you can stop fighting back and start negotiating. The first thing I do is stop trying to “light” the object and start lighting the space around it. If you point a strobe directly at a carafe, you aren’t getting a photo of a beautiful vessel; you’re getting a white, blown-out blob of light. To manage the chaos of refraction and reflection in glass, you have to treat the light like a liquid. I usually lean on large, soft modifiers—a big octa or even a white foam core board—placed just out of frame to create those long, elegant vertical strips that define the shape without creating a blinding hot spot.
If the object is thick or has a complex curve, you’ll run into the nightmare of refraction, where the light bends and makes the contents look distorted or muddy. This is where backlighting glass objects for photography becomes your best friend. By placing a strip box behind the glass, slightly offset to the side, you can force the light through the material. This defines the edges and makes the liquid inside glow, rather than just letting the light bounce off the surface and die. It’s about controlling the path of the light before it ever touches the surface.
How to Light Glass Without Losing Your Mind
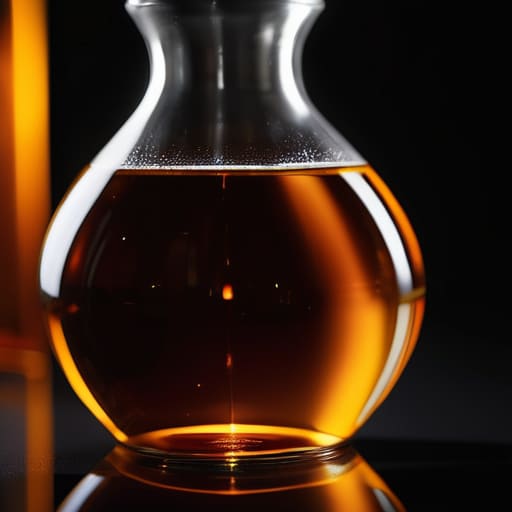
First, stop trying to point your main light directly at the object. That is the fastest way to turn a beautiful carafe into a white, blown-out mess of glare. Instead, think about the environment you are creating around the glass. I usually find that backlighting glass objects for photography is the most reliable way to define their shape without fighting a losing battle against front-on reflections. If you place your light source behind the subject—ideally diffused through a large silk or a white foam core board—you allow the light to wrap around the edges, defining the silhouette and making the liquid inside glow.
Once you have that shape, you have to deal with the details. To really make the piece look premium, you need to manage the refraction and reflection in glass by adding small, controlled highlights. I don’t use big softboxes for this; I use small, hard reflectors or even a piece of white card held just out of frame. This helps in minimizing glare on glass surfaces while simultaneously carving out the textures and curves that make the object look three-dimensional rather than like a flat, transparent ghost.
Mastering Studio Lighting for Glassware and Difficult Subjects
When you finally stop fighting the chaos and settle into the studio, you have to stop thinking about “lighting the object” and start thinking about shaping the light that hits it. If you’re working with a heavy crystal decanter or a simple wine glass, don’t just point a strobe at it. I usually grab a medium strip box and place it about three feet behind the subject, slightly off-center. This kind of backlighting glass objects for photography creates those sharp, clean edges that define the silhouette. Without that rim of light, your glass just turns into a muddy, grey blob that disappears into the background.
The real trick to mastering studio lighting for glassware is controlling the “hot spots.” If you see a massive, blown-out white patch on the side of a glass vase, you’ve gone too far. I prefer using a large piece of white foam core or a reflector just out of frame to bounce a softer, secondary light back into the shadows. It’s all about managing the transition between the bright highlights and the dark core. You aren’t just trying to make it visible; you’re trying to map out the physical shape through light.
Backlighting Glass Objects for Photography Chasing the Glow
If you want that ethereal, luminous look where the object seems to hold its own light, you have to stop fighting the shadows and start leaning into the backlight. When I’m working with glassware, I rarely place the light directly behind the object unless I’m prepared for a total blowout. Instead, I aim for a slight offset—maybe about 15 degrees to the left or right—to catch the edges. This is where you really start lighting glass textures and shapes rather than just illuminating a silhouette. It’s the difference between a shot that looks like a dark shape in a room and a shot that feels like it’s vibrating with energy.
The trick to successful backlighting glass objects for photography is managing the spill. If your light is too raw, you’ll lose all the internal detail of the glass to a white smear. I usually throw a small piece of diffusion—a scrim or even a piece of tracing paper—between the light and the object. It softens the transition and helps you control the way light travels through the liquid or the crystal, turning harsh glares into a controlled, golden glow that actually feels intentional.
Minimizing Glare on Glass Surfaces and Controlling Light
If you’re standing there staring at a massive, white hot spot on a wine glass that looks more like a sunburst than a highlight, stop. Don’t reach for your exposure compensation; reach for your flags. Most of the time, you aren’t fighting the glass itself, but the sheer amount of light bouncing off the walls of your studio back into the subject. I’ve spent more afternoons than I care to admit using black foam core to create “negative fill” just to kill a stray reflection that was ruining the silhouette. Minimizing glare on glass surfaces isn’t about adding more light; it’s almost always about subtracting it.
When you’re working with complex shapes, you have to stop thinking about the light source as a single unit and start thinking about it as a series of controlled surfaces. If you’re using a large softbox, you might find that the light is too “greedy,” wrapping around the edges and washing out the shape. Try pulling your modifier further away or using a strip box to create a more disciplined line of light. When you focus on lighting glass textures and shapes with precision, you realize that the most important part of the setup is often the shadow you’ve managed to tuck away in the corner.
Five Things I’ve Learned While Fighting with Glass
- Stop trying to light the object and start lighting the space around it. Glass is basically a mirror that’s been tricked into being transparent; if you point a light directly at it, you’re just going to get a white, blown-out mess. Instead, aim your modifier at a white foam board or a wall just out of frame. You want to create a soft, controlled shape that the glass can “catch” rather than hitting it head-on.
- Black flags are your best friend when the reflections get too loud. If you’ve got a beautiful rim light but there’s a distracting white glare cutting right through the middle of your subject, don’t move the light—move a piece of black cardboard. Sliding a black flag into the line of sight between your light and the glass can kill that specific reflection while leaving the rest of the glow intact.
- Watch your distance, especially with small glassware. I’ve learned the hard way that moving a single light just six inches closer or further away can be the difference between a crisp, elegant highlight and a massive, ugly blob of light that ruins the silhouette. If the reflection looks too aggressive, back the light up and increase the power; don’t just settle for the first shape you see.
- Don’t ignore the “floor” of your setup. When you’re shooting something like a cocktail glass or a perfume bottle, the surface it’s sitting on is just as much a reflective element as the glass itself. If you’re using a dark table, you’ll get moody, deep reflections; if you’re using glass or acrylic, you’re doubling your headache. I usually opt for a matte surface unless I’m specifically trying to create a complex, layered look.
- Use a polarizing filter, but don’t expect it to be a magic wand. It’s great for cutting down on that annoying, surface-level glare that makes glass look cheap, but it won’t fix a poorly placed light. Use it to fine-tune the transparency, not to bail you out of a bad lighting setup. If you find yourself cranking the polarizer to the max just to see the subject, your light placement is fundamentally broken.
## The Lie of the Perfect Setup
You can spend three hours obsessing over your light meter and your power settings, but the moment you put a piece of glass in the frame, the physics of the room takes over. You aren’t just lighting an object anymore; you’re negotiating with every window, every white wall, and every stray bit of light in the studio. Stop trying to control the glass and start learning how to manage the mess it creates.
Iwona Krawczyk
The Messy Reality of the Final Frame
At the end of the day, lighting glass isn’t about finding a magical setting on your strobe; it’s about a constant, frustrating negotiation with physics. You’ve spent the last hour moving a scrim three inches to the left, fighting a reflection that looks like a ghost in the corner of the frame, and praying that the client doesn’t decide they want the glass to look “more expensive” halfway through the session. We’ve talked about managing refraction, controlling your highlights, and why backlighting is often your only lifeline when a subject is being particularly stubborn. Just remember that the light doesn’t live in the glass; it lives in how you manage the space around it. If you can control the room and the angles, you can eventually tame the chaos.
When you finally stop tweaking the modifiers and you actually look at the back of the camera, don’t be surprised if the shot isn’t perfect. Glass is temperamental, and sometimes the most beautiful images come from the moment you stopped trying to fight the reflections and started working with the way the light actually wanted to behave. There is a specific kind of magic in that accidental, soft glow that happens when you finally stop overthinking. So, pack up your gear, go home, and maybe don’t try to develop any film in your kitchen tonight—you’ve earned a break from the technical headache.
