
I spent my first three years assisting for people who would spend twenty minutes lecturing you on the physics of light refraction before even touching a modifier. They’ll tell you that you need a specialized polarizing filter or a brand-new, ultra-expensive lens to solve the problem, but let’s be honest: that’s nonsense. Most of the time, when you’re struggling with how to photograph someone wearing glasses, the issue isn’t your gear; it’s that you’re fighting a losing battle against a poorly placed softbox or a client who is tilting their chin down in a way that turns their lenses into two miniature mirrors.
I’m not here to sell you a masterclass or a piece of glass you don’t need. This is about the unsexy reality of the studio—the stuff that happens when the light hits the frames at exactly the wrong angle and your subject starts to lose confidence. I’m going to walk you through the actual compromises I make, from the specific distance I keep my key light to the way I coach a person to shift their posture without making them feel self-conscious. We’re going to focus on practical adjustments that actually work when you’re staring at a screen full of white glare.
The Subject and Their Frames How to Photograph Someone Wearing Glasses
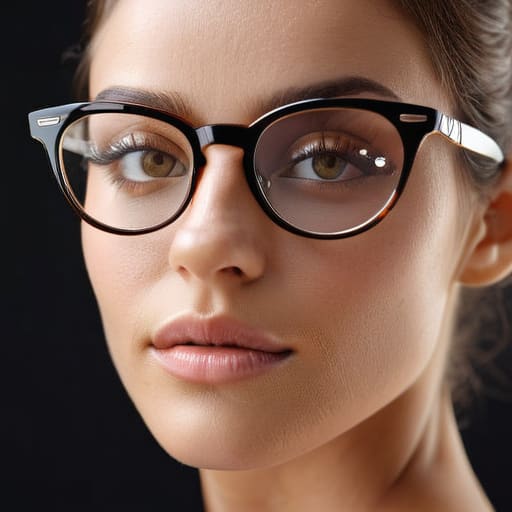
The moment I see a subject reach for their glasses, I already know I’m entering a negotiation. It’s rarely about the tech; it’s about the person in front of me deciding that their frames are a barrier to looking “normal.” Most of the time, they’ll start tilting their chin down to hide the reflections, which just makes them look like they’re staring at their own shoes. You have to stop that immediately. I tell them, “Keep your head level; we’ll fix the light, not your posture.”
When it comes to actual managing reflections on eyeglass lenses, my first instinct isn’t to move the light, but to move the person. If you’re using a single large softbox, don’t just blast them from the front. I usually move my light source higher and slightly to the side—maybe 45 degrees off-axis—to kick those reflections out of the frame. If the glare is still fighting you, a slight adjustment to the camera angle for glasses wearers can be the difference between a clean shot and a white-out. Sometimes, you just have to ask them to tilt their head a fraction of a millimeter until the light hits the glass just right.
When the Room Betrays You Managing Reflections on Eyeglass Lenses
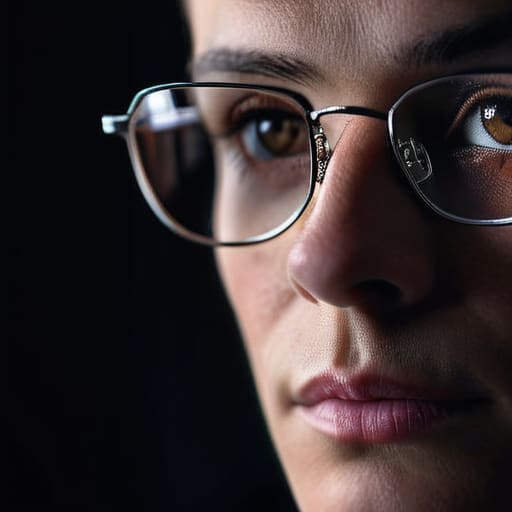
Sometimes the issue isn’t the person or their attitude; it’s the architecture of the room itself. You can have the most expensive kit in the world, but if you’re shooting in a studio with floor-to-ceiling windows or a white wall directly opposite your main light, you’re fighting a losing battle. I’ve spent many afternoons staring at a monitor, realizing that the “uncontrollable” glare is actually just a window reflecting perfectly into the subject’s lenses. When you’re managing reflections on eyeglass lenses, you have to stop thinking about the subject and start thinking about the geometry of the light.
If you find yourself trapped in a room with bad light, stop trying to overpower it. Instead of moving the subject, move your modifiers. I usually find that a slight adjustment to the camera angle for glasses wearers—just a few degrees of tilt or a slight shift in my own position—is enough to bounce that reflection off the lens and into the void. If you are using a large softbox, try moving it higher and further to the side. You want softbox lighting for spectacles that wraps around the face without hitting the glass at a direct 90-degree angle. It’s a game of inches and angles, not gear.
Mastering Softbox Lighting for Spectacles Without Killing the Mood
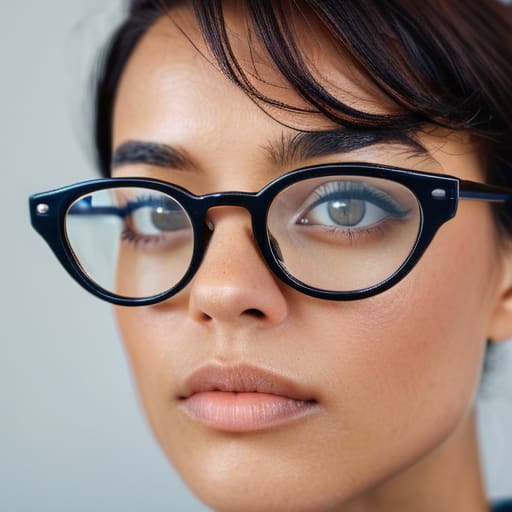
If you’re standing there with a massive, unmodified beauty dish thinking you’re going to get that high-fashion pop, stop. You’re just inviting a white rectangle to sit right in the middle of your subject’s pupils. When I’m dealing with heavy frames, I lean heavily on softbox lighting for spectacles that is placed slightly higher and further to the side than your standard “safe” setup. I usually aim for a large octabox, about 45 degrees off-axis, positioned high enough that the light catches the brow rather than the lens. It’s a compromise; you lose a bit of that perfect, symmetrical catchlight, but you gain an image where you can actually see the person’s eyes.
The trick is to realize that light is a physical thing that bounces off glass like water off a windshield. If you see a reflection blooming, don’t just tilt the camera—that often just moves the glare to the other eye. Instead, try widening the modifier or moving it further away to decrease the intensity of the reflection. It’s about finding that sweet spot where the light is soft enough to wrap around the face but angled enough to avoid eliminating lens glare in portraits by sheer luck. You have to dance with the light, not try to bully it.
The Battle Against Glare Eliminating Lens Glare in Portraits
If you’ve spent any time in a studio, you know that moment of dread when you look at your monitor and see two white rectangles sitting right where the subject’s eyes should be. It’s frustrating, but stop looking at your expensive glass for a solution. The problem isn’t your lens; it’s the geometry of the room. Most of the time, eliminating lens glare in portraits is just a matter of a subtle, almost imperceptible shift in the camera angle for glasses wearers. I usually start by dropping my tripod by just two or three centimeters or tilting the camera slightly upward. It feels like you’re breaking the rules of a standard eye-level portrait, but a slight tilt can move that reflection from the pupil to the edge of the frame where it’s invisible.
Sometimes, though, the angle isn’t enough because the light source is too aggressive. If you’re using a large modifier, you might need to physically move it. I’ve learned that even a slight rotation of the softbox—moving it from a direct 45-degree angle to something a bit more oblique—can make all the difference. It’s about finding that sweet spot where the light hits the cheekbones but misses the lenses entirely. It’s a game of inches and patience, not gear.
Finding the Right Camera Angle for Glasses Wearers in Chaos
When everything else fails—when the light is bouncing off the walls and your softbox feels like a spotlight in a mirror factory—you have to stop fighting the gear and start moving your body. I’ve spent many afternoons in cramped studios where the only way to save a shot is to physically descend to the floor. Finding the right camera angle for glasses wearers often means abandoning the “eye-level” rule you learned in school. If you’re seeing those white rectangles of death in the lenses, try dropping your tripod by six inches or tilting the camera upward slightly. It sounds simple, but it’s often the only way to shift the reflection out of the line of sight without making the subject feel like they’re being interrogated.
Sometimes, the fix isn’t a better light, but a slight tilt of the chin. I usually ask my subject to tuck their chin just a fraction of a millimeter or tilt their head toward the light source. It’s a tiny, almost imperceptible adjustment, but it’s often more effective than any complex eyewear photography techniques involving flags or scrims. You aren’t just capturing a face; you’re negotiating with physics.
Beyond Technicality Essential Eyewear Photography Techniques for Real Life
At some point, you have to stop treating the glasses like a technical error to be solved and start treating them like part of the person. I’ve spent too many minutes fighting with a light stand only to realize the subject’s personality is being swallowed by the very frames I was trying to “fix.” Sometimes, the best eyewear photography techniques involve leaning into the reflection rather than chasing it away. If the light is hitting the lenses in a way that feels intentional—maybe a subtle catchlight that adds depth without obscuring the eyes—then leave it. A portrait that is technically perfect but feels sterile is a failure in my book.
The real work happens in the micro-adjustments. It’s about the three-centimeter tilt of the chin or the way you nudge a client to look slightly past the lens instead of directly into it. You aren’t just managing reflections on eyeglass lenses; you are managing the subject’s confidence. If they feel like they are constantly being “corrected,” they’ll stiffen up, and then you’ve lost the shot entirely. Keep the conversation moving, watch their hands, and remember that the goal is the person, not the hardware they happen to be wearing.
Five things I wish I’d known before my first eyewear commission
- Watch the tilt. If you’re fighting a massive white rectangle in their left lens, don’t just move your light; ask the subject to tilt their chin down just a fraction of a centimeter. It’s a tiny, uncomfortable compromise for them, but it’s faster than rebuilding your entire lighting setup.
- Check the frames before you click. I’ve spent way too much time on a shoot only to realize the client’s glasses were sliding down their nose, making them look like they were peering over a fence. Have them push them up, or better yet, if you’re doing a long session, bring a tiny microfiber cloth to clean the lenses between setups.
- Mind the nose pads. If you’re shooting a close-up headshot, those little plastic pads can leave red indentations on the bridge of the nose. If the client is sensitive about that, tell them to take a five-minute break away from the glasses before the final shots so the skin can settle.
- Beware of the “double reflection.” You might kill the glare from your main softbox, but then you’ll see a tiny, distracting reflection of a window or a stray LED from a laptop in the corner of the lens. Always do a quick “lens check” from the subject’s perspective before you commit to a series.
- Don’t fight the personality. Some people feel “hidden” behind their glasses and will try to take them off halfway through. If they look more like themselves without them, let them. My job is to capture the person, not just a technically perfect image of a piece of acetate.
## The Real Battle
You can spend an hour obsessing over your aperture or your light meter, but if you haven’t accounted for the way a client’s frames catch a stray window reflection, you’re just wasting time; the gear is rarely the issue, it’s the physics of the room and the stubbornness of the glass.
Iwona Krawczyk
The Final Frame
At the end of the day, managing glasses isn’t about finding some magic setting on your strobe or praying for better glass. It’s about the constant, small adjustments: nudging the softbox three inches to the left, asking the subject to tilt their chin down just a fraction, or realizing that your “perfect” lighting setup is actually just creating a white rectangle in their pupils. You have to manage the room, the light, and most importantly, the subject’s confidence. If they feel like their frames are a barrier to a good photo, they’ll stop cooperating, and that is when the shoot actually fails. Remember, the goal isn’t to hide the glasses; it’s to integrate them into the portrait so they look like a part of the person, not an obstacle in your way.
Don’t let a bit of glare or a stubborn pair of thick frames make you lose your temper or your rhythm. Most of the time, the solution is much simpler than the technical manuals suggest—it’s usually just a matter of changing your perspective or being willing to move your entire kit ten feet to the side. Photography is often just a series of small, practical compromises made in the heat of the moment. Once you stop fighting the eyewear and start working with the reality of the person sitting in front of you, you’ll find that the best portraits aren’t the ones that are technically perfect, but the ones that feel honest and unforced.
