
I once spent three hours in a window-lit studio, sweating through my shirt while trying to nail a corporate headshot, only to realize my histogram looked like a cliff edge. I had all the right gear—a high-end mirrorless body and a massive softbox—but I was still staring at a forehead that looked like a glowing white hole in the middle of a perfectly good portrait. It’s the great lie of photography school: they tell you that if you buy a better sensor, you’ll magically learn how to expose for highlights without breaking a sweat. But a sensor isn’t a magic wand; it’s just a bucket, and if you pour too much light in too fast, you’re left with nothing to recover in post-production except regret.
I’m not here to give you a lecture on the physics of light or tell you to buy a new histogram-reading gadget. Instead, I want to talk about the messy, real-world compromise of managing light when the room refuses to cooperate. I’m going to show you how I actually handle it when the sun decides to move or a client’s white shirt is fighting the lens. This is about the practical, slightly unglamorous math of keeping your highlights intact so you can actually get on with your life.
The Light Is Not the Enemy the Room Is
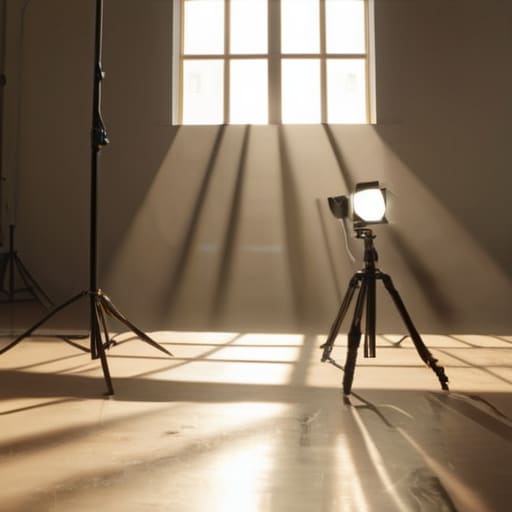
I’ve spent more hours than I care to admit staring at a ceiling, trying to figure out why a setup that looked perfect on my monitor looks like a disaster in reality. It’s rarely the sensor; it’s the white walls reflecting a bounce of light you didn’t account for, or that massive window that turns your controlled environment into a chaotic mess of shifting shadows. You can dial in your settings all day, but if the room is a giant, uncontrolled reflector, you’re fighting a losing battle.
I remember a shoot for a high-end hair salon where the lighting was a nightmare. They wanted to showcase the subtle shifts in a client’s recent toning after highlights, but the clinical, bright white tiles of the studio were bouncing light into every corner. It wasn’t a technical failure of my camera; it was a battle against the architecture. I had to move my single softbox three feet closer and use a black flag to kill the spill. You have to read the room before you even touch the shutter button, or you’ll spend the whole session chasing shadows that shouldn’t be there.
How to Expose for Highlights Without Losing the Soul

If you’re chasing a perfect exposure, you’re probably looking at your histogram like it’s a life support monitor. But here’s the thing: if you try to save every single detail in the brightest part of the frame, you end up with a flat, lifeless image that lacks any real punch. I’ve learned that sometimes, you have to let the highlights dance on the edge of clipping to keep the texture and mood intact. It’s about finding that sweet spot where the light feels intentional rather than accidental.
I often see this struggle when shooting clients with very light hair—think someone who has just finished a rigorous hair bleaching process and has that bright, almost ethereal glow. If you overexpose to catch the fine strands, you lose the shape of the face; if you underexpose, they just look like a white blob. You have to manage the fall-off. I usually dial my exposure down by half a stop, prioritize the skin tones, and accept that a bit of specular highlight loss is a fair trade for a portrait that actually feels human.
Managing the Chaos of Hair Porosity and Color Absorption

Then there is the subject’s hair. If you’re shooting someone with fresh, high-contrast blonde, you aren’t just fighting the light; you’re fighting physics. This is where hair porosity and color absorption become your invisible variables. When a client comes in with hair that has been through a heavy bleaching process, the cuticle is often wide open and thirsty. This creates a texture that catches light in ways that can feel chaotic. Instead of a smooth, continuous highlight, you get these micro-reflections that can make the hair look “fried” or overly white in your RAW files if your exposure is even a fraction too high.
I’ve learned that you can’t just treat a head of hair like a flat surface. If the hair is highly porous, it tends to scatter light rather than reflect it cleanly. I usually compensate by backing my key light off about two feet and swapping my beauty dish for a larger, softer octabox to dampen those harsh specular highlights. If you try to chase the brightness of the blonde, you’ll end up with a halo of blown-out white that looks more like a mistake than a style choice.
Toning After Highlights Salvaging What the Light Left Behind
Sometimes, you’ve done everything right. You’ve managed the exposure, you’ve controlled the bounce, and you’ve caught that perfect expression—but the hair looks like a blown-out white halo because of how much light it’s reflecting. This is where the technical side of photography meets the messy reality of my subjects’ actual lives. If I’m shooting someone who has recently undergone a heavy hair bleaching process, that hair isn’t just a surface; it’s a high-reflectance zone that can swallow your dynamic range whole.
When you’re dealing with that level of brightness, you can’t just “fix it in post” without making the skin look muddy. I’ve learned that the best way to handle this is to treat the hair as a separate texture entirely. I often find myself looking at the client’s hair color maintenance tips—not because I care about their shampoo, but because knowing if they’ve just had a professional service or a DIY disaster tells me exactly how much light that hair is going to bounce back at my lens. If it’s high-porosity, it’s going to behave like a mirror. You have to compensate by pulling the exposure down just enough to keep the strands from turning into a featureless white blob.
Preventing Hair Damage From Lightener When Everything Goes Wrong
When you’re shooting a portrait and the client shows up with fresh, high-contrast blonde, your technical struggle with exposure suddenly meets a physical reality: the hair might be structurally compromised. I’ve sat in studios where a subject’s hair looks like spun gold under a softbox, only to realize the texture is actually a result of a botched hair bleaching process. If the light is hitting hair that has been over-processed, it doesn’t just reflect light; it scatters it in a way that makes the hair look frizzy or “blown out” even if your settings are perfect.
If you’re working with a client who has opted for salon vs at home highlights, you need to be ready for the difference in how that hair reacts to your strobes. Home kits often leave the cuticle wide open, meaning the hair is incredibly thirsty and prone to looking dull or uneven under harsh light. To manage this, I always suggest a bit of pre-shoot consultation regarding their hair color maintenance tips. If they’ve just had a heavy chemical session, I tend to move my key light a few inches further back and swap my beauty dish for a larger, more diffused octa to avoid catching every single microscopic crack in the hair shaft.
Salon vs at Home Highlights the Cost of Unpredictable Light
When I’m shooting a client in a professional studio, I can control the Kelvin temperature and the exact angle of my softbox. But when I’m sent to a client’s house for a lifestyle session, the lighting becomes a moving target. This is where the debate of salon vs at home highlights gets messy, not just for the stylist, but for the person behind the lens. In a salon, you have calibrated, consistent overheads. At home, you’re fighting the glare of a cheap LED bulb or the harsh, directional afternoon sun slicing through a kitchen window.
If a client has recently attempted a DIY job, the lighting situation becomes a nightmare for my sensor. Because they haven’t managed the hair porosity and color absorption correctly, the hair often has uneven patches of high-shine or extreme matte textures. These inconsistencies catch light in ways that make it nearly impossible to balance the exposure. You’ll find yourself chasing a highlight on one strand of hair while the rest of the head falls into a muddy shadow, making the whole image feel disjointed and amateurish.
Five Ways to Stop Chasing the Light and Start Controlling It
- Stop trusting your eyes and start trusting the histogram. Your eyes will lie to you in a dimly lit studio, especially when you’re tired and the client is staring at you expectantly. If that little graph is hugging the right wall, your highlights are dead. It doesn’t matter how “good” the skin looks to you; if the data isn’t there, you can’t fix it in post.
- Use a bounce card to catch the spill. When you’re working with a single light source and the highlights are getting too aggressive on the forehead or cheekbones, don’t just turn the power down and lose your shadow detail. Throw a white foam board or a silver reflector into the mix to fill the gaps, but keep it far enough away so you aren’t just creating a second, even more uncontrollable light source.
- Underexpose by a stop and pray—then adjust. My rule of thumb for tricky skin tones is to intentionally underexpose by about a third or a full stop. It is much, much easier to pull detail out of a shadow in Lightroom than it is to try and resurrect a highlight that has turned into a flat, white void. You can’t “un-blow” a pixel.
- Watch the forehead, not the eyes. Everyone tells you to focus on the catchlights in the eyes, but if you expose for the eyes and the subject has even a hint of oil on their skin, the forehead is going to blow out. Aim for the mid-tones of the face; if the forehead gets a bit bright, you can massage it back down, but if the skin texture disappears, the portrait is gone.
- Check your light meter’s “gotchas” with a grey card. Don’t just point the meter at the subject’s cheek and hope for the best. Put a small grey card in the light path, get your reading, and then move the card out of the way. It takes ten seconds, but it prevents that moment of panic ten minutes into a shoot when you realize every single frame is overexposed.
The Trap of the Perfect Histogram
You can stare at your histogram until your eyes bleed, but if you’re chasing a perfect line while ignoring the way the light is actually hitting your subject’s forehead, you aren’t taking a portrait—you’re just managing data. I’ve learned that it’s better to lose a little shadow detail to the dark than to let a single blown-out highlight turn a human face into a white smear that no amount of retouching can save.
Iwona Krawczyk
The Reality of the Finished Frame
At the end of the day, managing highlights isn’t about mastering a technical manual; it’s about managing the variables you can’t control. We’ve talked about everything from the way a room’s bounce light can turn a controlled studio setup into a mess, to the specific way hair texture eats up your dynamic range. You can’t just set your exposure and walk away. You have to watch the way the light hits the skin, anticipate how the subject’s movement might blow out a cheekbone, and be ready to pivot your lighting before the shutter even clicks. It is a constant, messy negotiation between the sensor and the environment, and the camera is just a witness to that struggle.
If you find yourself staring at a histogram that looks like a mountain range in a storm, don’t panic. Most of the “perfect” shots you see in magazines were likely born from a series of tiny, frantic corrections made in the heat of the moment. Photography is less about the pristine math of exposure and more about the graceful recovery from the unexpected. So, keep your eyes on the highlights, keep your chin up when the light fails you, and remember that a little bit of struggle is usually where the real character lives. Now, go out there and actually shoot something.
