
I spent three years assisting photographers who swore you needed a $5,000 lighting kit and a degree in physics just to shoot a living room. They’d spend forty minutes fussing with light meters while the sun moved three inches and the client started eyeing the exit. Honestly, if you’re looking for a lecture on the theoretical properties of photons, you’ve come to the wrong notebook. Real estate isn’t about perfection; it’s about knowing how to light an interior for an estate listing when the windows are blowing out the exposure and the ceiling is a beige abyss. Most of the time, the “problem” isn’t your gear—it’s the fact that the room was designed to swallow light, and you’re fighting a losing battle against a poorly placed lamp.
I’m not here to sell you on more equipment. I want to talk about the compromises you actually have to make when you’re standing in a dark hallway with a deadline looming. I’m going to show you how to use what you already have to balance that nasty window light with the messy reality of a lived-in home. This is about practicality over theory, focusing on the specific distances and modifiers that actually work when the light fails you.
The Room Is the Problem How to Light an Interior for an Estate Listing
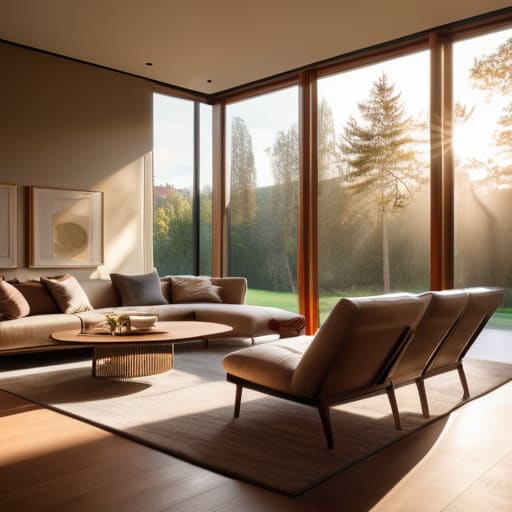
Most people walk into a room and look at the ceiling height or the floor plan. I look at the windows and the shadows they’re throwing. If you’re trying to figure out how to light an interior for an estate listing, the first thing you have to accept is that you are in a fight against the sun. You can have the most expensive strobe kit in the world, but if you haven’t mastered balancing ambient and artificial light, you’re just going to end up with blown-out windows and a living room that looks like a basement.
The secret isn’t more power; it’s better timing. I usually aim for that window where the light is soft enough to not feel aggressive, but bright enough to give the room life. When the sun is being difficult, I rely on window light exposure techniques—basically, using the exterior light as my key source while using a subtle, bounced flash to fill the dark corners. You aren’t just taking a photo; you’re trying to convince the viewer that the space is breathable. If the room feels claustrophobic in the frame, no amount of post-processing will save the listing.
Chasing the Sun Natural Light Optimization Amidst the Chaos
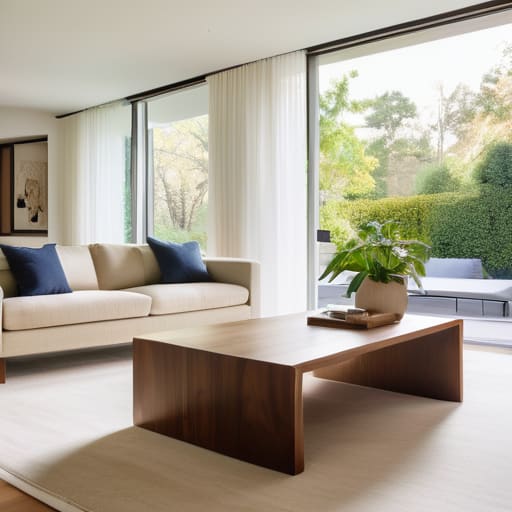
Everyone talks about “golden hour” like it’s a magic wand, but in real estate, the sun is usually just a nuisance that creates blown-out windows and harsh, unflattering shadows. I’ve spent many afternoons fighting a single, aggressive sunbeam that turned a beautiful living room into a high-contrast mess. The trick isn’t to wait for the perfect moment—because that moment rarely aligns with a client’s schedule—but to master window light exposure techniques that actually work. If the sun is hitting the glass directly, don’t try to fight it with brute force; use sheer white curtains to diffuse the glare or, if you’re desperate, move your tripod to an angle that catches the bounce rather than the direct hit.
When you’re aiming for that polished look, you’re really just balancing ambient and artificial light to make the space feel breathable. I never rely on the sun to do the heavy lifting. I use the natural light to set the mood, then I bring in a flash or a continuous LED to fill the dark corners the sun forgot. It’s about making the room look like it was lit by God, even when it was actually lit by a tired photographer with a tripod and a prayer.
When Windows Lie Window Light Exposure Techniques That Work
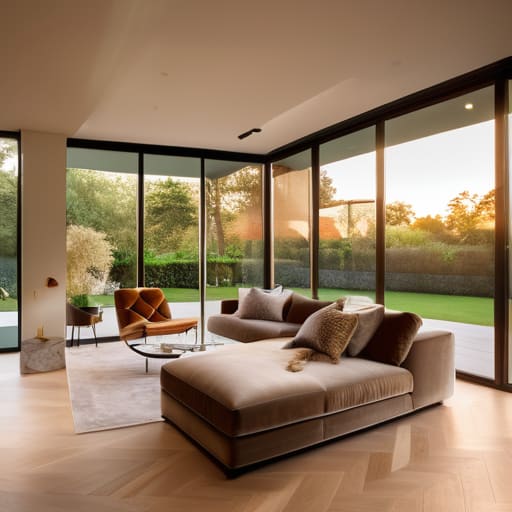
The biggest lie in real estate is that a big window equals a bright room. Usually, it just means you’re staring at a white void where the view should be. If you try to expose for the interior, your windows blow out into nothingness; if you expose for the view, the room turns into a dark, moody cave that looks more like a crime scene than a luxury listing. This is where most people panic and start throwing every lamp in the house at the walls, but you have to focus on balancing ambient and artificial light instead of just fighting it.
I’ve learned that the secret isn’t more power, it’s better placement. If you’re using a tripod—and you should be—don’t just stand in the middle of the floor. Move back, find the angle where the window light wraps around the furniture rather than hitting it head-on, and use a single off-camera flash to fill the shadows. It’s not about making it look like a sunny day; it’s about controlled exposure. You’re looking for that sweet spot where the window detail and the floor texture coexist without one murdering the other.
The Balancing Act Mastering Ambient and Artificial Light
This is where most people lose their minds—and their exposure settings. You’re standing in a living room that feels like a bright, airy sanctuary through the viewfinder, but the moment you look at your histogram, the interior is a muddy mess of shadows while the view outside the window is a blown-out white void. You can’t just crank the ISO and hope for the best; that’s how you end up with grainy, amateurish files that no high-end client will touch. Balancing ambient and artificial light isn’t about finding a perfect middle ground; it’s about deciding which light source is going to be the boss of the frame.
I usually lean on a tripod and a flared-out strobe or a powerful LED panel to fill the dark corners of the room, but you have to be careful. If your artificial light is too “clean” or color-balanced differently than the sun, the room ends up looking like a cheap showroom with a fake glow. My rule of thumb is to match the temperature of the window light as closely as possible. If you’re fighting a warm sunset, don’t hit the room with a clinical, blue-toned flash. It’s a constant tug-of-war, but getting that harmony is what separates professional real estate photography lighting from a quick snap on an iPhone.
Beyond the Bulb High End Property Staging Tips for Light
If you’re waiting for the perfect light to hit a room, you’re going to be sitting on a curb for three hours. Realistically, you have to help the room along. This is where high-end property staging tips actually cross over into technical lighting. I’ve learned that a room feels “dark” not just because of the lumens, but because of the clutter. If a client has a heavy, velvet navy curtain blocking a window, no amount of professional real estate photography lighting is going to make that corner look inviting. You have to tell them to pull the drapes back, or better yet, swap them for something sheer.
I also tell my assistants to watch the reflections in mirrors and polished surfaces. A beautiful marble countertop can become a nightmare if it’s reflecting your flash or a glaring overhead light. Instead of fighting it, use subtle, indirect light—bounce something off a white ceiling or a nearby wall to soften the spill. It’s about creating a sense of depth so the space doesn’t look like a flat, two-dimensional box. Sometimes, the best way to “light” a room is simply to move a lamp two feet to the left.
Professional Real Estate Photography Lighting for Luxury Visual Marketing
When you move into the territory of high-end listings, the goal shifts from simply showing a room to selling a lifestyle. This is where luxury real estate visual marketing actually happens, and it requires a level of precision that most “point and shoot” real estate photographers completely miss. You aren’t just documenting a floor plan; you are managing the mood. In a luxury setting, I stop looking for “enough” light and start looking for intentional light. This means being incredibly picky about which lamps are on and which are off. A beautiful designer floor lamp can look like a distracting orange blob if you don’t manage its output, so I often end up turning off the very things that make a room look “homely” to maintain control over the color temperature.
At this level, you’re essentially performing surgery on the shadows. You aren’t just balancing ambient and artificial light; you are sculpting the space to ensure the architecture feels expensive. If you’re working with a high-ceilinged living area, don’t just blast it with a flash from the center of the room. I prefer using a large, off-camera strobe—something like a 5-foot octabox—positioned far back to mimic the way sunlight would naturally wrap around a piece of furniture. It’s about creating a seamless transition between the view outside the window and the texture of the velvet sofa inside. It takes longer, and it’s a massive pain to move gear around a pristine house, but that’s the difference between a listing that looks like a brochure and one that looks like an editorial.
Five Things My Assistant and I Actually Do on Site
- Stop trying to fight the ceiling. If the room has those dated, yellowing recessed lights that turn skin tones into something from a horror movie, just turn them off. I’d rather fight the darkness with a single, well-placed strobe than try to “fix” bad, sickly light in post-production.
- Watch the reflections in the glass. It’s not just about the windows; it’s the mirrors, the polished marble, and the glass dining tables. I always carry a black foam board in my kit—not for light, but to kill those distracting white hotspots that make a luxury kitchen look cheap.
- Mind the “dead zones” in the corners. When you’re using a wide lens to make a room look spacious, the light tends to fall off aggressively at the edges. I always check my corners to make sure they aren’t swallowed by shadow, or the whole room feels like it’s shrinking.
- Don’t trust the “Golden Hour” promise. Real estate clients always want that magical sunset glow, but if the house is north-facing or tucked behind a massive oak tree, that light isn’t coming. Be honest with them early: sometimes a bright, overcast afternoon gives you much more consistent, workable light than a sunset that disappears in ten minutes.
- Check the height of your light source. I see too many people putting a light on a stand at eye level, which makes the room look flat and clinical. Raise your modifier. Aiming the light slightly down from a higher angle creates much more natural shadows and gives the architecture some actual depth.
Forget the Gear, Watch the Walls
You can spend ten thousand dollars on a lighting kit, but it won’t save you if you haven’t accounted for the way a dark navy wall swallows every lumen you throw at it. Real estate lighting isn’t about finding the perfect lamp; it’s about negotiating with the architecture and realizing that sometimes, the most professional thing you can do is stop fighting the shadows and start working around them.
Iwona Krawczyk
The Reality of the Final Shot
At the end of the day, lighting an interior isn’t about having a bag full of expensive strobes or a magic lens; it’s about managing the friction between the space and the light available. You’ve learned to fight the shadows of a dark corner, to stop trusting a window that’s blowing out your highlights, and to balance that messy ambient glow with something more controlled. It’s a constant negotiation between the technical settings on your sensor and the physical reality of a room that wasn’t designed for a photoshoot. If you can master the art of the compromise—knowing when to push the exposure and when to just accept the mood of the room—you’ve already won half the battle.
Don’t let the chaos of a changing client or a sudden cloud cover make you think you’re failing. Photography is often just a series of small, practical decisions made under pressure. When the gear feels heavy and the lighting feels impossible, remember that the best shot is the one that actually works within the constraints you were given. Stop looking for the perfect setup and start looking for the best possible version of the mess in front of you. That is where the real skill lives.
