
I once spent forty minutes trying to figure out why a cellist looked like a startled deer in every frame, only to realize it wasn’t my aperture or my lighting setup—it was the fact that the instrument was physically acting as a shield between him and the lens. Most tutorials will tell you to buy a $2,000 macro lens or a specialized lighting rig, but they never mention that the biggest hurdle in learning how to photograph a musician with an instrument is actually the geometry of the awkwardness. You aren’t just shooting a person; you are shooting a person wrapped around a piece of wood or brass that was never designed to be photogenic.
I’m not here to talk to you about sensor resolution or the latest lens releases. Instead, I want to talk about the uncomfortable reality of the shoot: how to manage the physical space between the subject and the gear, how to stop the instrument from swallowing their face, and how to handle the inevitable moment when the musician realizes they have no idea what to do with their hands. This is about the practical, messy logistics of getting a shot that actually feels like music, rather than a technical manual.
Understanding How to Photograph a Musician With an Instrument
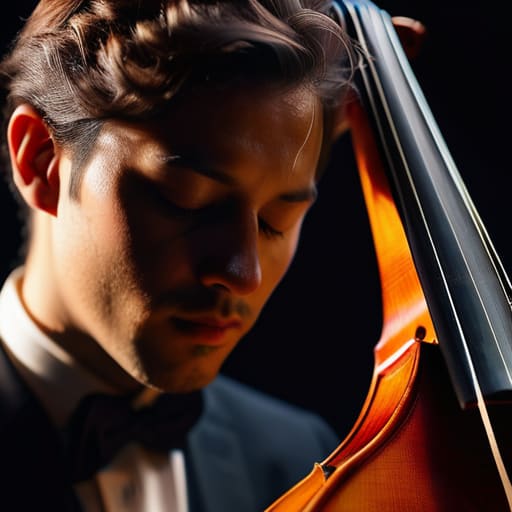
The first mistake I see is treating the instrument like a piece of furniture. It isn’t. If you’re shooting a cellist, that instrument is an extension of their ribcage; if you’re shooting a guitarist, it’s their shield. You can’t just slap a key light on them and call it a day. You have to figure out how the object changes their posture. Most musicians will instinctively hunch or stiffen when a lens appears, so your job is to find the geometry where the person and the tool actually look like they belong together.
When I’m working on composition for instrument photography, I’m looking for the tension between the player’s hands and the hardware. Don’t just stand five feet back and take a wide shot. Get close enough to see the callouses or the way a finger rests on a valve. Sometimes, the most honest way to tell the story isn’t a headshot, but a series of macro shots of musical instruments that capture the wear and tear of a life spent playing. It’s about finding the friction between the human and the wood or brass.
Key Things to Know
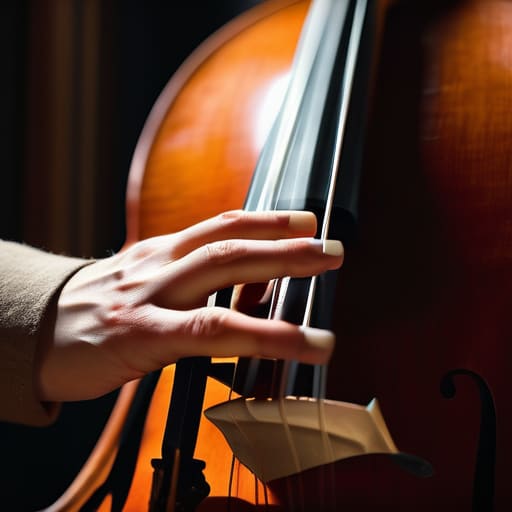
First, let’s talk about the physical reality of the gear. An instrument isn’t just a prop; it’s a bulky, often heavy, and highly reflective piece of equipment that dictates how your subject moves. If you’re shooting a cellist, they aren’t going to sit in a standard chair, and if you’re dealing with a brass player, you’re going to spend half your session fighting glare from the polished metal. You need to prioritize composition for instrument photography by considering how the shape of the object interacts with the person’s body. Don’t just frame the face; frame the relationship between the hands and the wood or metal.
Second, you have to manage the light, especially if you aren’t in a controlled studio. If you’re working a gig, you’ll quickly realize that most venues are a nightmare of high-contrast shadows and colored LEDs. Instead of chasing perfection, focus on capturing musical emotion in photos by leaning into the mood the room provides. If the light is messy, use it. If you’re trying to get those tight, intimate details, don’t be afraid of some macro shots of musical instruments to bridge the gap when the subject is too overwhelmed to pose.
Practical Tips and Steps
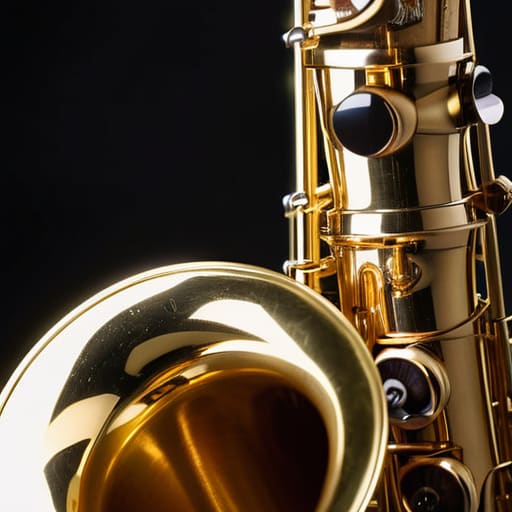
First, let’s talk about the light. If you’re in a studio, stop trying to light the person and the instrument as two separate entities; they are one unit now. I usually start with a single large softbox placed about 45 degrees to the side to create some shape, but I always keep an eye on the reflections. If you’re shooting a polished saxophone or a glossy electric guitar, that light is going to bounce back at you like a mirror. You’ll need to nudge your modifier or slightly tilt the instrument to avoid a massive white blob where the musician’s face should be. This is where portrait photography lighting for musicians gets tricky—you aren’t just managing shadows, you’re managing glare.
Once the light is behaving, focus on the hands. I always ask my subjects what they do with their hands when they’re nervous, and with musicians, the answer is usually “I don’t know, they just go to the instrument.” Don’t fight this. Use it. Instead of forcing a stiff, formal pose, lean into the way they naturally grip a neck or rest their fingers on the keys. Effective composition for instrument photography often means letting the tool dictate the frame. If they look comfortable with the gear, the shot will feel earned rather than staged.
Common Mistakes to Avoid
The biggest mistake I see—and I’ve lost count of how many times I’ve had to fix this in post—is treating the instrument like a prop rather than an extension of the person. If you’re just framing a musician and their gear without considering how they actually interact with it, you end up with a sterile, lifeless shot. People often get so caught up in the technicalities of composition for instrument photography that they forget to look for the tension in the shoulders or the way a guitarist’s grip changes when they’re deep in a piece. If the connection isn’t there, the photo is just a catalog shot, and nobody pays for that.
Then there’s the light. I see so many beginners trying to fight a dark venue with a massive, unmanageable strobe, only to end up with a subject who looks like they’re being interrogated by the police. When you’re dealing with portrait photography lighting for musicians, less is almost always more. Don’t try to illuminate the whole stage; pick one direction, find a soft modifier, and embrace the shadows. If you try to light everything, you lose the atmosphere, and once that mood is gone, you aren’t capturing musical emotion anymore—you’re just documenting a person standing in a room.
Final Thoughts
At the end of the day, don’t let the gear intimidate you or the technicalities paralyze you. If you spend the whole session worrying about whether your composition for instrument photography is mathematically perfect, you’re going to miss the moment the cellist actually closes their eyes or the guitarist leans into a chord. That’s where the real work happens. My advice? Stop looking at the waveform on your screen and start looking at the person.
If you find yourself struggling with a difficult room or a subject who is fighting you, remember that the light is rarely the enemy—it’s your relationship with it. Whether you are attempting complex portrait photography lighting for musicians in a controlled studio or just trying to survive a dim rehearsal space, keep it simple. If things go sideways, strip it back. Go back to one light, find a better angle, and breathe. The best shots aren’t the ones where everything went according to the manual; they are the ones where you managed to find a bit of truth in the middle of a chaotic shoot.
Five things I’ve learned when the gear is working but the session is falling apart
- Watch the hands, even if they aren’t playing. If you’re shooting a guitarist and they’re white-knuckling the neck because they’re nervous, the photo will look tense no matter how soft your light is. I always ask them what they do with their hands when they’re stressed; it helps me spot that tension before I even press the shutter.
- Respect the instrument’s “good side.” Every musician has a specific way they hold their gear or a certain angle where the light hits the lacquer just right. Don’t fight them on this to get a “better” composition; if they say the light is hitting the brass too hard, believe them and move your modifier, don’t just crank the exposure compensation.
- Mind the physical footprint. A cello or a drum kit isn’t just a prop; it’s a massive, awkward obstacle that dictates where I can stand and where the light can go. I’ve learned to scout the room for floor outlets and cable runs before I even unbag my lights, because once that kit is set up, you aren’t moving it.
- Don’t treat the instrument like a still life. If you’re shooting a violinist, they need to feel the weight of the bow. If the shot looks too sterile, it’s usually because you’ve separated the person from the tool. I try to get close—maybe 35mm or a 50mm—to capture that physical connection, even if it means I have to dodge a few awkward angles.
- Watch for the “glare trap.” Polished wood, brass valves, and silver strings are nightmare magnets for reflections. If you’re using a single large softbox, you’ll likely see a giant, distracting white rectangle on the bell of a trumpet. I usually end up flagging the light or slightly offsetting my stand to keep the instrument looking like an instrument, not a mirror.
The Real Battle
Stop obsessing over whether you have the right aperture for that Stradivarius; the real work starts when you realize the musician is white-knuckling their fretboard because they’re terrified of the lens, and you have to figure out how to light the instrument without making the human being look like a prop in their own life.
Iwona Krawczyk
The Reality of the Final Frame
At the end of the day, photographing a musician isn’t about mastering the technicalities of your sensor or finding the perfect aperture; it’s about managing the chaos between the gear. You have to account for the bulky case in the corner, the way the light dies in a rehearsal space, and most importantly, how the musician holds their instrument when they aren’t playing. If you’ve managed to balance the practicalities—positioning the modifier to catch the curve of a cello or making sure the guitarist doesn’t look like they’re fighting their own strap—then you’ve done the hard part. Remember, the goal is to document the relationship between the person and the tool, not just to take a sharp photo of a piece of wood and wire.
Don’t let the technical hurdles paralyze you. There will be sessions where the lighting is garbage and the subject is convinced they look ridiculous, but that is exactly where the real work happens. Stop worrying about whether your kit is “professional enough” and start focusing on the room and the person in it. If you can navigate the awkwardness and the logistical mess, you’ll find that the best shots usually happen in the moments when you stop overthinking the settings and start observing the rhythm of the room. Go out, get your hands dirty, and just shoot.
