
I once spent forty-five minutes in a client’s living room, sweating through my shirt, trying to figure out why my skin tones looked like they’d been dipped in orange juice. I had the most expensive color-accurate strobe sitting three feet from the subject, but the massive, low-hanging afternoon sun was pouring through the window, turning the whole frame into a color temperature battlefield. Most tutorials will tell you to buy a more expensive sensor or spend hours in post-production, but that’s nonsense. Learning how to shoot in mixed lighting isn’t about having a magical camera; it’s about realizing that the room is actively working against you and knowing exactly which fight is worth winning.
I’m not here to give you a lecture on the physics of Kelvin scales or a shopping list of gear you don’t need. Instead, I want to talk about the actual compromises you have to make when the warm glow of a tungsten lamp refuses to play nice with the blue light from a skylight. I’m going to show you how I manage the chaos by choosing which light to kill and which to embrace, so you can stop fighting your environment and start actually shooting.
Understanding How to Shoot in Mixed Lighting
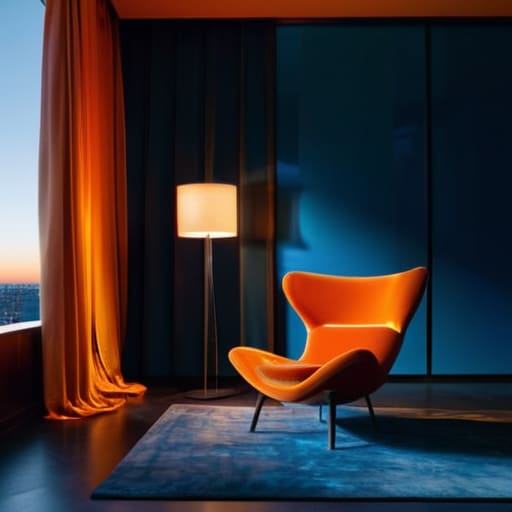
Before you even touch the shutter, you have to accept that you are no longer in control of the entire scene. When you’re dealing with a room that has a massive floor-to-ceiling window on one side and a heavy tungsten lamp on the other, you aren’t just taking a photo; you are mediating a conflict. The fundamental issue is the tungsten vs daylight balance. Your camera wants to pick a side, but the environment is forcing it to be indecisive. If you set your white balance for the window, your subject’s skin will turn a sickly, bruised orange under the indoor lights. If you balance for the lamps, the view outside becomes a blown-out, ghostly white void.
I’ve learned that the easiest way to stop the bleeding is to stop fighting the physics and start managing the Kelvin scale for photographers with some actual intention. You can try to balance everything in-camera, but usually, that just leads to a muddy middle ground where nothing looks quite right. Instead, I prefer to lean into the mess. I’ll often use a single strobe to “punch through” the ambient chaos, effectively choosing which light source gets to dictate the mood. It’s about deciding which light source is the boss of the room before you start clicking.
Key Things to Know
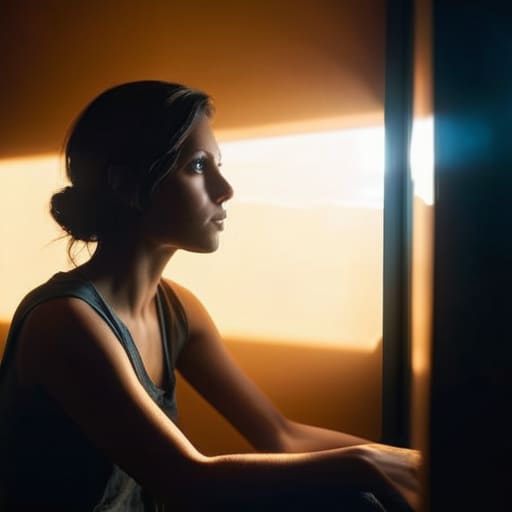
First, stop thinking about your camera settings as a way to “fix” the room; they are actually just a way to choose which battle you want to fight. If you’re in a studio where a window is pouring in blue-ish daylight while your overheads are spitting out orange tungsten, you have to make a choice. You can’t please everyone. You’ll either be managing tungsten vs daylight balance by setting your white balance to one or the other—which inevitably makes the “wrong” light look even more dramatic—or you can try to bridge the gap.
If you want to actually control the chaos rather than just reacting to it, you need to get comfortable with using gels for lighting consistency. I usually keep a stack of CTO (Color Temperature Orange) gels in my bag for exactly this reason. If I’m shooting a portrait and the ambient light is a warm, messy mess, I’ll slap a gel on my flash to bring it into the same ballpark. It’s not about achieving perfection; it’s about making the compromise look intentional rather than accidental.
Practical Tips and Steps

First, stop trying to fight every light source in the room and start deciding which one gets to be the boss. If you’re in a studio with a massive window but a single, sickly yellow lamp in the corner, pick a side. I usually lean toward the window and treat the lamp as the enemy. If you absolutely must use both, you’re going to need to get comfortable with using gels for lighting consistency. Slapping a CTO (Color Temperature Orange) gel on your flash to match that warm tungsten light isn’t just a trick; it’s the only way to stop your subject from looking like they have a sunburn on one side of their face and a corpse on the other.
Once you’ve picked your primary source, check your white balance manually. Don’t trust your camera’s “Auto” setting; it’ll panic the moment it sees two different spectrums and give you a muddy mess. I find it helpful to glance at the Kelvin scale for photographers to get a ballpark idea of where the battle is being won. If the light is still winning the war, don’t sweat it too much—just make sure you leave yourself enough room for correcting color casts in post-processing later. You can fix a tint, but you can’t fix bad shadows.
Common Mistakes to Avoid
The biggest mistake I see—and I’ve made it myself more times than I’d like to admit—is trying to “fix it in post” before even setting up the lights. You’ll see people shooting a portrait with a harsh window on one side and a warm lamp on the other, thinking they can just nudge the sliders in Lightroom later. You can’t. If the color cast is deep enough, you aren’t retouching; you’re performing digital surgery, and it always looks unnatural. Stop treating your camera like a magic wand and start treating the room like a puzzle.
Another trap is getting paralyzed by the math of the Kelvin scale for photographers. I’ve seen assistants spend twenty minutes debating the exact degree of a light source while the client is sitting there getting more awkward by the second. Don’t get lost in the theory. If you can’t find a way to balance the tungsten vs daylight tension in the room using a simple gel or by moving your subject six inches to the left, you’re fighting a losing battle. The goal is to control the environment, not to win an argument with physics.
Final Thoughts
At the end of the day, don’t let the technicality of it paralyze you. You’re going to walk into a room, see a weird orange glow from a lamp clashing with a blueish window, and feel that momentary spike of panic. That’s normal. Just remember that you aren’t trying to achieve mathematical perfection; you’re trying to make a scene that feels cohesive. Whether you decide on correcting color casts in post-processing or you grab a handful of CTO gels to bring the window light in line with your flashes, the goal is the same: control the chaos.
If you find yourself stuck in a loop of indecision, just pick a side. It is almost always easier to fix a slight color imbalance later than it is to fix a muddy, flat image where nothing has any definition. Mastery over the Kelvin scale for photographers isn’t about memorizing numbers; it’s about developing an intuition for how light behaves when it’s forced to share a space. Keep your kit simple, watch the shadows, and trust your eyes more than your light meter.
Five ways to stop the light from fighting you
- Stop trying to “fix” the window. If you’ve got a massive, beautiful north-facing window and a shitty overhead fluorescent light, don’t try to balance them perfectly. You’ll just end up with a muddy, grey mess. Instead, lean into the window. Turn off the overheads entirely, or move your subject so the window is your primary source and the room’s ambient light becomes a secondary, negligible player.
- Check your white balance every time you move. I can’t tell you how many times I’ve spent twenty minutes setting up a shot only to realize I’m metering for the warm tungsten lamp in the corner while my subject is being hit by cool daylight. If you’re switching between a window and a lamp, you have to manually reset your Kelvin temperature. Don’t trust Auto WB; it’ll jitter like it’s nervous, and so will your subject.
- Use a flag to kill the spill. Sometimes the problem isn’t the light you want, it’s the light you don’t. If you’re using a flash to balance a window, but that window light is spilling onto the shadow side of the face and ruining your contrast, grab a piece of black foam core. Hold it just out of frame to block that unwanted bounce. It’s a crude tool, but it works better than any expensive filter.
- Watch the skin tones, not the meter. Your light meter is a mathematical tool, but it doesn’t have eyes. It might tell you the exposure is “correct,” but if the mixed light is making your subject look like they have a sickly green tint from a cheap LED, the meter won’t care. Trust your eyes. If the skin looks off, adjust your gels or your flash power until the color feels human again.
- Embrace the “controlled chaos” of a single source. If the mixed lighting in a client’s office is truly a nightmare—I’m talking about three different color temperatures all hitting the subject from different angles—stop fighting it. Close the blinds, kill the lights, and just use one light. One strobe or one continuous light with a large softbox is almost always better than a “balanced” shot that looks like a confused mess of color casts.
The Reality of the Room
Stop looking at your light meter and start looking at the windows and the overheads; you aren’t fighting physics, you’re just trying to negotiate a peace treaty between a warm tungsten lamp and a harsh afternoon sun.
Iwona Krawczyk
The Reality of the Room
Look, at the end of the day, you aren’t going to win a battle against physics every single time. You can white balance like a madman, use gels to fight that sickly orange tungsten, or move your subject three feet to the left to escape a window that’s blowing out the highlights, but the light is still going to be messy. The goal isn’t perfection; it’s intentionality. Whether you’re choosing to embrace the color cast or working tooth and nail to neutralize it, the most important thing is that you aren’t letting the light dictate the mood to you. You have to be the one in charge of the visual narrative, even when the room is actively working against your setup.
If you leave a shoot feeling like you struggled, you’re probably doing it right. Some of my best portraits came from those moments where the lighting was a disaster and I had to stop thinking about my settings and start thinking about the compromise. Don’t let a mixed-lighting headache make you retreat into the safety of a controlled studio every time. Get out there, get messy, and remember that a bit of visual friction often makes a portrait feel much more human than something surgically clean. Just keep an eye on those hands—and maybe keep a roll of CTO gel in your bag just in case.
