
I once spent forty-five minutes sweating in a cramped, windowless office, trying to justify why I needed a second Profoto light for a corporate headshot, only to realize the white drywall right next to the subject was doing a better job than my expensive modifier ever could. It’s a ridiculous waste of energy and gear to think that “professional” lighting requires a heavy kit and a complex diagram. Most people think they need more power when, in reality, they just need to figure out how to bounce off a wall that is already sitting there, waiting to be used. Stop overcomplicating the physics; the room is usually your best collaborator if you stop fighting it.
In this entry, I’m skipping the theoretical nonsense about light angles and lumens that you’ll find in a textbook. Instead, I’m giving you the unfiltered reality of using surfaces to shape light when you’re stuck in a bad location. I’ll tell you exactly which textures work, which ones turn your subject into a muddy mess, and how to manage the inevitable fall-off. This isn’t about gear; it’s about making do with what you have so you can actually get the job done.
The Room Is the Enemy Mastering How to Bounce Off a Wall
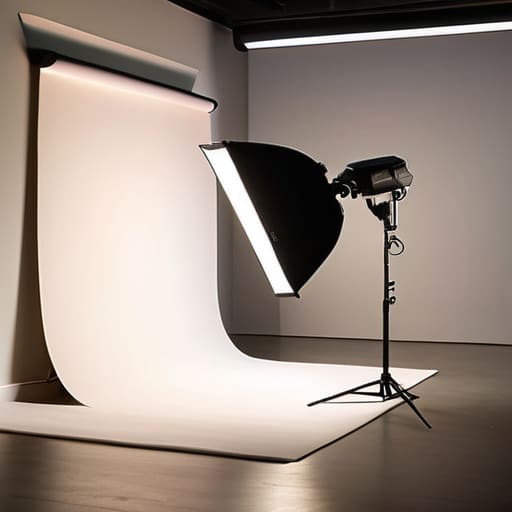
When you roll into a client’s office and realize they’ve tucked your shooting space into a cramped corner with beige-on-beige walls, don’t start mourning your lack of a softbox. This is where the actual work begins. You need to stop looking at the wall as an obstacle and start seeing it as your largest, cheapest modifier. The trick isn’t just pointing a flash at it; it’s understanding the angle of incidence and reflection. If you aim your light dead-on at a flat surface, you’re going to get a hot spot that makes your subject look like they’re standing in a spotlight. I usually tilt my strobe about 30 degrees off-axis to ensure the light spreads more evenly across the vertical plane.
The texture of that surface changes everything, too. A matte, painted wall is a dream for a natural wrap, but if you’re stuck with a glossy boardroom finish, you’re dealing with a different beast entirely. I’ve spent many sessions fighting a soft surface impact that just isn’t there, trying to turn a hard, reflective surface into something that mimics a large silk. If the wall is too dark or too textured, stop trying to force it. Move the subject, change your distance, or just accept that you’re going to have to work harder with your secondary light.
The Math of the Moment Wall Bounce Physics and Failed Light
Look, you don’t need a degree in optics to understand the angle of incidence and reflection, but you do need to stop guessing. If you point your strobe at a corner and nothing happens, it isn’t magic; it’s math. Light follows a predictable path, and if you aren’t accounting for where that beam hits, you’re just wasting battery life. I’ve spent way too many sessions staring at a ceiling that swallowed my light whole because I forgot that a matte, acoustic-tiled surface acts like a sponge rather than a mirror.
The real trick is managing the soft surface impact of the room. A white plaster wall is your best friend, but a dark, textured brick wall is a thief. When I’m stuck in a cramped office with zero gear, I don’t panic; I just move. I’ll shift my light three feet to the left to catch a different plane of the wall, or I’ll angle the modifier just enough to change the direction of the throw. It’s less about complex rebound technique training and more about reading the texture of the space before you even turn the power on.
Angle of Incidence and Reflection When the Geometry Betrays You
Here is the reality of the physics: light doesn’t care about your creative vision; it only cares about geometry. You can have the most expensive Profoto strobe in the world, but if you don’t respect the angle of incidence and reflection, you’re just making expensive mistakes. I remember a corporate shoot in a narrow hallway where I tried to bounce a large octa through a white wall to get that soft, wrap-around light. Instead, because I was standing too close to the corner, the light hit the surface at such a sharp angle that it didn’t spread—it just shot a harsh, directional beam straight into the subject’s eyes.
It’s a constant game of trial and error. You have to treat every room like a math problem you didn’t study for. If the wall is too far, the light loses its punch; if it’s too close, the fall-off is too aggressive. I’ve spent more time than I’d like to admit shifting my feet three inches to the left just to find the sweet spot where the light actually behaves. It’s not about the gear; it’s about understanding how that light is going to travel once it hits the surface.
Rebound Technique Training for the Unpredictable Studio Environment
You can’t wait for the light to hit the wall to start thinking about where it’s going. If you’re standing there staring at your light meter while the client is already shifting uncomfortably in their chair, you’ve already lost the momentum. I used to spend way too much time over-calculating, but now I treat it more like improvising movement drills. I’ll physically walk the perimeter of a new studio, tossing a small handheld LED or even just a heavy flashlight against different surfaces to see how they react. You need to feel the difference between a matte white plaster and a glossy painted finish before the subject even walks through the door.
It’s about developing a sort of wall bounce reaction time. When a client decides they want to move three feet to the left mid-session, you shouldn’t be panicking about your shadows disappearing; you should already be eyeing the nearest surface to catch the spill. I’ve learned that the most important part of rebound technique training isn’t the math—it’s the muscle memory of knowing exactly how much to tilt your modifier to compensate for a sudden change in the room’s geometry.
Improvising Movement Drills When the Space Feels Too Small
When you’re wedged into a studio apartment or a cramped office corner, you can’t exactly set up a seamless backdrop and a five-foot octabox. You start feeling claustrophobic, and if you’re tense, your subject will feel it too. This is where improvising movement drills becomes less about “exercise” and more about spatial awareness. I used to spend my assistant years watching photographers panic when they realized they couldn’t move their tripod back another inch. Instead of fighting the walls, I started treating them as part of the kit. I’ll have my subject shift their weight or turn their head just slightly to see how the light catch changes when it hits a nearby surface.
It’s about testing the soft surface impact of the room. If you’re working with a heavy velvet curtain instead of a white plaster wall, your bounce is going to die instantly. I make it a habit to do a quick “light check” by moving my single source in small, incremental arcs. You aren’t just looking for a pretty glow; you’re learning how to manipulate the angle of incidence and reflection when you only have a two-foot margin of error. If you can master the light in a closet, you can master it anywhere.
Wall Bounce Reaction Time and the Chaos of Soft Surface Impact
You’ll learn the math in a classroom, but you learn the chaos in the field. I once spent forty minutes trying to nail a clean bounce in a corporate lobby, only to realize the “walls” were actually textured acoustic panels. That’s where the theory of wall bounce physics hits a brick wall. When you hit a soft surface, the light doesn’t just redirect; it dies. It gets swallowed by the fabric, leaving you with a muddy, directionless glow that makes your subject look like they’re standing in a fog bank.
This is why your wall bounce reaction time needs to be instinctive. You can’t stand there staring at your histogram while the client’s confidence evaporates. You have to see the texture of the room before you even click the shutter. If the surface is matte or porous, stop trying to play it smart with a single bounce and start thinking about how to compensate for that soft surface impact. You aren’t just managing light anymore; you’re fighting the very material of the building to keep your shadows from turning into sludge.
Five ways to stop fighting the architecture
- Check the paint before you commit. I once spent twenty minutes trying to get a clean bounce off a “cream” wall only to realize the pigment had a heavy yellow undertone that turned my subject’s skin the color of a bruised banana. If the wall looks suspicious, don’t trust it.
- Use a V-flat when the wall is being stubborn. If the room is too dark or the texture is too aggressive—think rough plaster or heavy wallpaper—stop trying to make the wall work for you. Pull out a white V-flat, lean it against the wall, and create your own predictable surface.
- Watch your distance from the bounce point. The closer you move your light source to the wall, the harder and more concentrated that reflected light becomes. If you want that soft, wrap-around light for a portrait, back the light up. Give the light room to spread out before it hits the surface.
- Mind the “shadow trap” in corners. People always try to bounce light off the corner where two walls meet to get more “volume,” but you usually just end up with a messy, unintentional gradient that looks like a mistake rather than a choice. Stick to a flat plane whenever you can.
- Test the bounce with your eyes, not just your meter. A light meter will tell you the intensity, but it won’t tell you that the light is bouncing off a wall and hitting a glass picture frame behind your subject, creating a distracting flare. Look at the whole room, not just the exposure numbers.
The Reality of the Bounce
Stop looking for a better strobe and start looking at the paint on your walls; half the time, your “bad lighting” is just you fighting a surface you haven’t actually bothered to understand yet.
Iwona Krawczyk
The Reality Check
At the end of the day, bouncing light off a wall isn’t about mastering complex geometry or calculating the exact angle of incidence like some textbook would have you believe. It’s about being observant enough to see that the white plaster behind your subject is actually your best, cheapest softbox. You’ve learned that the texture of the surface matters, that the distance between the light and the wall changes the quality of the spill, and that a dark, matte wall will swallow your light faster than a hungry client swallows a free lunch. Stop obsessing over your strobe settings for a second and start actually looking at the room. If you can master the way light hits a corner or bounces off a ceiling, you’ll realize that the environment is never just a backdrop; it is your primary modifier.
When you finally get into a shoot where the lighting rig fails or the client drags you into a cramped, windowless office, don’t panic. That moment of friction is where the real work begins. Most people freeze when the “perfect” setup disappears, but that’s when you actually start being a photographer instead of just a gear operator. Trust your eyes, trust the physics of the space, and remember that a well-placed bounce can do more for a portrait than a thousand-dollar octabox ever could. The magic isn’t in the kit; it’s in how you negotiate with the room.
