
I once spent forty-five minutes in a cramped, drafty studio trying to figure out how to shoot a portrait from above, only to realize the problem wasn’t my focal length or my tripod height—it was that the ceiling light was casting a shadow that made my subject look like a character in a noir film they hadn’t auditioned for. Most tutorials will tell you that a high angle is a simple matter of tilting your lens and adjusting your composition, but they completely ignore the physical reality of the room. They don’t mention that once you move the camera up, you’ve also moved yourself away from the subject’s eye line, and suddenly you’re fighting a losing battle against awkward chin angles and disappearing light.
I’m not here to give you a theoretical lecture on geometry or suggest you go out and buy a specialized heavy-duty jib arm. I want to talk about the actual, messy logistics: how to manage the light when it’s coming from a direction you can no longer control, and how to keep a person from feeling like they’re being interrogated by a camera hovering overhead. This is about the compromises you make with your gear and your space to get the shot you actually wanted, not the one the textbook promised.
The View From Above When the Room Dictates the Angle

Most people think choosing a high angle is a stylistic whim, like picking a filter, but usually, it’s a desperate tactical retreat. You find yourself staring at a client in a rented studio with a ceiling that’s too low, or a subject sitting in a corner where the light is hitting them like a hammer from the side. When the environment is working against you, you stop fighting the room and start using it. I’ve spent many sessions realizing that using a tripod for high angle shots isn’t just about getting the frame right; it’s about finding a vantage point that masks a messy background or a distracting window.
It’s also about the physics of the face. If you’re working with someone who is hyper-aware of their jawline or feels self-conscious about their chin, a slight tilt downward can be a lifesaver. It’s a common camera angle for slimming face profiles without having to spend forty minutes on awkward chin tucks. But don’t get cocky—if you go too high, you lose the eyes. You have to find that sweet spot where you aren’t just looking down on them, but actually directing the light where it needs to go.
Mastering How to Shoot a Portrait From Above Without Chaos
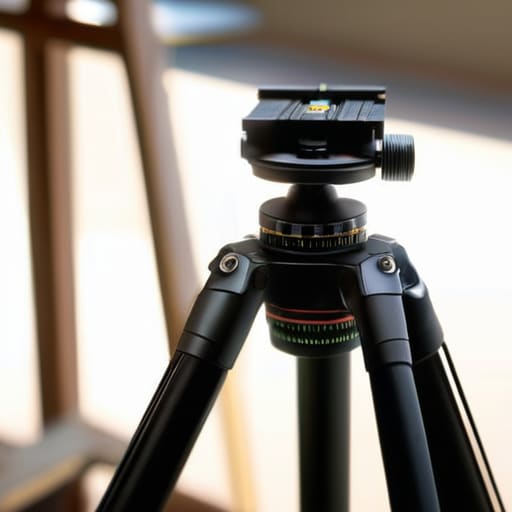
If you’re going to commit to a high angle, stop treating it like a gimmick and start treating it like a geometry problem. Most people try to wing it, but if you aren’t using a tripod for high angle shots, you’re just begging for a micro-shake that ruins the sharpness. I don’t care how good your IBIS is; when the camera is looking down at a forty-five-degree angle, even a heavy breath can shift the frame. Get the tripod up, level the spirit level, and make sure you aren’t about to knock a light stand over when you extend the center column.
The real trick is managing the shadows. When you’re shooting from above, you’re essentially fighting gravity’s effect on the light. If you use a single overhead source, you’ll end up with dark, hollow sockets that make your subject look like they haven’t slept since 2014. Instead, I lean on specific overhead portrait lighting techniques—usually a large octa through a scrim—to wrap the light around the brow. You want to soften the transition from the forehead to the nose, otherwise, you aren’t getting a flattering shot; you’re just documenting a mess of harsh shadows.
Birds Eye View Photography Tips for Difficult Uncooperative Subjects
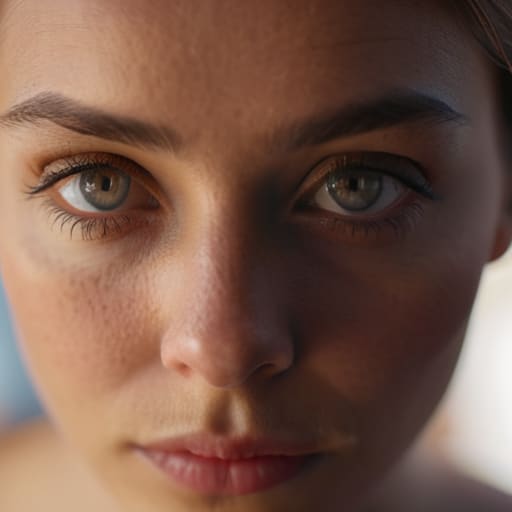
When you’re working with someone who has decided they are “unphotogenic,” a high angle can feel like a cheat code, but it’s a delicate one. If they’re stiff, don’t just stand on a chair and start clicking. Use the angle to redirect their focus. I’ve found that if I’m looking down at them, I can guide their chin slightly toward the lens, which helps with model posing for top-down shots without making them feel like they’re being interrogated. It creates a sense of vulnerability that actually works in your favor, provided you aren’t making them feel small in a way that kills their confidence.
The real danger here is the “deer in headlights” look. When you’re shooting from a bird’s eye view, the eyes become the absolute anchor of the frame. If they’re looking up at you with wide, panicked eyes, the shot is dead. I usually suggest they look just past the lens or slightly toward my shoulder to soften the gaze. Also, for the love of everything, stop trying to hand-hold the camera if you’re reaching upward. Using a tripod for high angle shots isn’t just about stability; it’s about giving you the freedom to actually talk to the subject instead of fighting gravity and a shaky sensor.
Overhead Portrait Lighting Techniques When the Sun Wont Cooperate
When you’re shooting top-down and the sun decides to be your enemy—either by disappearing behind a cloud or by blasting through a window with zero subtlety—you can’t rely on luck. If you’re trying to execute overhead portrait lighting techniques in a room with bad natural light, you have to stop treating the sun like a constant. I’ve spent many afternoons watching a perfectly planned setup fall apart because the light turned muddy. If you aren’t using a flash, you’re essentially at the mercy of the sky. My rule of thumb? If the light is changing every ten minutes, stop chasing it and start controlling it.
Get a reflector or a small bounce card and keep it close. When you’re working with a high angle, the shadows under the brow and nose can get aggressive very quickly. I usually aim to soften those deep sockets by bouncing whatever light is available back up toward the face. If you’re serious about the shot, you’ll need to be using a tripod for high angle shots to ensure your framing doesn’t drift while you’re fussing with the modifiers. It’s about stabilizing the environment so you can focus on the person in front of you.
Using a Tripod for High Angle Shots and Shaky Hands
If you’re trying to hold a heavy DSLR or a mirrorless rig at arm’s length while tilting the lens upward, just stop. You aren’t a superhero, and your micro-jitters will show up as a blurry mess in the eyes—which is the one place you can’t afford to lose sharpness. When I’m working on a tight schedule, using a tripod for high angle shots isn’t a luxury; it’s my insurance policy. Even if you’re using a lightweight travel tripod, getting that center column extended and locked is the only way to ensure your portrait composition and framing doesn’t drift two centimeters to the left halfway through the session.
I’ve spent enough time assisting to know that “shaky hands” is usually just a symptom of a bad setup. If you’re fighting gravity, you’re fighting the shot. If the tripod feels too clunky for the space, use a monopod or even a beanbag on a high shelf, but please, find a way to stabilize the weight. If you’re aiming for a specific camera angle for slimming face, the precision required means you can’t be guessing where the horizon line is. Lock it in, check the playback, and then move on to the actual work.
Model Posing for Top Down Shots and the Slimming Face Myth
Everyone tells you that a high angle is a magic trick for a slimmer jawline, but that’s a half-truth that usually ends in a portrait that looks like a caricature. When we talk about the camera angle for slimming face shapes, people assume it’s just about tilting the lens down. In reality, if you tilt too far without directing the subject, you just end up with a massive forehead and eyes that look like they’re staring into another dimension.
The trick to successful model posing for top-down shots isn’t just the angle; it’s the chin. I tell my subjects to drop their chin slightly toward their chest, but then—and this is the part they always miss—to extend their neck just a fraction. It sounds counterintuitive, but it creates that separation between the jaw and the neck that people are actually looking for. If they just tuck their chin, they look like they’re hiding from a predator. You have to manage the tension. If they get too stiff, the shot is dead, no matter how much you’ve perfected your overhead portrait lighting techniques.
Five things I’ve learned when the camera is looking down
- Watch the chin, not just the eyes. When you’re shooting from above, the subject’s chin becomes a lever. If they tilt it up too much to meet your lens, you’re going to get a massive, unflattering nostrils-first shot that no amount of retouching will fix. Tell them to keep the chin slightly tucked, like they’re looking at something on the floor, and then guide their eyes up to you.
- Mind the shadows under the brow. High angles often mean your light source is also competing for space. If you’re using a single beauty dish from the side, a top-down perspective can cast deep, cavernous shadows in the eye sockets. I usually move my modifier a bit closer and more frontal than I’d normally dare, just to fill those sockets back up.
- Check your background for “the mess.” When you tilt the camera down, you aren’t just framing the person; you’re framing everything behind their head that they thought was hidden. I’ve ruined perfectly good portraits because I didn’t realize a stray power cable or a half-empty coffee cup was sitting right in the top third of the frame.
- Don’t forget the hands (again). Since I’m always asking people what they do with their hands when they’re nervous, I’ve noticed that high angles make them feel even more exposed. They tend to clench or hide them under their thighs. Give them a prop—a chair arm, a lap, even a jacket—to give those hands a job to do so they don’t look like they’re vibrating.
- The “Floor is Lava” rule for gear. If you’re shooting from a high angle, you’re likely working with a tripod or a heavy light stand extended to its limit. Don’t just set it and forget it. Check the tension on the center column every ten minutes. There is nothing more soul-crushing than hearing a slow, metallic creak halfway through a session and realizing your entire setup is about to tip onto a client’s toes.
The View from the Ceiling
Stop obsessing over the focal length for a second and look at the space; shooting from above isn’t some stylistic choice you make in a vacuum, it’s usually a desperate, necessary compromise because the light is hitting the subject’s forehead like a spotlight and you’re trying to find a way to make them look human again.
Iwona Krawczyk
The View From Here
At the end of the day, shooting from above isn’t about some magic trick to make a jawline disappear or a way to compensate for a studio with zero ceiling height. It’s about making a decision when the environment pushes back. Whether you’re wrestling with a tripod that feels like it’s going to tip over, trying to fix a lighting setup that’s casting ugly shadows under the eyes, or managing a subject who is convinced they look ridiculous from a high angle, the goal is the same: control the chaos. You’ve got the gear, you’ve got the angle, and you’ve got the technical setup. Now, you just have to stop fighting the room and start working with what’s actually in front of you.
If you leave a shoot feeling like you spent more time adjusting a light stand than actually looking through the viewfinder, don’t beat yourself up. That’s just the job. The most interesting portraits rarely come from the perfect, textbook setup; they come from the moments where you had to pivot because the sun moved or the client’s energy shifted. Don’t get so caught up in the geometry of a high-angle shot that you forget to look at the person in the frame. Once you stop obsessing over the technical perfection of the perspective, you’ll finally start seeing the actual portrait.
