
I remember one specific shoot in a cramped studio in East London—the kind of room where the heater clanks and the light is already fighting a losing battle against the grey afternoon. I had a client with stunning, deep skin tones, and I could feel the tension in the room because my meter was giving me readings that felt completely disconnected from what my eyes were actually seeing. I realized then that most of the “pro” tutorials are useless; they tell you to adjust your exposure compensation by a stop or two, but they never talk about how the texture of the skin actually interacts with the falloff of a softbox. If you are struggling with how to light dark skin well, stop looking at your light meter and start looking at the specular highlights.
I’m not here to sell you a new strobe or a magic sensor. This isn’t a lecture on the physics of light; it’s a notebook on how to actually manage the room and the modifiers to make sure that melanin doesn’t just look “correct,” but looks alive. We are going to talk about specific distances, why I usually ditch the heavy diffusion for something more intentional, and how to stop treating dark skin like a technical problem to be solved and start treating it like the subject it is.
It Is Never the Subject It Is the Light
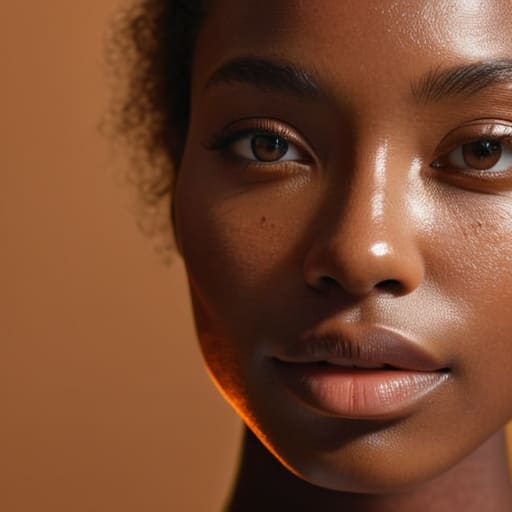
I’ve spent enough years as an assistant to know the exact moment a client starts to spiral. They look at the monitor, see a flat, grayish patch where their cheek should be, and immediately decide they “don’t photograph well.” I’ve heard it a thousand times. But let’s be clear: they aren’t the problem. The problem is that you’re treating their skin like it’s a piece of white paper. If you use the same generic exposure settings you’d use for a pale subject, you aren’t going to capture the richness; you’re just going to lose the detail in the shadows or blow out the highlights.
When we talk about photography lighting for deep skin tones, we aren’t just adjusting a slider in Lightroom later. It’s about how the light physically interacts with the surface. You have to be intentional about managing highlights on dark skin so they look like a healthy glow rather than a greasy smear. I usually find myself reaching for a large octa over a standard softbox because I need that wrap-around quality to define the bone structure. If you don’t give the light something to catch, the subject just disappears into the background.
How to Light Dark Skin Well Without Fighting the Room
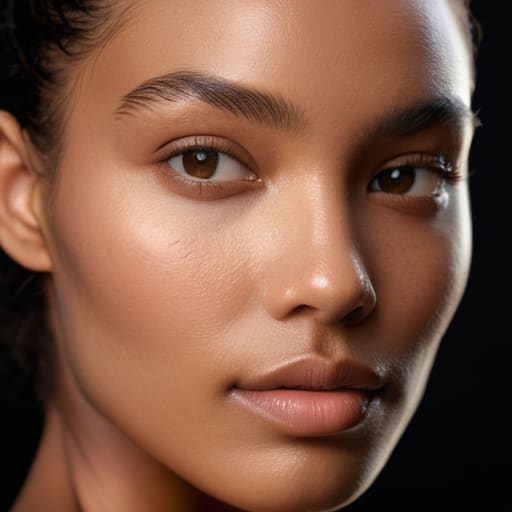
The biggest mistake I see is people treating deep skin tones like they’re something to be “corrected” rather than celebrated. If you’re walking into a room and trying to overpower the subject with a massive, underexposed key light, you’re going to lose all that beautiful texture. Instead of fighting the shadows, you need to learn the art of managing highlights on dark skin. I usually reach for a medium-sized beauty dish or a slightly smaller softbox—maybe a 32-inch Octabox—positioned about four feet away. This gives you enough direction to define the bone structure without turning the skin into a matte, lifeless surface.
You also have to stop being afraid of the edges. When I’m working with very deep tones, I almost always find myself using rim light for dark skin to create that essential separation from the background. A subtle strip box placed just behind the shoulder, set to a lower power, prevents the subject from melting into a dark studio wall. It’s not about making them “brighter”; it’s about defining where the person ends and the room begins.
The Battle of Softbox vs Hard Light for Dark Skin
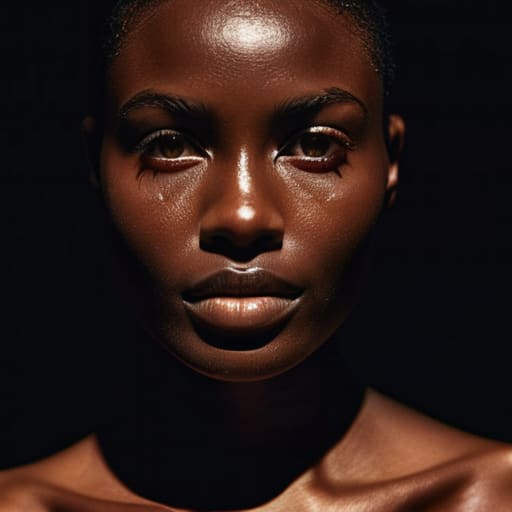
Here’s the thing: you’ll see a dozen tutorials telling you to bury your subject in soft light to keep things “flattering,” but that’s lazy advice. When I’m working with deep skin tones, a massive, over-powered softbox can sometimes turn the skin into a flat, muddy plane. You lose the very thing that makes a portrait soulful—the dimension. If you want to actually see the structure of a face, you need to stop being afraid of a little directionality.
The real magic happens in the tension of softbox vs hard light for dark skin. I usually start with a medium-sized modifier—maybe a 36-inch octa—placed about four feet away to keep the light wrapping gently. But if the skin looks too matte or “lost” in the frame, I’ll pull a secondary, smaller light behind them. Using rim light for dark skin is my absolute favorite way to create separation; it catches that beautiful edge along the jaw or shoulder, preventing the subject from melting into a dark background. It’s about finding that sweet spot where the light defines the shape without blowing out the highlights into white noise.
Managing Highlights on Dark Skin When the Client Is Nervous
Once I’ve asked them what they do with their hands when they’re nervous—usually, it’s clutching a phone or twisting a ring—the real work begins. A nervous subject tends to tense up, which often leads to excess oil or sweat on the forehead and nose. If you aren’t careful, your lighting setup will turn those natural oils into blinding white patches. When managing highlights on dark skin, you can’t just blast them with a massive softbox and hope for the best; you’ll end up with “hot spots” that look like glare on a car windshield rather than a healthy glow.
Keep a pack of blotting papers in your kit, right next to your lens cloth. I’ve learned the hard way that no amount of clever photography lighting for deep skin tones can fix a forehead that’s reflecting the entire studio. If the skin is looking a bit too shiny, I’ll pull my key light back another foot and perhaps swap my large octabox for a slightly smaller one with a grid. It gives me more control over where that light hits, ensuring we catch the beautiful texture of the skin without turning the subject into a disco ball.
Using Rim Light for Dark Skin to Find the Edges
When you’re working with deep skin tones, the biggest risk isn’t the shadows—it’s the subject disappearing into a dark background. If you’re shooting against a navy wall or a dark studio backdrop, a standard key light might leave you with a silhouette that looks more like a void than a person. This is where using rim light for dark skin becomes your best friend. I usually grab a strip box, strip the diffusion down to almost nothing, and place it about 45 degrees behind the subject. You aren’t looking for a massive glow; you’re looking for that thin, sharp line of light that defines the shoulder and the jawline.
It’s a delicate balance, though. If you get too aggressive with the intensity, you’ll end up with blown-out white outlines that look cheap and digital. I prefer to keep the rim light just strong enough to separate the subject from the environment without making it look like they’re being abducted by aliens. If you find the edge is too harsh, move the light further back or add a single layer of silk. It’s about finding that sweet spot where the light catches the texture of the skin without losing the richness of the tone.
Portrait Lighting Techniques for Melanin and the Final Color Grading
Once you’ve wrestled the light into submission in the studio, the real work starts at the computer. I’ve seen too many photographers nail the exposure only to absolutely butcher the skin tones in post. When you’re working with color grading for dark skin portraits, the temptation is to pump up the saturation to make the skin “look” richer, but that’s a shortcut to making someone look like a plastic mannequin. Instead, I focus on the luminance of the mid-tones. You want to preserve the natural warmth without letting the shadows turn into muddy, grey voids.
If you’ve been careful with managing highlights on dark skin during the shoot, your retouching should be minimal. My rule of thumb is to treat the skin like a landscape: you’re looking for the topography of the bone structure, not trying to flatten it out. Keep an eye on the transition between the highlight and the shadow; if that gradient looks stepped or unnatural, you’ve lost the soul of the portrait. It’s about enhancing the glow that was already there, not inventing a new one in Lightroom.
Five things I’ve learned when the light actually works
- Stop treating dark skin like it’s a shadow. I used to see assistants try to “fill” the shadows on a deep complexion just to see the features, but all they did was turn the subject into a muddy, grey mess. You need to light the skin, not just the shape. Treat the highlights as your primary way of defining the face; that’s where the life is.
- Watch your gels, but don’t go overboard. If you’re using a heavy CTO (Color Temperature Orange) to warm things up, you might accidentally turn a beautiful rich tone into something looking like copper or orange juice. I usually find it’s better to keep the light clean and white—around 5600K—and let the natural undertones of the skin do the heavy lifting.
- The “Specularity” trap. Darker skin often has a much higher specular reflection than lighter skin, meaning it picks up every single tiny bit of light you throw at it. If you’re using a massive, cheap softbox that’s too close, you’re going to end up with a giant, distracting white blob on their forehead. Use a grid to control exactly where that reflection lands so you aren’t fighting it in post.
- Check your background contrast immediately. I once spent twenty minutes trying to fix a “dull” portrait only to realize the subject was wearing a dark navy blazer against a charcoal backdrop. With deep skin tones, you need a way to separate them. If you can’t use a rim light, move them six feet away from the wall or find a lighter backdrop. Contrast is your best friend when the subject and the environment are fighting for the same tonal space.
- The moisturizer factor. This isn’t about lighting, but it affects the light. If a client shows up with extremely dry skin, the light is going to hit those micro-textures and look harsh and “ashy.” I always keep a non-greasy oil or a heavy moisturizer in my kit. A little bit of hydration changes how the light wraps around the cheekbones, and it makes the difference between a flat photo and one that looks expensive.
The mistake we all make
Stop trying to ‘correct’ the skin tone in post-production like it’s a technical error; if you haven’t respected the way the light actually hits the surface in the room, you’re just moving digital dirt around. You don’t need more exposure, you need to understand how the light wraps around the cheekbones before you even touch the shutter.
Iwona Krawczyk
The notebook is closed (for now)
At the end of the day, lighting deep skin tones isn’t some mystical science or a matter of buying a more expensive sensor; it’s about being observant enough to see how the light actually behaves. We’ve talked about why you can’t just blast a softbox and hope for the best, why you need that rim light to stop the subject from melting into a dark background, and how to manage those specular highlights so the skin looks luminous rather than greasy. Remember: it’s about the balance between the fall-off and the texture. If you can master the relationship between your key light and the way the melanin catches the edge, you’ve already won half the battle. Stop obsessing over the technical specs in your manual and start looking at how the light actually sits on the skin.
If you’re walking away from this feeling a bit overwhelmed by the physics of it all, take a breath. Most of the “technical” failures I see in professional work aren’t because the photographer didn’t understand exposure, but because they didn’t respect the subject or the environment. When you show up to a shoot with the intention of actually seeing the person in front of you—not just the light hitting them—the gear becomes secondary. Trust your eyes, keep your modifiers close, and for heaven’s sake, ask them what they do with their hands. The best portraits happen when the technical struggle ends and the human connection begins.
