
I spent three years assisting in studios where the senior photographers would spend forty minutes lecturing me on the “mathematical geometry of light angles” before we even plugged in a single strobe. It’s a load of rubbish. They treat lighting like a physics exam, but in a real studio—where the client is running late and the air conditioning is making a racket—you don’t have time for equations. You just need to know how to use a kicker to stop your subject from melting into a black backdrop. A kicker isn’t some high-concept artistic statement; it’s a practical tool for separation when the room is working against you.
I’m not going to give you a lecture on the theory of light fall-off or suggest you buy a five-thousand-dollar lighting rig to make it work. Instead, I’m going to tell you exactly where I place my modifier, how far back I stand, and the specific compromises I make when the light is behaving badly. This is about the messy, unglamorous reality of using a rim light to save a portrait, stripped of all the textbook nonsense.
When the Room Fails You the Kickers Last Resort
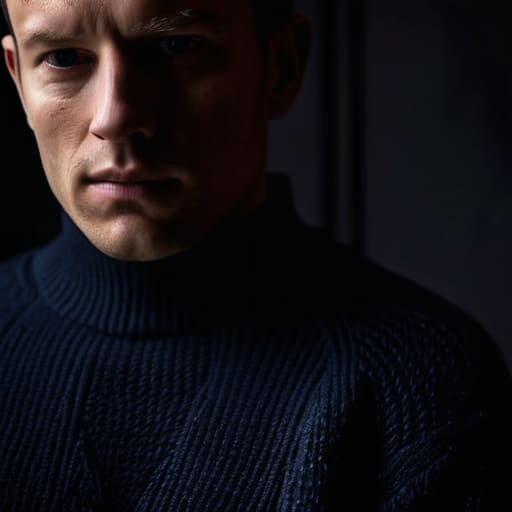
Sometimes you walk into a studio—or a client’s living room—and realize the physics of the space are working against you. Maybe the walls are a muddy, dark grey that swallows light, or the subject is wearing a navy sweater that blends perfectly into a shadow. This is where the textbook version of a three point lighting setup usually falls apart because you don’t have the luxury of space to move your key light back. You’re cramped, the floor is cluttered, and everything looks flat.
In these moments, I stop trying to fix the ambient light and start focusing on separating the subject from the background. I’ll grab a small strip box or even just a bare speedlight, tuck it behind the subject, and aim it specifically at their shoulder or the side of their hair. It isn’t about a polished, multi-layered look; it’s about creating a sliver of definition so the person doesn’t look like a floating head in a void. It’s a messy, improvised way of adding dimension, but when the room is fighting you, it’s the only way to save the frame.
Separating Subject From Background When Space Is Tight

When you’re squeezed into a tiny studio corner or a cramped office where the subject is practically leaning against a beige wall, you lose the luxury of distance. You can’t just move the person five feet forward to create a natural fall-off. This is where most people give up and settle for a flat, lifeless image. But if you can find even a sliver of space behind their head, you can start separating subject from background by using a kicker to carve them out of the gloom.
I usually grab a small strip box or even a focused snoot for this. I don’t want a wash of light; I want a sharp, deliberate line. I’ll place it about 45 degrees behind the subject, tucked just out of frame, and pull it back until it hits the shoulder or the hair without spilling onto the wall. It’s a messy compromise, but it’s the only way to achieve creating depth in portraits when your physical environment is working against you. It’s not about a perfect three-point lighting setup; it’s about making sure the person doesn’t look like a cutout pasted onto a bad backdrop.
The Real Way to Master How to Use a Kicker

Stop looking for a textbook diagram. In a real studio, mastering this isn’t about memorizing a perfect three point lighting setup; it’s about learning to read the falloff. If you place your light too far behind the subject, you get a thin, clinical line that looks like a mistake. If it’s too close to their back, you’ll blow out the hair and lose all the texture. I usually start with a medium octa or a strip box positioned about 45 degrees behind the shoulder, tucked just far enough that it catches the edge of the jaw without turning the subject into a glowing silhouette.
The trick to creating depth in portraits is knowing when to dial it back. A kicker shouldn’t scream for attention; it should whisper that there is a person standing in a three-dimensional space. If you’re working on a video commission, I often find myself softening the edge even further with a bit of diffusion, because harsh rim light on a moving subject can feel jittery and distracting. It’s about the balance between the light and the shadow, not just adding more power to the strobe.
Creating Depth in Portraits Amidst Lighting Chaos
When you’re stuck in a rental studio with nothing but a single window and a massive, distracting white wall, you realize that a standard three point lighting setup is a luxury you simply can’t afford. You don’t have the floor space for a fill light, let alone a dedicated hair light. This is where the kicker becomes your best friend for creating depth in portraits. Instead of trying to light the whole room, you focus entirely on that thin sliver of light hitting the shoulder or the jawline. It’s about carving the person out of the air so they don’t look like a flat, two-dimensional cutout.
The trick is to stop thinking about “lighting the subject” and start thinking about separating subject from background through sheer contrast. If the room is a mess of shadows and beige tones, a well-placed kicker acts like a scalpel. I usually pull my strip box about two feet behind the subject, angled slightly toward their back, just to catch that edge. It isn’t about being pretty; it’s about making sure the viewer knows where the person ends and the chaos begins.
Cinematic Lighting Placement for the Unpredictable Client
When you’re working with a client who is clearly out of their element—the kind who keeps shifting their chair or apologizing for their “bad skin”—you don’t have time to rebuild a complex three point lighting setup from scratch. You need a way to anchor them in the frame before they lose confidence entirely. This is where I lean on cinematic lighting placement that prioritizes stability over perfection. I’ll grab a single strip box, move it behind them at a 45-degree angle, and use it as a rim light to create a hard edge. It’s a quick way to stop them from looking like a flat, washed-out shape against a beige wall.
The trick with these unpredictable subjects is that you can’t rely on them to hold a pose. If they are moving, your light needs to be forgiving. Instead of trying to nail a precise, narrow beam, I broaden the modifier. Using a slightly larger source for your backlighting techniques for video or stills ensures that even if they lean forward or tilt their head, that sliver of separation remains. It’s not about being fancy; it’s about maintaining a sense of professional control when the subject is anything but.
Rim Lighting Photography Tips for Saving a Flat Shot
If you’ve ever looked at a monitor and realized your subject looks like a cardboard cutout pasted onto a dark wall, you don’t need a new lens; you need a rim light. We’ve all been there—the light is hitting the face fine, but the hair and shoulders are just melting into the shadows. It’s a flat, lifeless look that makes the whole image feel two-dimensional. My go-to move for separating subject from background is to tuck a small strip box or even a bare speedlight behind them, angled just enough to catch that sliver of light along the jawline or the hair.
Don’t get caught up in the complexity of a full three point lighting setup if you’re struggling with flatness. Sometimes, adding that single edge of light is more effective than adding three more softboxes that just wash everything out. I usually place the light at about a 135-degree angle from the camera, keeping it low enough to avoid hitting the lens and causing flare. It’s a small compromise in terms of setup time, but it’s the difference between a portrait that feels like a real person in a real space and one that looks like a mistake.
Five things I’ve learned when the kicker is the only thing saving the shot
- Watch your spill. A kicker is meant to be a sharp edge, not a floodlight. If you’re using a strip box, keep it tight and angled away from the background, otherwise, you’re just making the whole room look messy and unintentional.
- Mind the hair. I’ve spent too many shoots trying to fix a shot where the kicker hit the subject’s hair and turned it into a glowing, white halo of nothingness. If the hair is light or frizzy, dial the power back or move the light further behind them to keep the edge controlled.
- It’s not just for the silhouette. Don’t just aim for the shoulder; try to catch the jawline. When a client is feeling particularly self-conscious about their face, a subtle kicker on the jaw can provide the separation they need to feel like they aren’t just a flat shape in a dark room.
- Check your color temperature. If you’re working with a client who wants a warm, lifestyle feel but you’ve got a daylight-balanced kicker hitting them from behind, it can look jarringly clinical. I usually keep my kicker on the same gel or Kelvin setting as my key light unless I’m specifically trying to create a sense of “wrongness.”
- Don’t overdo the intensity. A common mistake is treating the kicker like a second key light. It should be a suggestion, not a shout. If it’s brighter than your main light, you aren’t creating depth; you’re just creating a distracting line that pulls the eye away from the subject’s expression.
The Truth About the Rim
A kicker isn’t a way to fix a bad setup; it’s a way to rescue a subject who is being swallowed by a room that refuses to cooperate. If they’re starting to look like a floating head in a dark void, stop fiddling with your key light and just give them an edge.
Iwona Krawczyk
The Last Word on Kickers
At the end of the day, a kicker isn’t some high-concept tool for an art gallery; it’s your survival kit. We’ve talked about using it to peel a subject away from a muddy background, adding much-needed dimension when the room is too cramped, or even just carving a silhouette out of a lighting setup that’s completely fallen apart. It’s about knowing that when the key light isn’t doing its job or the client’s office looks like a beige nightmare, you have a way to create separation where none exists. Don’t get bogged down in the math of angles or the perfect wattage. Just remember that the goal is to stop the subject from becoming a flat, two-dimensional shape lost in the scenery.
If there is one thing I want you to take away from this notebook, it’s that you shouldn’t fear the chaos of a shoot. The lights will fail, the windows will let in too much sun, and your subject will likely start wondering what they should do with their hands halfway through the session. But once you stop obsessing over the gear and start looking at how light actually interacts with the space, you’ll realize you have more control than you think. A kicker is just one more way to reclaim the frame when things go sideways. Now, go out there, stop worrying about the perfect setup, and just start shooting.
