
I once spent three hours in a cramped, overheated studio trying to make a bowl of artisanal pasta look like something a human would actually want to eat, armed with a three-light setup and a client who kept moving the bowl two inches to the left every time I found the sweet spot. I had the “perfect” gear, but the pasta looked like wet, grey plastic. It turns out, most of the tutorials online are lying to you; they make it seem like you need a lighting empire to get results, when really, you just need to understand how to light food so it looks edible without fighting the physics of the room.
I’m not here to sell you on a new softbox or a way more expensive lens. My goal is to tell you what actually happens when the sun goes down or when you’re stuck in a kitchen with a single, terrible overhead bulb. I want to talk about the compromises—the specific distances, the way a simple piece of white foam core can save a shot, and why sometimes, less is significantly more. This isn’t a lecture; it’s a guide to the messy reality of making food look delicious when things aren’t going according to plan.
It Is Never the Sensor Why Your Light Fails the Food
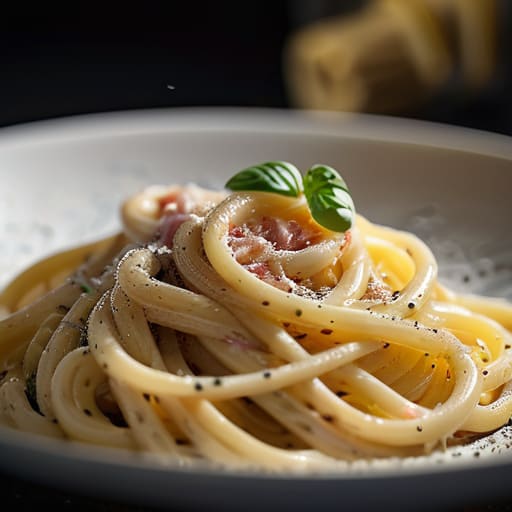
I’ve spent enough time in studios to know that when a shot looks dead, the first instinct is to blame the gear. You start thinking you need a higher resolution sensor or a more expensive prime lens to capture the “soul” of the dish. But let’s be honest: your sensor isn’t the one making the pasta look like wet cardboard. The problem is that you’re treating light like a utility—something you just turn on to see—rather than a sculpting tool.
If you’re struggling with flat, uninspired images, stop looking at your camera settings and start looking at your angles. Most beginners fall into the trap of frontal lighting, which kills all depth. You need to be enhancing food texture with shadows to give the plate any sense of dimension. Whether you are experimenting with softbox vs hard light for food or trying to mimic a window, the goal is the same: create contrast. Without that interplay between light and dark, even the most expensive macro food photography lighting will just result in a bright, lifeless mess.
How to Light Food So It Looks Edible and Real
The biggest mistake I see is trying to kill every shadow. People think “bright” equals “good,” but if you blast a plate of pasta with a massive, even light, it ends up looking like a plastic model from a supermarket catalog. To make things actually look appetizing, you need to embrace the drama of enhancing food texture with shadows. I usually position my main light source slightly behind or to the side of the plate—what we call rim lighting—to catch the glisten on a sauce or the crumb of a piece of bread.
When I’m working with a client who wants that airy, breakfast-in-bed vibe, I lean heavily into natural light for food styling. I’ll pull the table right up to a north-facing window, but I never rely on the sun alone. If the light is too harsh, I’ll hang a thin white sheet or use a large scrim to soften it. If the shadows are getting too heavy on the “dark side” of the dish, I don’t reach for another lamp; I just grab a piece of white foam core. Using reflectors in food photography is the simplest way to bounce a little bit of that window light back into the shadows without losing the shape of the food.
The Chaos of Natural Light for Food Styling
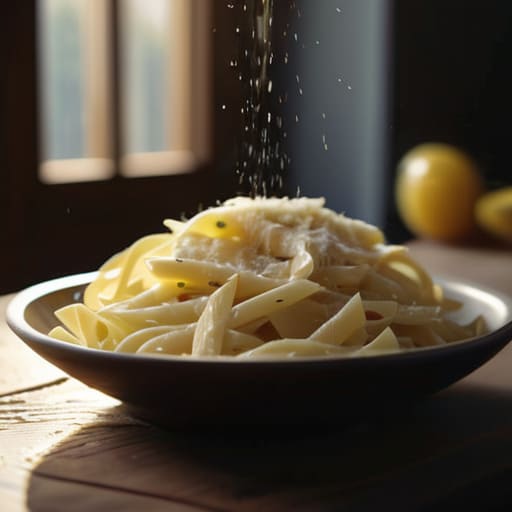
Everyone tells you to chase the window, but nobody tells you that the window is a liar. You’ll spend forty minutes styling a bowl of pasta, waiting for that perfect, creamy morning glow, only for a cloud to roll in and turn your high-contrast dream into a flat, gray mess. This is the reality of natural light for food styling: it is beautiful, but it is fundamentally unreliable. I’ve lost more shoots to a sudden sunbeam hitting a glass of water and blowing out my highlights than I have to technical gear failures.
When the light is too harsh, you can’t just sit there and hope for the best; you have to intervene. I usually keep a white foam board or a small silver reflector tucked in my bag specifically for these moments. If the sun is punching through too hard, you aren’t looking for a softbox vs hard light for food debate—you are looking for a way to manage the spill. Sometimes, that means using a piece of diffusion paper directly against the pane to tame the beast, or using a reflector to bounce some much-needed life back into the shadows.
Softbox vs Hard Light for Food Choosing Your Mood
When you’re deciding between softbox vs hard light for food, stop thinking about what looks “pretty” in a textbook and start thinking about what the dish actually is. If you’re shooting a stack of pancakes or a crusty sourdough, you want hard light. I usually grab a small silver reflector or just use a bare flash positioned at a 10 o’clock angle to create those sharp, aggressive shadows. It’s all about enhancing food texture with shadows; those deep lines tell the viewer’s brain exactly how crunchy that crust is going to be.
On the flip side, if you’re working with something delicate—think a bowl of chilled gazpacho or a soft meringue—hard light is your enemy. It’ll make the highlights look oily and harsh, which is the fastest way to make food look unappealing. In these cases, I lean on a large softbox or even a diffusion sheet placed about two feet from the plate. You want that light to wrap around the curves of the food, creating a gentle transition from light to shadow that feels approachable and fresh rather than clinical.
Mastering Food Photography Lighting Setups in Small Rooms
Most people think you need a sprawling studio with ten-foot ceilings to get professional results, but I’ve spent half my career shooting in cramped kitchen corners or tiny studio apartments where I could barely swing a tripod. When you’re working in a tight space, your biggest enemy isn’t the lack of gear; it’s the unintended bounce. Every white wall and ceiling becomes a giant, uncontrolled reflector that fills your shadows with a muddy, flat light. If you’re trying to manage food photography lighting setups in a room that feels like a closet, you have to stop thinking about the whole space and start thinking about what you can physically block.
I usually start by using black foam core to create “negative fill.” If your light is bouncing off a nearby wall and washing out the details of a crusty loaf of bread, put that black board right where the bounce is happening. This is how you actually start enhancing food texture with shadows, giving the dish depth instead of making it look like a medical diagram. If you’re working with a single light and a small window, don’t fight the room—control it. Use a small scrim or even a bedsheet to tame the spill, and keep your modifiers close to the plate. In a small room, proximity is your best friend.
Enhancing Food Texture With Shadows and Reflector Magic
If you’ve spent any time staring at a flat, lifeless shot of a sourdough loaf or a piece of seared salmon, you’ll know the problem isn’t the lack of light; it’s the lack of shadow. When we talk about enhancing food texture with shadows, we aren’t talking about making things dark for the sake of drama. We are talking about creating micro-contrasts. A single light source hitting a craggy surface at a steep angle—say, about 45 degrees from the back—creates those tiny valleys of darkness that tell the viewer’s brain exactly how crunchy or juicy that item is. Without those shadows, your food doesn’t just look flat; it looks fake, like it’s made of plastic.
This is where most people panic and start adding more lights, but that’s a mistake. Instead of more light, try using reflectors in food photography to control what’s already there. If your shadows are getting too “inky” or swallowing the detail in a sauce, don’t reach for a second strobe. Grab a small piece of white foam core or a silver card and tuck it just out of frame on the shadow side. It’s about a controlled bounce, not a flood. You want to lift the shadows just enough so the texture remains visible, but not so much that you kill the dimension you worked so hard to create.
Five Things to Do Before the Camera Actually Clicks
- Stop fighting the shadows. If you try to blast every corner of the plate with light to make it “clear,” you’ll end up with a flat, clinical mess that looks like a medical textbook. You need shadow to create depth; it’s the shadow that tells the eye the bread is crusty and the sauce is viscous. Let the dark side of the plate stay dark.
- Watch your color temperature like a hawk. There is nothing more soul-crushing than spending an hour styling a beautiful, warm bowl of pasta only to realize your white balance is fighting a blue-tinted window or a cheap LED panel. If the food looks grey or sickly, don’t fix it in Lightroom—fix it with a gel or by moving your light source.
- Use a bounce card, not just a second light. I’ve seen too many beginners try to solve a shadow problem by adding another expensive strobe. Usually, you just need a piece of white foam core held about 30cm from the shadow side of the plate. It’s subtle, it’s cheap, and it mimics how light actually behaves in a real room.
- Mind the moisture. If you’re shooting something that should be glistening—like a steak or a glazed donut—the light will reveal every single imperfection. Use a small, focused light source (think a snoot or a tight grid) to hit the highlights specifically. If you spray the whole thing with oil, you’ll just end up with a greasy mess that reflects light in all the wrong places.
- Position yourself for the “hero” angle, then move the light to match. Most food looks best from a 45-degree angle or straight on, but if you set your light up based on where you are standing, you’ll likely catch a nasty reflection in a spoon or a glass. Always check the reflection in the cutlery before you commit to a setup.
## The Difference Between a Photo and an Appetite
You can spend three hours styling a plate to look like a masterpiece, but if you wash out the textures with too much light, you’ve just photographed a pile of expensive-looking mush. Real food has depth, it has shadows, and it has imperfections; if your lighting doesn’t respect the grit and the moisture, your subject isn’t going to look delicious—it’s just going to look plastic.
Iwona Krawczyk
Stop Chasing the Gear, Start Watching the Plate
At the end of the day, lighting food isn’t about mastering a complex diagram or owning a specialized strobe that costs more than my first car. It’s about understanding that light is a tool for texture and direction. We’ve talked about why the sensor isn’t your enemy, why you need to embrace the chaos of natural light when you can, and why a single well-placed reflector often does more work than a massive softbox setup. Whether you are fighting a cramped kitchen or a window that refuses to cooperate, remember that your goal is to make the viewer feel like they can reach out and grab that piece of toast. If you can control the shadows to define the shape and use the highlights to show the moisture, you’ve already won the battle against flat, unappetizing imagery.
If you find yourself staring at a plate that looks lifeless despite your best efforts, step away from the viewfinder. Go look at the food under a different angle, or better yet, change the light source entirely. The most important lesson I learned during my years assisting is that the setup is fluid. A client will move the plate, the sun will go behind a cloud, and your carefully planned lighting will vanish in a second. Don’t panic. Instead, lean into the compromise. Photography is less about perfection and more about how you react when things go sideways. Now, go make something look delicious.
