
I remember one shoot in a rented studio in East London where I spent forty minutes sweating under a heavy strobe, trying to figure out why my subject looked like they were floating in a sea of charcoal-colored fog instead of a void. I had the most expensive modifiers money could buy, but I still couldn’t figure out how to light a black background without it looking like a muddy, underexposed mess. It’s a classic trap: you think you need more gear, more power, or a more expensive sensor, but the truth is usually just a window left slightly ajar or a light stand placed two inches too far to the left.
In this notebook, I’m skipping the theoretical nonsense you find in textbooks and getting straight to the actual physics of the room. I’m going to show you how to control spill, how to use distance as your best friend, and why your light placement matters more than your ISO settings. This isn’t a lecture; it’s a breakdown of the specific, messy compromises I make to ensure that when I want a black void, I actually get one.
The Void Is Not Your Enemy How to Light a Black Background

The mistake most people make is thinking they need to “fix” the background. You don’t. You just need to stop accidentally hitting it with light. If you’re using a standard umbrella or a massive softbox, you’re essentially throwing light everywhere, and that light is going to bounce off your backdrop and turn your beautiful void into a muddy, charcoal mess. To get that deep, intentional darkness, you have to master light falloff control.
I usually reach for a grid or a snoot to narrow the beam, keeping the light tightly wrapped around my subject. This is where the inverse square law actually becomes your best friend rather than just a math problem from a textbook; by moving your light source just a little closer to the subject and a lot further from the backdrop, the light loses its energy before it can even touch the fabric. If you’re still seeing a glow behind their head, add some rim lighting for subject separation. A small, stripped-down strip box tucked behind the subject can carve them out of the dark without spilling a single lumen onto the background.
When the Room Fights Back Managing Light Falloff Control
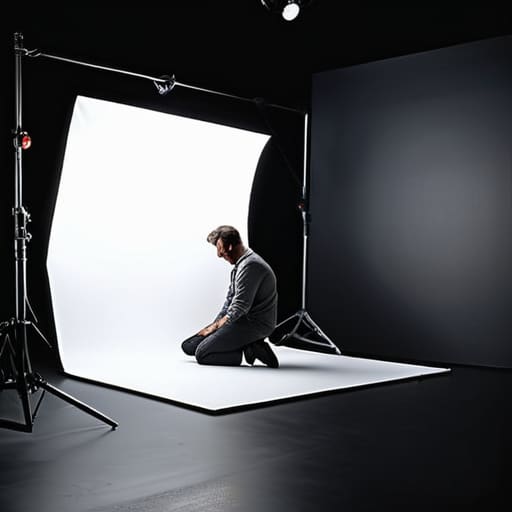
Here is the reality of working in a studio that isn’t a literal cave: light is lazy. It wants to go everywhere. You might think you’ve dialed in your setup, but then you see a soft, unwanted glow creeping onto your backdrop, turning your intended void into a charcoal smudge. This is where most people lose their minds, blaming their gear when they should be looking at their distance. You need to master light falloff control by respecting the physics of the room. If you move your subject just two feet further from the background, the light hitting that backdrop drops off exponentially. It’s the inverse square law in photography in action, and it is your best friend when you’re fighting a room that refuses to stay dark.
If you can’t move the subject, you have to physically choke the light. I stop using big, floppy softboxes for this; they spill light like an open faucet. Instead, I grab a grid or a snoot to force the beam where I want it. I’m looking for rim lighting for subject separation—just enough of a sliver of light to define their shoulder or hair so they don’t disappear into the dark, without letting a single stray photon touch the fabric behind them.
Mastering the Invisible Low Key Photography Techniques for Real Life
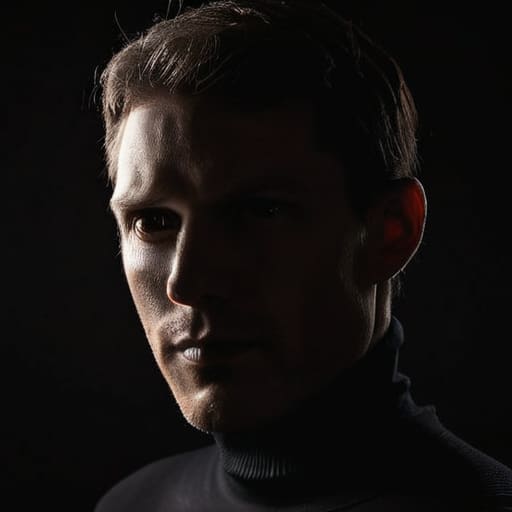
If you’re trying to nail low key photography techniques in a room that isn’t a purpose-built black box, you have to stop thinking about the subject and start thinking about the distance. I’ve spent too many shoots watching a client’s shoulder catch a stray beam of light and ruin the whole mood. The secret isn’t just more power; it’s about leaning into the inverse square law in photography. If you move your key light just a few feet closer to the subject and pull them further away from that backdrop, the light will drop off aggressively before it ever touches the wall. It’s a game of inches, not stops.
Don’t rely on a single source if you want any sense of shape, or you’ll end up with a “floating head” effect that looks more like a horror movie than a professional portrait. I usually add a subtle hair light or a tight strip box specifically for rim lighting for subject separation. You want just enough of a sliver of light to define the jawline or the edge of a shoulder so they don’t disappear into the dark. It has to be barely there—if you can see the light hitting the background, you’ve gone too far.
Fighting the Spill Preventing Light Spill on Backdrop Chaos
Here is the problem: you’ve finally got the subject looking moody and perfect, but then you look at the monitor and see a faint, sickly gray glow creeping up the edges of your backdrop. It’s infuriating. Most people think they just need a darker cloth, but usually, it’s just physics being a nuisance. You’re fighting the light’s tendency to wander. To fix this, you have to stop thinking about the subject and start thinking about the distance between your light and that background.
If you aren’t already leaning on the inverse square law in photography, start now. Every foot you move your subject away from the backdrop is a massive win for your contrast ratio. I usually pull my subjects at least six to eight feet from the rear wall; it gives the light enough room to die off before it ever touches the fabric. If you’re working in a cramped home studio, you’ll need to get aggressive with flags or even just a piece of black foam core to physically block the path of the light. It’s not about being elegant; it’s about preventing light spill on backdrop surfaces that refuse to stay dark.
The Math of Darkness Using the Inverse Square Law in Photography
Look, I know “math” is the last thing anyone wants to hear about when they’re staring at a dark studio, but if you want to master light falloff control, you have to respect the physics. Most people think they can just crank the power on their strobe to get more punch, but they end up washing out the whole room. That’s where the inverse square law in photography comes in to save your sanity. It basically means that if you double your distance from the subject, you aren’t just losing half your light; you’re losing three-quarters of it.
In a practical studio lighting setup for dark backgrounds, I use this to my advantage by keeping my key light incredibly close to the subject—maybe 1.5 meters with a medium beauty dish—while keeping the backdrop several meters behind them. Because the light drops off so aggressively over that distance, the subject stays beautifully illuminated while the background effectively vanishes into nothing. It’s not magic; it’s just knowing that distance is your most effective dimmer switch. If you can control the gap between the person and the wall, you’ve already won half the battle.
Defining the Subject Rim Lighting for Subject Separation
Once you’ve wrestled the background into submission, you’re going to hit the next wall: the subject starts melting into the darkness. This is where most people panic and turn up the key light, which is a mistake. If you just blast them with more light from the front, you lose the very drama you were working for. To fix this, you need rim lighting for subject separation. I usually grab a strip box, tuck it behind the subject at a 45-degree angle, and aim it right at the shoulder or the edge of the hair. It creates that thin, sharp line of light that says, “Hey, there is actually a human being standing here.”
The trick is all in the positioning. If you place the light too close, you’ll end up preventing light spill on backdrop by accident, but you might also blow out the highlights into a messy white blob. I like to keep the rim light slightly underexposed compared to my main source. It’s a delicate dance of light falloff control—you want just enough glow to define the silhouette without turning the whole scene into a high-key mess. It’s about carving the person out of the void, one edge at a time.
Five ways to stop fighting the light and start controlling the dark
- Stop trying to “fix” the background with more gear; just move the subject. If you can’t get that black to stay black, move your client at least three feet further away from the backdrop. It’s the simplest way to use physics to your advantage without needing a single extra flag.
- Kill your ambient light like it’s a bad habit. I don’t care if there’s a window in the studio or a crack under the door; if you can see a sliver of light hitting that backdrop, you’ve already lost. Black out the windows, turn off the overheads, and treat the room like a cave.
- Use a grid if you have one, and use it aggressively. A bare beauty dish or a standard softbox is a light leak waiting to happen. Slap a honeycomb grid on your key light to narrow the beam so it hits the subject’s face and nothing else, rather than spraying light across the entire room like a sprinkler.
- Watch your distance—both ways. Your light needs to be close to the subject but far from the background. If your light source is too large or too close to the backdrop, the light will wrap around the subject and wash out your “void” before you even click the shutter.
- Check your exposure settings before you get comfortable. When you’re shooting into the dark, your camera’s meter is going to try and “help” you by brightening everything up, which turns your beautiful black background into a grainy, muddy mess. Manually set your exposure and trust your eyes, not the little bar at the bottom of the viewfinder.
The Myth of the Perfect Backdrop
Stop obsessing over your camera settings and start looking at your walls; you don’t create a black background by clicking a button, you create it by aggressively managing where your light isn’t allowed to go.
Iwona Krawczyk
The Final Check
At the end of the day, getting a clean black background isn’t about some magical setting on your sensor; it’s about the physical distance between your light and your backdrop. You have to respect the math of the inverse square law, keep your modifiers tight, and be prepared to fight the light spill that inevitably tries to creep into your frame. Whether you are using a single strip box to create a sharp rim or struggling to keep a window from washing out your shadows, remember that controlling the darkness is just as important as shaping the light. If the background looks like a muddy, charcoal gray instead of a true void, don’t blame your gear—check your distance and your flags.
Photography is often sold as this pursuit of technical perfection, but most of the time, we are just negotiating with a room that doesn’t want to cooperate. There will be sessions where the light behaves, and others where you spend forty minutes moving a single black foam board just to save the shot. Don’t let the frustration of a “difficult” setup get to you. Once you stop fighting the environment and start understanding its limitations, you stop being a technician and start being a creator. Now, go turn off the overheads, find your shadows, and make something that actually feels real.
