
I remember a corporate headshot session three years ago where I spent forty minutes moving a massive octabox three inches to the left, only to have the subject’s glasses catch a stray reflection from a window I hadn’t even accounted for. I felt like a complete amateur, even though I’d been shooting for years. Most tutorials will tell you that you need a specialized, expensive polarizing filter or a complete overhaul of your studio kit to solve this, but that’s nonsense. Learning how to light glasses without reflections isn’t about buying more gear; it’s about understanding the geometry of the room and having the patience to move your light source just far enough off-axis to hide the glare.
In this notebook, I’m skipping the theoretical fluff and getting straight to the practical physics of the situation. I’ll show you exactly how I manage light placement, which modifiers actually work when you’re fighting glare, and the specific compromises you’ll have to make with your key light to keep those eyes visible. This isn’t a lecture; it’s a set of notes on how to handle the real-world chaos of a client who shows up in frames you didn’t prepare for.
Understanding How to Light Glasses Without Reflections
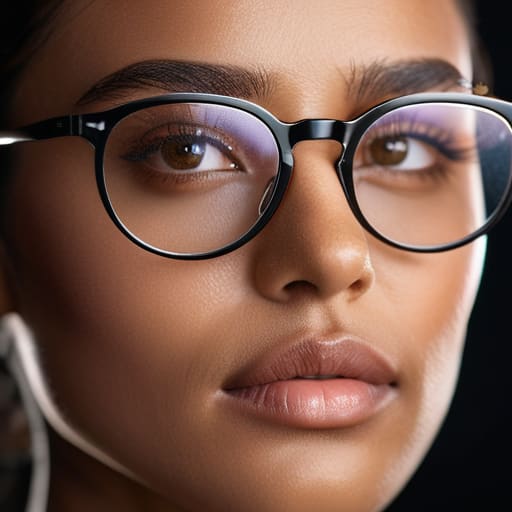
Before you even touch a dial, you have to accept one thing: glasses are essentially two tiny, curved mirrors sitting right in the middle of your frame. If you’re trying to solve the problem by just moving the light a few inches, you’re going to lose half the shoot to frustration. The issue isn’t that the subject has “bad” glasses; it’s that your current portrait photography lighting setup is likely hitting those lenses at an angle that forces a direct reflection back into your glass.
The trick isn’t just about hiding the light; it’s about changing the geometry of the room. I’ve learned that eliminating lens glare usually comes down to two things: where the light lives and where your head is. You either need to move your primary source further to the side, or you need to stop being so precious about your center line. Sometimes, a slight shift in your camera angle for glasses photography—just a few degrees of tilt—is the difference between a clean eye and a white void. It’s a compromise, sure, but it’s better than a subject who spends the whole session squinting through their own reflection.
Key Things to Know

First, you have to accept that you aren’t fighting the subject; you’re fighting physics. Every pair of glasses is essentially two tiny, curved mirrors sitting right where you want the eyes to be. If you’re using a single, harsh light source, you’re essentially asking for trouble. My rule of thumb is that you can’t just “fix” the reflection after the fact in Lightroom—you have to prevent it during the shoot by mastering diffused lighting for eyewear. This means moving away from bare bulbs and toward larger, softer modifiers that wrap the light around the frame rather than hitting it dead-on.
Second, stop looking only at your light stand and start looking at your tripod. Sometimes, the simplest fix for eliminating lens glare isn’t a new modifier, but a slight shift in your camera angle for glasses photography. Even a few degrees of tilt can move that white hot spot from the pupil to the edge of the lens, where it’s much easier to hide. It’s a constant game of inches between the height of your softbox and the tilt of the subject’s chin.
Practical Tips and Steps
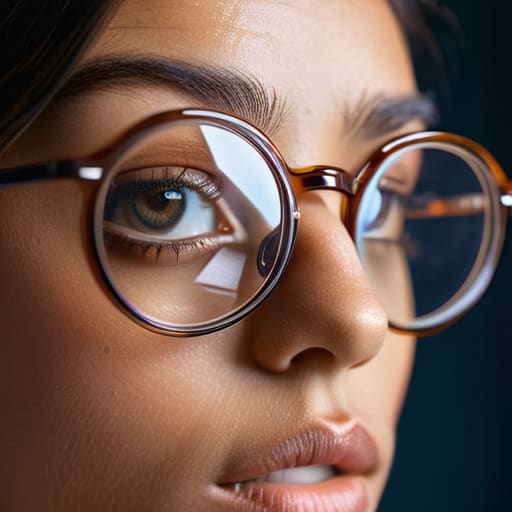
First, stop fighting the subject’s frames and start moving your gear. If you’re stuck with a single light, your best bet is to widen your softbox placement for spectacles by moving it further away and angling it slightly more to the side. I usually find that if I can get the light to hit the subject at a 45-degree angle relative to their face, the reflection vanishes into the periphery of the lens rather than staring you in the eye. If you’re still seeing those white hot spots, try tilting the light up just a hair; it’s a small compromise, but it’s better than a blown-out reflection.
Next, don’t ignore your physical position. Sometimes the fix isn’t more gear, but a slight shift in your camera angle for glasses photography. Even a two-centimeter move to the left or right can kill a glare that a modifier simply can’t. I’ve spent more time than I’d like to admit crouching or tilting my head just to find that sweet spot where the eyes are visible and the lenses are clear. It feels a bit undignified, but it beats asking a client to take their glasses off.
Common Mistakes to Avoid
The biggest mistake I see is people trying to “fix” the reflection by moving the subject’s head instead of the light. You’ll spend ten minutes asking a client to tilt their chin up or down, making them look stiff and unnatural, when all you really needed to do was shift your softbox placement for spectacles by six inches to the left. If you fight the person, you lose the portrait. The moment they start feeling self-conscious about their glasses, the shot is dead.
Another trap is relying on a massive, single light source and hoping for the best. When you’re working on a tight portrait photography lighting setup, a single large source often creates those massive, white rectangles in the eyes that are impossible to edit out later. Don’t try to hide the glare; aim to control it. I’ve seen too many assistants try to use a heavy flash directly on-axis, thinking it’ll “freeze” the moment, but all they’ve done is create a permanent whiteout on the lenses. If you aren’t actively reducing specular highlights through positioning, you’re just making more work for yourself in post.
Final Thoughts
At the end of the day, don’t let a pair of frames derail your entire session. I’ve spent way too many hours staring at a monitor only to realize I was fighting a losing battle against physics because I was too stubborn to move a light stand. If the glare won’t budge, stop trying to outsmart the glass and just change your position. Whether that means a slight shift in your camera angle for glasses photography or moving the subject two inches to the left, the solution is almost always physical, not technical.
Remember, a perfect portrait isn’t about achieving a sterile, clinical look; it’s about managing the environment so the person can actually show up. If you’ve spent twenty minutes obsessing over eliminating lens glare only to find the subject looks washed out and lifeless, throw the plan away. Sometimes, a tiny bit of catchlight in the lenses is a fair trade-off for a subject who finally feels comfortable. Keep your kit simple, keep your modifiers close, and if the light is acting up, trust your eyes over your settings.
Five ways to stop fighting the frames
- Move your key light higher and wider. If you’re using a single beauty dish or a medium softbox, don’t keep it dead-on with the subject’s face. Raise it up about 30 degrees and push it slightly to the side. You want the reflection to bounce off the lens and hit the floor or a wall, not your sensor.
- Use a flag to kill the bounce. If you have a light positioned where it’s inevitably hitting those lenses, don’t move the light—just block it. Grab a piece of black foam core or a v-flat and slide it between the light and the glasses. It’s a clumsy move, but it works better than any software fix.
- Watch the catchlights, not just the glare. Sometimes we get so obsessed with removing the white blob in the lens that we kill the life in the eyes. If you’re using a large octabox, try tilting it just enough so the reflection moves to the very edge of the lens frame, keeping the pupil clear but the eye looking “awake.”
- Check the angle of the tilt. I always tell my assistants to watch the subject’s head position. If they tilt their chin down even a fraction of a millimeter, those glasses become mirrors. Sometimes the “fix” isn’t a lighting change, but a gentle instruction to “lift your chin just a hair” to change the angle of incidence.
- Manage your rim light carefully. A backlight or hair light is great for separating a subject from a dark background, but if it’s too low or too far back, it’ll catch the edge of the frames and create a distracting white line. Keep your rim light high and tight to the silhouette to avoid catching the glass.
The Real Culprit
Stop blaming your aperture or your lens for those white patches in the eyes; the problem is usually just a light stand placed two inches too far to the left and a modifier that’s too large for the room.
Iwona Krawczyk
The Reality of the Reflection
At the end of the day, managing eyewear isn’t about some magical camera setting or a high-end lens that promises to “see through” the glare. It’s about the physical geometry of the room. You have to be willing to move that key light six inches to the left, tilt your modifier just a hair more toward the ceiling, or tell your subject to tilt their chin down an inch. It’s a constant dance of repositioning the light and managing the subject’s physical comfort. Remember: if you see a white rectangle in their lenses, it’s not a technical glitch; it’s just a sign that your light is hitting the glass at the wrong angle. Fix the angle, and you fix the shot.
Don’t let a pair of thick frames or a sudden bout of glare derail your entire session. Most of the time, when a client starts telling you they “photograph badly” because of their glasses, they just need you to take control of the environment. Be the person who knows exactly how to pivot when the light behaves badly. Once you stop fighting the equipment and start mastering the space, you’ll realize that the most difficult technical hurdles are usually just small, solvable puzzles. Now, go find your light and get back to work.
