
I once spent three hours in a cramped, overheated studio trying to explain to a client why their portrait looked like a flat, muddy mess, even though I was using a three-light setup that cost more than my first car. It wasn’t the sensor or the lens; it was the fact that the subject was physically melting into a dark gray background. Everyone tells you that you need a massive lighting kit to fix depth, but honestly, most of the time, you just need to figure out how to use a rim light to stop your subject from disappearing. You don’t need more gear; you just need to understand how to carve a shape out of the shadows.
I’m not going to give you a lecture on the physics of light or a list of expensive modifiers you’ll never use. Instead, I’m going to tell you exactly where to stand, how far to pull that backlight away, and what to do when the light hits a pair of glasses and ruins the whole shot. This is about the practical reality of separation—the kind of stuff you only learn when you’ve spent too many hours staring at a monitor in a dark room.
Its Not the Lens Its the Lack of Separation
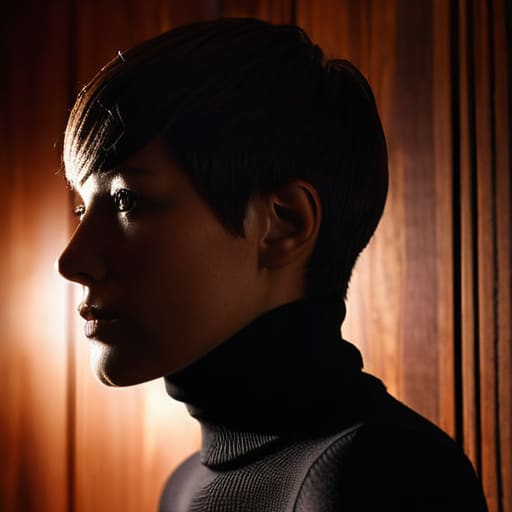
You can spend five grand on a prime lens with a beautiful bokeh, but if your subject is wearing a black turtleneck and standing against a dark wood-paneled wall, that lens isn’t going to save you. You’ll end up with a “blob” effect where the person just melts into the background. This is where most beginners panic and start adjusting their aperture, thinking they need more depth of field, when the real issue is a total lack of contour. You aren’t failing at focus; you’re failing at creating depth in portraits.
To fix this, you need to stop thinking about the subject as a flat shape and start thinking about them as a 3D object that needs to be carved out of the darkness. This is the core of studio lighting for subject separation. I usually grab a small strip box or even just a bare flash with a grid, tuck it behind the subject, and aim it specifically at the shoulder or the edge of the hair. It’s not about flooding the room with light; it’s about controlled precision. You want just enough light to trace their silhouette so the eye knows exactly where the person ends and the room begins.
The Truth About How to Use a Rim Light
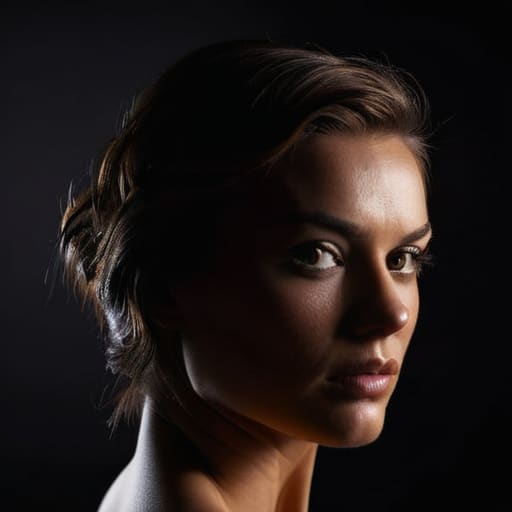
Here is the reality: most people treat a rim light like a magic wand, but if you just blast it from behind, you’ll end up with a messy silhouette and a subject who looks like they’re melting into the background. To actually get results, you have to think about controlling light spill. If your light is too close or too powerful, that glow is going to bleed right onto the subject’s face or wash out the texture of their clothes. I usually start by placing the light slightly to the side of the camera axis rather than dead center behind them. This gives you that crisp, sharp edge without turning the whole frame into a hazy mess.
It’s also worth noting the difference between a hair light and a rim light, even if the terms get tossed around loosely. While a hair light is specifically aimed to catch the top of the head, a proper rim light is about creating depth in portraits by carving the subject out of the shadows. I like to keep my modifier small—a strip box or even a snoot—to keep the light where it belongs. It’s about precision, not power.
Finding Depth When the Room Is Working Against You
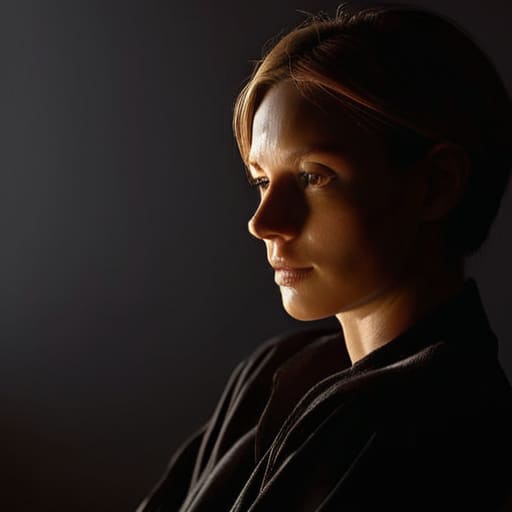
Sometimes you’re stuck in a rental studio or a client’s office that feels less like a creative space and more like a beige box. The walls are the wrong color, the background is cluttered, or—worst of all—it’s just a flat, lifeless gray that swallows everything you do. This is where you stop worrying about your aperture and start thinking about creating depth in portraits through placement. If the room is fighting you, you can’t rely on the environment to provide texture; you have to manufacture it with light.
I usually grab a strip box or a small reflector and place it behind the subject, slightly off-axis. The goal isn’t just to illuminate them, but to carve them out of that flat, oppressive space. You’ll find that the distinction between a hair light vs rim light becomes your best friend here; one hits the top of the head to define the shape, while the other traces the shoulder to stop the person from melting into the wall. It’s about controlling light spill so you aren’t washing out the entire background, but just enough to tell the viewer, “There is a person here, and they are separate from that wall.”
Hair Light vs Rim Light When the Subject Disappears
People get these two mixed up constantly, and it’s usually because they’re trying to fix a problem they don’t actually have. A hair light is a surgical tool; it’s a small, controlled beam meant to catch the top of the head to stop it from melting into a dark backdrop. I usually keep mine feathered and slightly off-axis to avoid that tacky, glowing halo effect. It’s about subtle definition, not a spotlight.
A rim light, on the other hand, is much more aggressive. If you’re working with a subject wearing dark clothing against a dark wall, a hair light won’t save you. You need a rim light to wrap around the shoulder and the side of the face to actually carve them out of the shadows. When I’m deciding between hair light vs rim light, I ask myself if I’m trying to add detail to the hair or if I’m trying to prevent the entire person from becoming a silhouette. It’s the difference between a gentle touch and creating a structural outline that holds the whole composition together.
Controlling Light Spill in a Messy Studio Environment
The problem with a rim light is that it’s a bit of a bully; it wants to be everywhere. You set up your light to catch the edge of a shoulder or a strand of hair, and suddenly, the entire background is blown out or a stray beam is hitting your lens, killing your contrast. This is where most people fail at controlling light spill. They think they just need more power, but what they actually need is a flag or a piece of black foam core. I’ve spent more time sliding cardboard into the line of sight than I have actually clicking the shutter.
If you’re working in a cramped studio with white walls, that light is going to bounce like a pinball. You might think you’re aiming for subtle cinematic lighting effects, but you’re actually just washing out the mood. Don’t be afraid to get aggressive with your modifiers. Use a grid on your backlight to narrow the beam, or position your subject a few feet further from the wall than you think you need to. It’s about managing the mess, not just turning on a lamp and hoping for the best.
Cinematic Lighting Effects for Subjects Who Wont Cooperate
When a subject is actively fighting you—maybe they’re stiff, or they’ve decided they hate their profile—you can’t rely on a standard three point lighting setup to save the day. You have to lean into the drama. Instead of trying to make everything look “clean” and commercial, use the rim light to carve them out of the shadows. By tightening your beam and pushing it slightly more to the side, you can use cinematic lighting effects to mask a tense jawline or a distracting posture. It’s about using shadow as much as light to direct the eye where it actually belongs.
I’ve found that if a client is particularly self-conscious, a soft, wrap-around rim light can be a lifesaver. It provides enough definition to prevent them from looking like a floating head, but it’s subtle enough that they don’t feel like they’re under a spotlight in an interrogation room. The trick is not to overdo it; if the edge of their shoulder is glowing like a neon sign, you’ve lost the mood. You want a sliver of light that says “there is a person here,” rather than a glare that screams “look at my bad posture.”
Five Things I’ve Learned While Fighting with Backlights
- Watch the spill. If you’re using a standard reflector and the light is too wide, you’ll end up washing out the subject’s actual face or hitting the wall behind them in a way that looks amateur. Use a grid or a snoot to keep that rim light exactly where it belongs—on the edge of the shoulder or the hair, not all over the room.
- Don’t overdo the intensity. A rim light shouldn’t look like a neon sign. If it’s twice as bright as your key light, you haven’t created “depth,” you’ve just created a distraction that makes people look like they’re glowing from within. Aim for a subtle lift that just says, “Yes, there is a person here.”
- Mind the distance, not just the power. Sometimes I find it’s better to move a smaller, weaker light closer to the subject’s head rather than cranking a massive strobe to full power from across the studio. It gives you much more control over the texture of the hair without blowing out the highlights.
- Position it to hide the mess. If you’re shooting in a client’s office and the background is a disaster of cables and half-empty coffee mugs, a well-placed rim light can catch the silhouette of the subject and create enough contrast to push that visual clutter into the shadows.
- Check the “halo” effect on glasses. If your subject wears spectacles, that rim light is going to find the lenses and turn them into two white orbs of light. I always check the monitor after every adjustment; sometimes you have to nudge the light just five degrees to the left to keep the rim on the hair without blinding the client.
## The Separation Problem
A rim light isn’t some fancy cinematic trick to make your work look expensive; it’s the tool you use when you realize your subject is slowly melting into a dark background and you need to physically carve them out of the room.
Iwona Krawczyk
The Reality Check
At the end of the day, a rim light isn’t some magical tool that fixes a bad setup, but it is the quickest way to stop a subject from becoming a flat, two-dimensional shape in a cluttered room. We’ve talked about the difference between a subtle hair light and a aggressive rim, how to manage spill when your studio feels too small, and why separation matters more than the expensive glass you’re shooting through. Remember that the goal isn’t to blast them with light, but to find that thin, intentional line of definition that says, “This person is here, and they are separate from that messy bookshelf behind them.” If the light feels too harsh, move the modifier back or dial down the power; don’t fight the physics of the room, work with them.
If you walk away with one thing, let it be this: stop obsessing over your camera settings and start looking at the edges of your frame. Most of the time, when a portrait feels “off,” it’s because the subject has lost their shape in the shadows. A rim light is just a way of reclaiming that shape. It’s about control and intention, not just adding more gear to the kit. So, go back to your studio, find that one extra light, and see if you can’t make your subject stand out from the chaos. You’ll find that once you master the separation, the rest of the image finally starts to make sense.
